OVERVIEW
Customer Relationship Management (CRM) is centered on the management of customer data and helps the enterprise to keep updating the contact information of the customers to the latest and track each interaction between the enterprise and the customers, which promotes the business relationship between the enterprise and the customers and help the enterprise to grow.
The Wave application integrates third-party applications and connects to the CRM system through the add-ins: ACT! CRM, Bitrix24 CRM, Dynamics 365, Freshdesk CRM, Hubspot CRM, Salesforce CRM, Sugar CRM, Vtiger CRM, Zendesk CRM, and Zoho CRM. Users can select and download the add-ins. After installing the add-in, the user can connect to the CRM system through the Wave application to enhance communication and contact with customers.
This document introduces how to install and use a CRM system through the Wave application.
By installing and logging in to the CRM system on the Wave Desktop application, you can obtain the following features:
- When receiving an incoming call or making an outgoing call, the customer information in the CRM system will be automatically matched, and the customer’s business card (customizable) will be displayed.
- During a call through the Wave Desktop application, you can quickly access the customer’s details page so that you can maintain the customer profile in the CRM system.
- For the unknown incoming call number on the Wave Desktop application, you can quickly add the contact to the CRM system.
- The call records on the Wave Desktop application can be synchronized to the CRM system.
- Quickly log in to the CRM system through the Wave Desktop application with one click.
Before using the CRM add-in, you need to configure and log in to the CRM system on the Wave Desktop application:
- Configure ACT! CRM System
- Configure Bitrix24 CRM System
- Configure Capsule CRM System
- Configure Dynamics 365 CRM System
- Configure Freshdesk CRM System
- Configure HubSpot CRM System
- Configure Less Annoying CRM System
- Configure Monday Sales CRM System
- Configure Odoo CRM System
- Configure Oracle Netsuite CRM
- Configure Salesforce CRM System
- Configure Sugar CRM System
- Configure Vtiger CRM System
- Configure Zendesk CRM System
- Configure Zoho CRM System
USING CRM ADD-IN ON WAVE APP
Prerequisites
- You need to purchase a UCM RemoteConnect plan for your UCM device, and the purchased plan must contain Full Integrate API and 3rd Party Add-ins. Please click here to view the UCM RemoteConnect plan details.
- You must have an account with the corresponding CRM system. Some CRM systems require a plan before using the service. You can visit the official website of the corresponding CRM system for more information.
Download Add-in
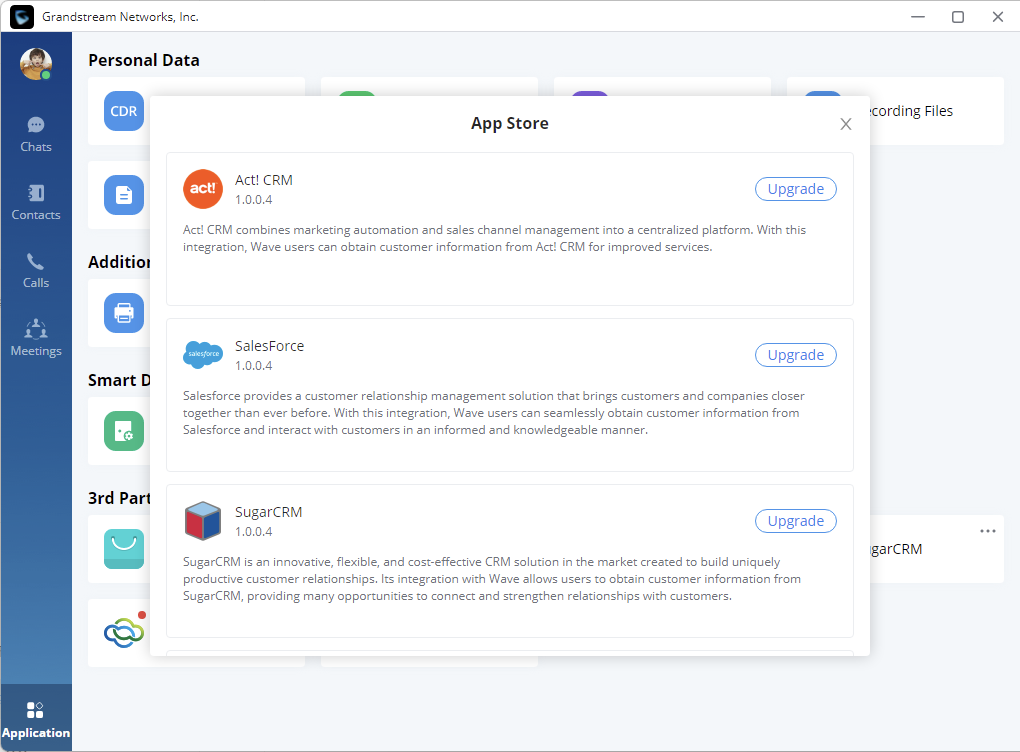
Users can access to “Application” interface, and click to enter the “App Store” menu, it will display all CRM systems currently supported in the Wave application, including ACT! CRM, Bitrix24 CRM, Freshdesk CRM, Hubspot CRM, SalesForce CRM, Sugar CRM, and Vtiger CRM, Zendesk CRM, and Zoho CRM. Users can select to install the preferred CRM system add-ins by clicking the “Install” buttons corresponding to the CRM systems, and the CRM system add-ins will be downloaded to the local desktop. Then, users can log in to the CRM systems, as the screenshot shows below:
Display CRM Contact Information When Receiving Calls
After logging into the CRM system, the user can invoke the CRM system when there is an incoming call to Wave application, or during an active call. Please refer to an example below for the Zoho CRM system (the operations in other CRM systems are the same):
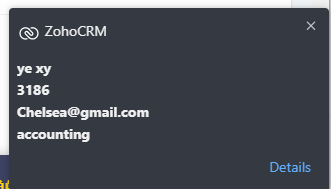
The user has already logged into the Zoho CRM system, and when there is an incoming call in the Wave application, the contact card will be displayed in the bottom left of the Wave application interface. Please see the screenshot below:
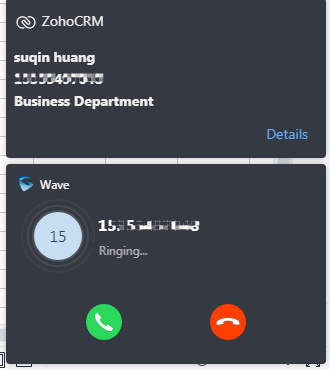
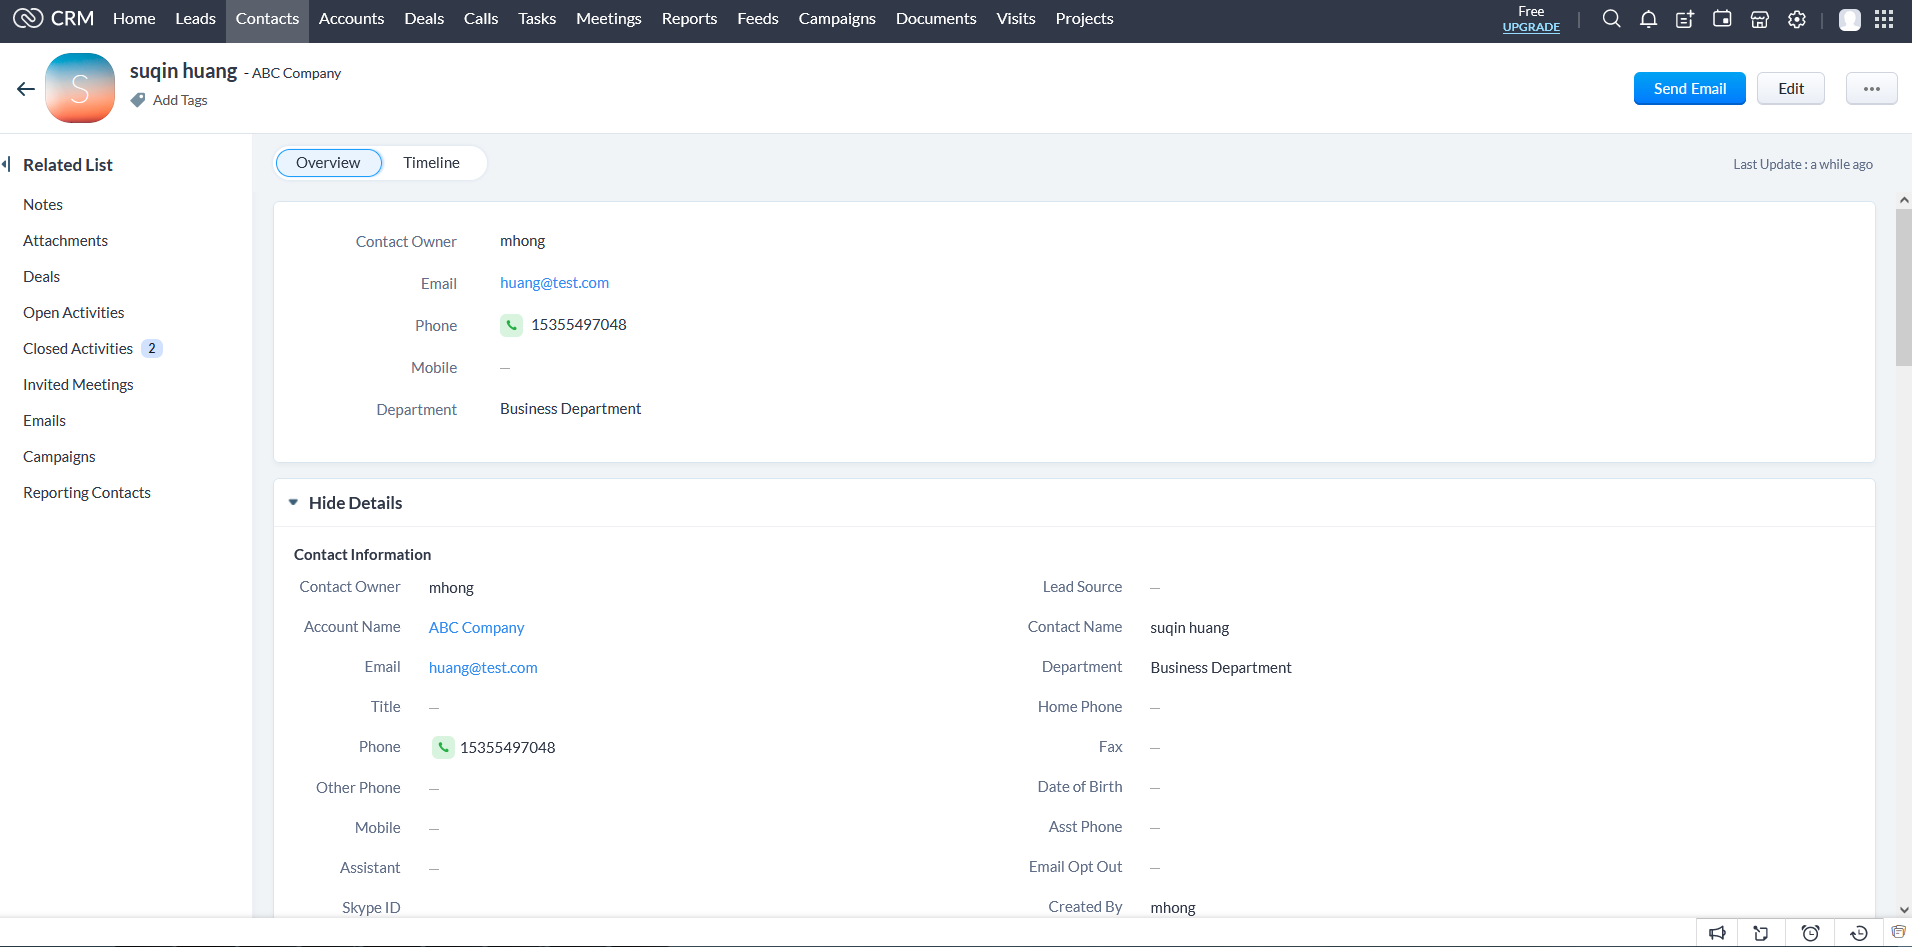
The user can click on the “Details” option to access the details page of the corresponding customer in the CRM system. Please refer to the details page of the customer in the Zoho CRM system:
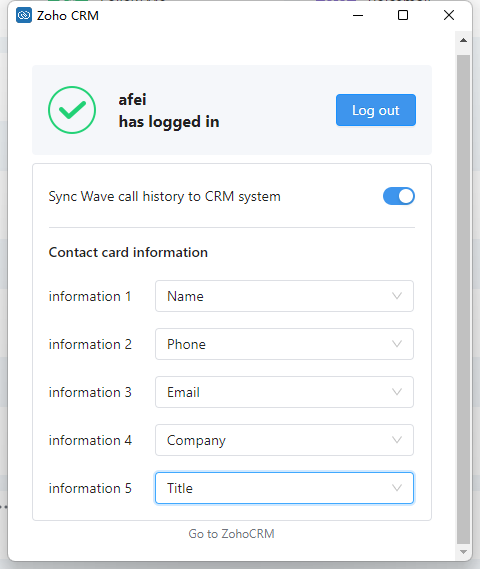
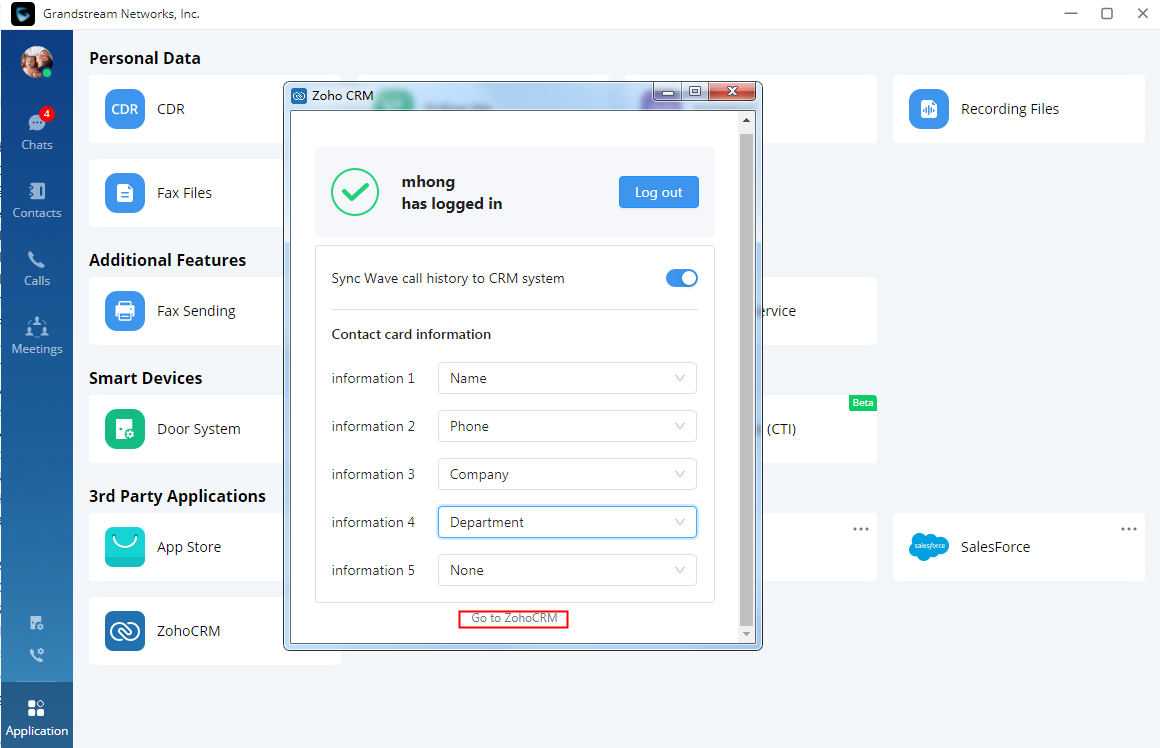
After logging into the CRM add-in, the user can customize the information that needs to be displayed on the business card information of the card. After setting it up, the business card of the contact will display the corresponding customized information during a call. Please refer to the screenshot below:

Add Contact to CRM System
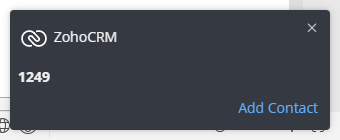
If the incoming call number or outgoing call number does not exist in the CRM system, the user can click the “Add Contact” button in the screenshot below to add the contact to your CRM system. Please refer to the example below – adding a contact to the Zoho CRM system:

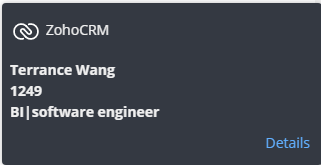
After the contact has been added, the contact information saved in the CRM system will be displayed when new incoming call come from this number.
Auto Create Contact in CRM System
When this option is enabled and the user ends a call with a customer whose number is not registered in the CRM database. The number will be added automatically to the CRM database as the call record is synchronized to the CRM system (The option “Sync Wave Call History to CRM” has to be enabled before the call).
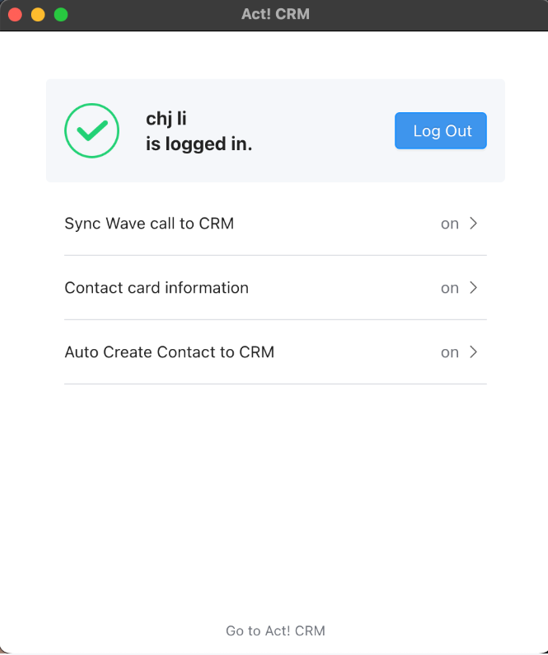
- After logging in to the CRM add-in successfully, you can set the following features:
2. Select the option “Auto Create Contact to CRM”, and you will see the following page:
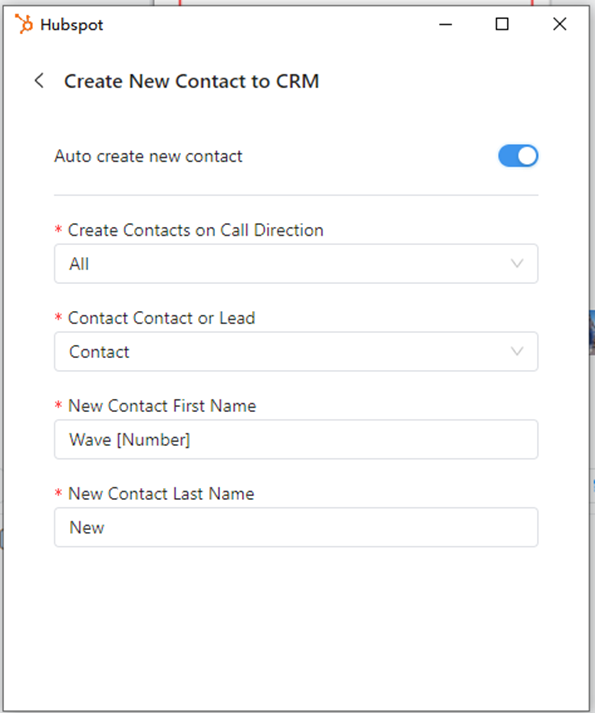
Auto Create New Contact | If this option has been enabled, when a call from a new number is received, or when you make a call to a new number, the system will automatically create a contact entry in the CRM system following the settings below. |
Create Contacts on Call Direction |
|
Create Contact or Lead | The type of the created contacts. Options: Potential Customer, Contact (This is the default setting.) |
New Contact First Name | The first name of the newly created contact. The default setting is "Wave [The number of the other party]". |
New Contact Last Name | The last name of the newly created contact. The default setting is "New". |
Users can modify the information above, and enter the parameters below. Parameters need to be circled with []:
Parameter Name | Description |
[Number] | The number of the other party (including the caller number of the incoming call and the callee number of the outgoing call) |
[Agent] | The extension number of the agent (i.e., 1000) |
[AgentFirstName] | The first name of the agent (i.e., John) |
[AgentLastName] | The last name of the agent (i.e., Doe) |
[AgentEmail] | The configured email of the agent (i.e., D.John@mycompany.com |
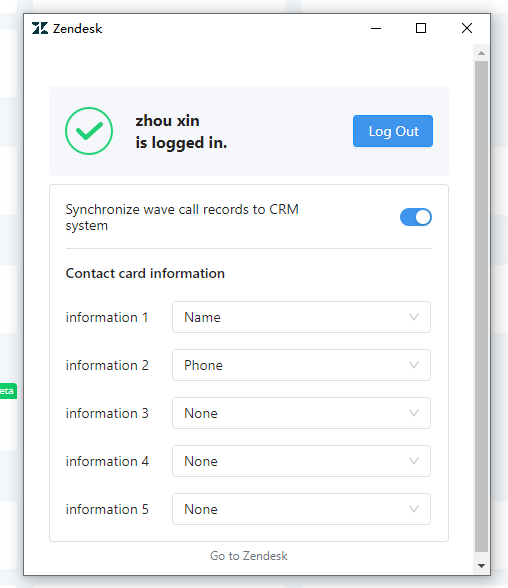
Synchronize Wave Call Records to CRM System
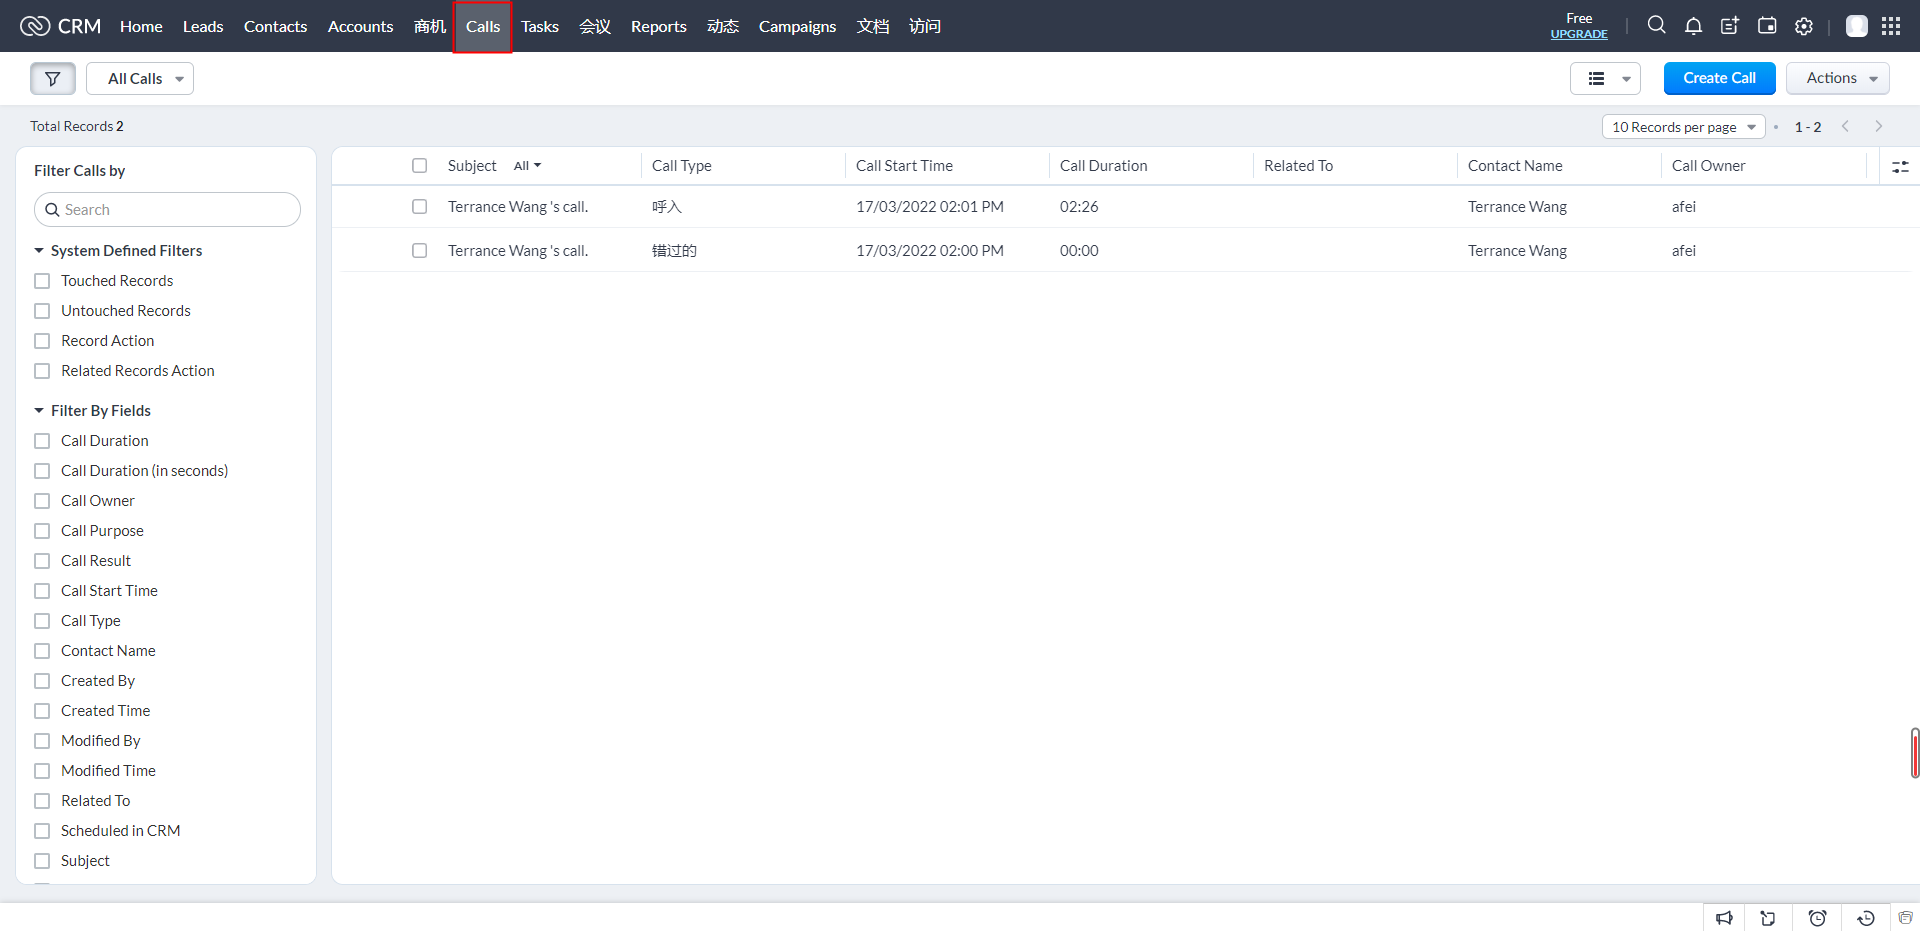
After logging in to the CRM system, the user can enable the option to synchronize Wave call records to the CRM system. Once the option has been enabled, the current call record will be synchronized to the CRM system after the Wave call. The user can log in to the CRM system to view the call record.
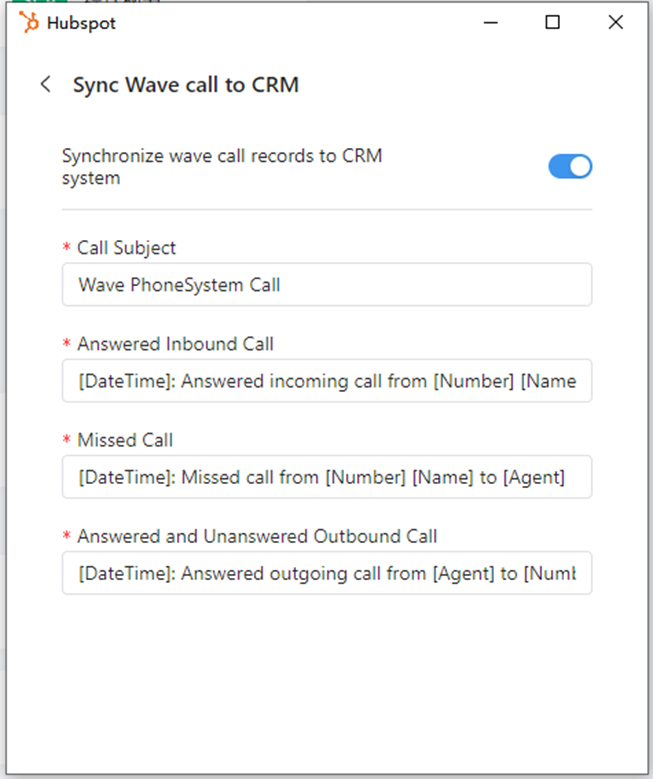
Synchronize Wave Call Records to CRM System | After this option is enabled, Wave call records will be automatically synchronized to the CRM system following the settings below. |
Call Subject | The subject of the call record. The default setting is "Wave PhoneSystem Call". |
Answered Inbound Call | The synchronized contents of incoming call. |
Missed Call | The synchronized contents of missed calls. |
Answered and Unanswered Outbound Call | The synchronized contents of answered and unanswered outbound calls. |
Users can modify the information above, and enter the parameter below. Parameters need to be circled with []:
Parameter Name | Descriptions |
[CallType] | The types of calls, including “Inbound”, “Outbound”, and “Missed”. |
[Number] | The number of the other party (Including the caller number of the incoming call and the callee number of the outgoing call) |
[CallDirection] | "Inbound" or "Outbound" |
[Name] | Matched CRM contact name |
[EntityId] | Matched CRM contact ID |
[EntityType] | Matched CRM contact type |
[Agent] | The extension number of the agent (i.e. 1000) |
[AgentFirstName] | The first name of the agent (i.e. John) |
[AgentLastName] | The last name of the agent (i.e. Doe) |
[AgentEmail] | The configured email of the agent (i.e. d.john@mycompany.com) |
[Duration] | Call duration. Format: hh:mm:ss |
[DateTime] | The start date and time (with time zone) of the call, the time format is standard time format. |
[CallStartTimeLocal] | The start date and time (with time zone) of the call, the time format is the local format of the Wave client. |
[CallStartTimeUTC] | The start date and time (with time zone) of the call, the time format is in UTC format. |
[CallEstablishedTimeLocal] | The actual established start date and time (with time zone) of the call, the time format is the local format of the Wave client. |
[CallEstablishedTimeUTC] | The actual established start date and time (with time zone) of the call, the time format is in UTC format. |
[CallEndTimeLocal] | The end date and time (with time zone) of the call, the time format is the local format of the Wave client. |
[CallEndTimeUTC] | The end date and time (with time zone) of the call, the time format is in UTC format. |
[CallStartTimeUTCMillis] | The start date and time (with time zone) of the call, the time format is timestamp (unix time). |
[CallEstablishedTimeUTCMillis] | The actual established start date and time (with time zone) of the call, the time format is timestamp (unix time). |
[CallEndTimeUTCMillis] | The end date and time (with time zone) of the call, the time format is timestamp (unix time). |
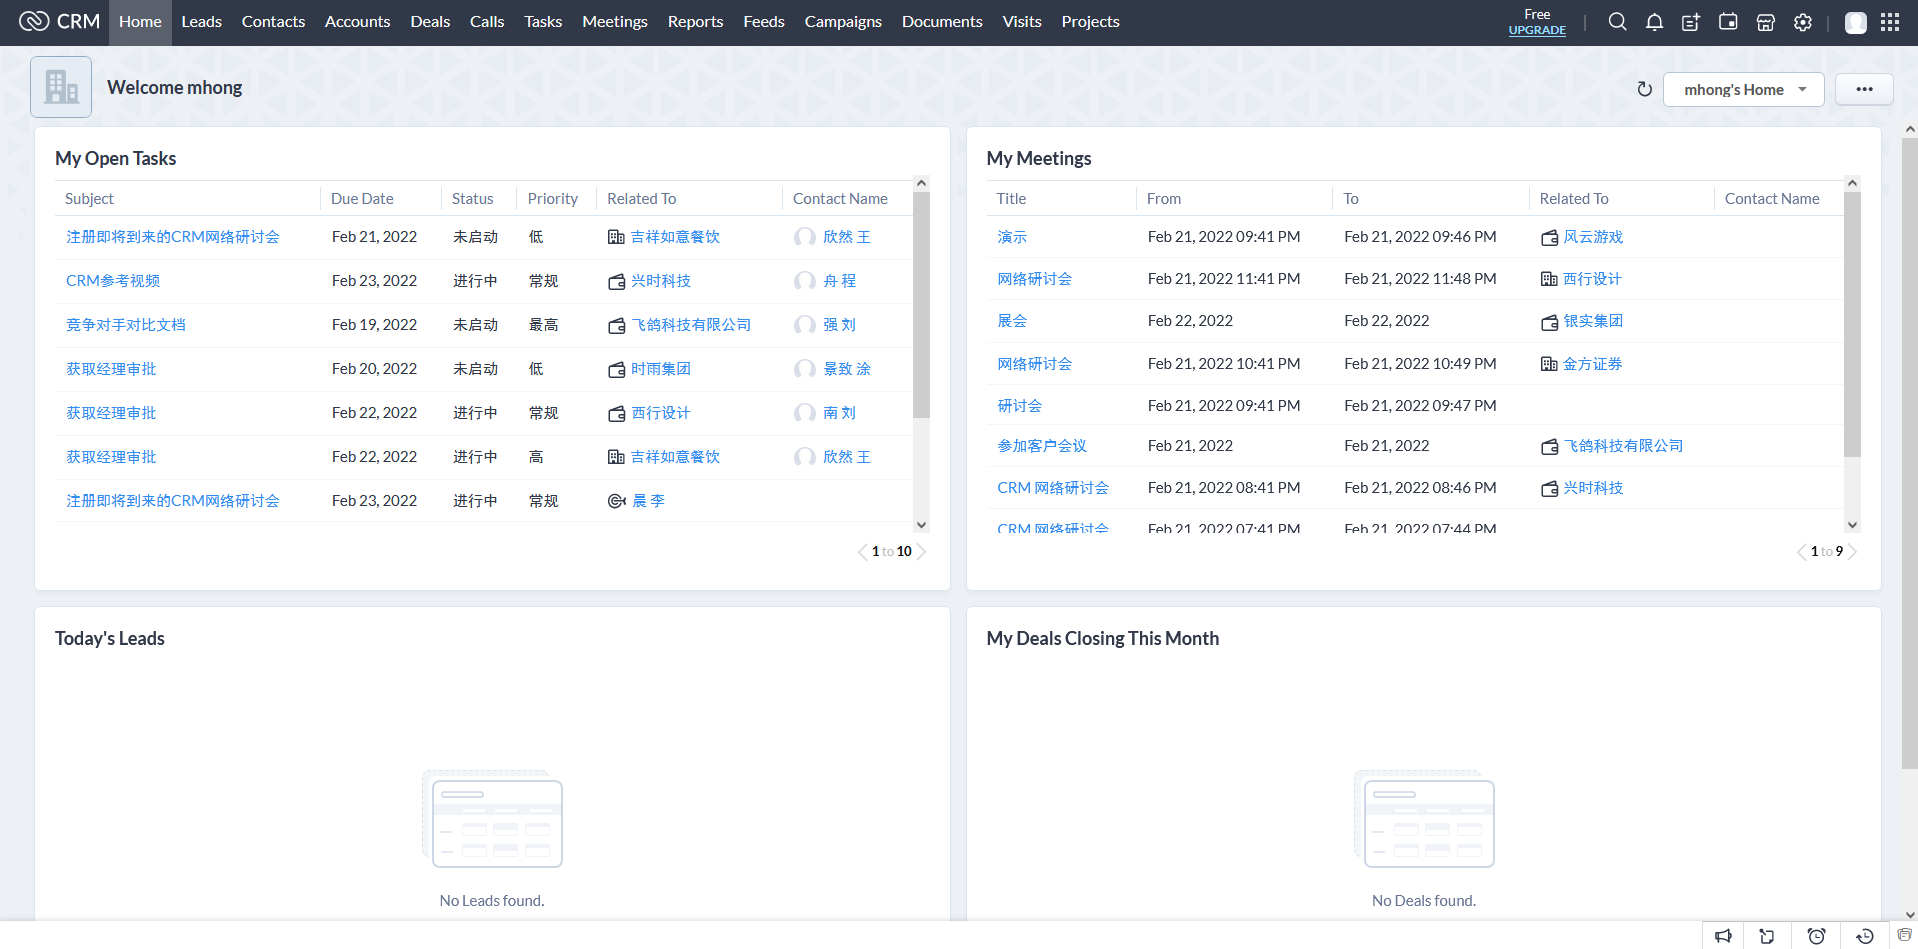
Login to CRM System by One-Click
On the “Application” page of the Wave Desktop application, the user can click the CRM system icon and access the corresponding settings page. For example, the user can click the “”Go to Zoho CRM” button on the bottom of the pop-up window and quickly log in to the Zoho CRM system web page. Please refer to the screenshots below:
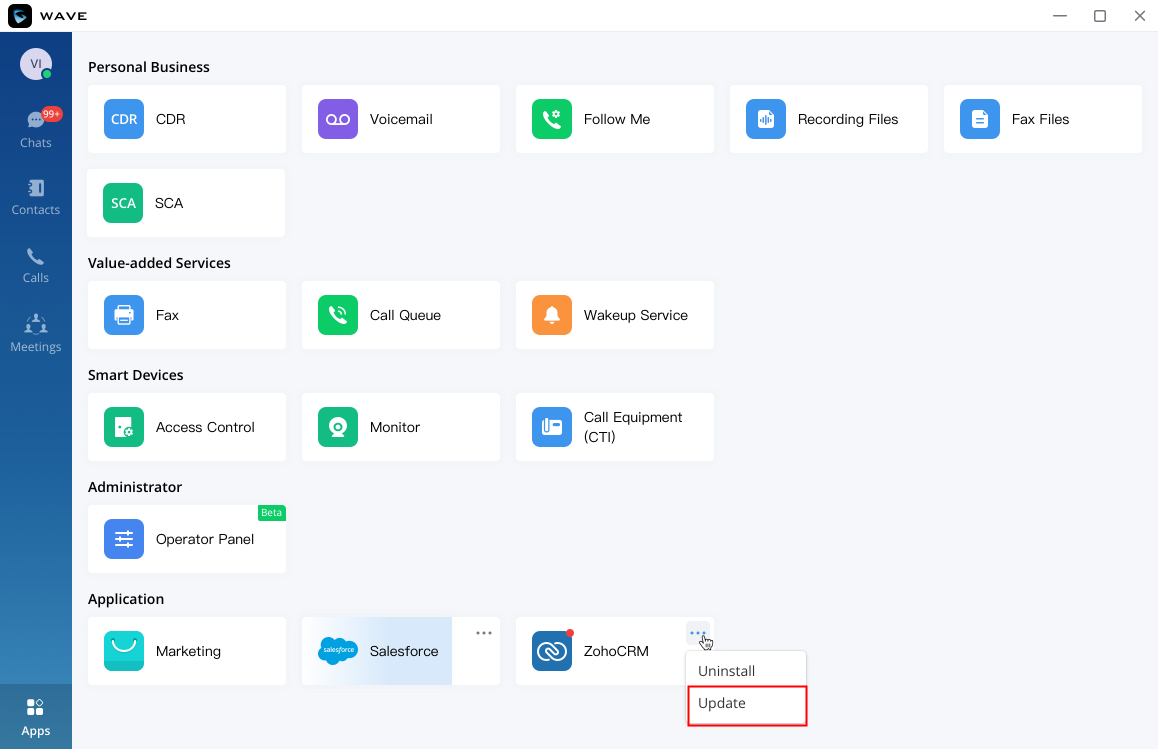
Update Add-in
If there is a new version for the current CRM system add-in, the user can click the button “…” on the right upper corner of the add-in icon, and select the “Update” button to update the CRM system add-in. Please see the screenshot below:
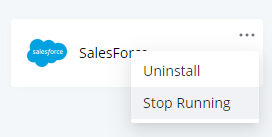
Stop Running Add-in
If the user does not use the CRM system for a long time, or the user does not need the Wave Desktop application to display the CRM contact card when dialing out or receiving calls, the user can stop running the add-in so that it does not occupy the memory of the computer.
The user can click “…” button on the right upper corner of the CRM add-in icon on the “Application” page, and click the “Stop Running” option to stop running the add-in.
If the user wants to run the add-in again, the user can click the add-in icon and log in to the CRM system again.
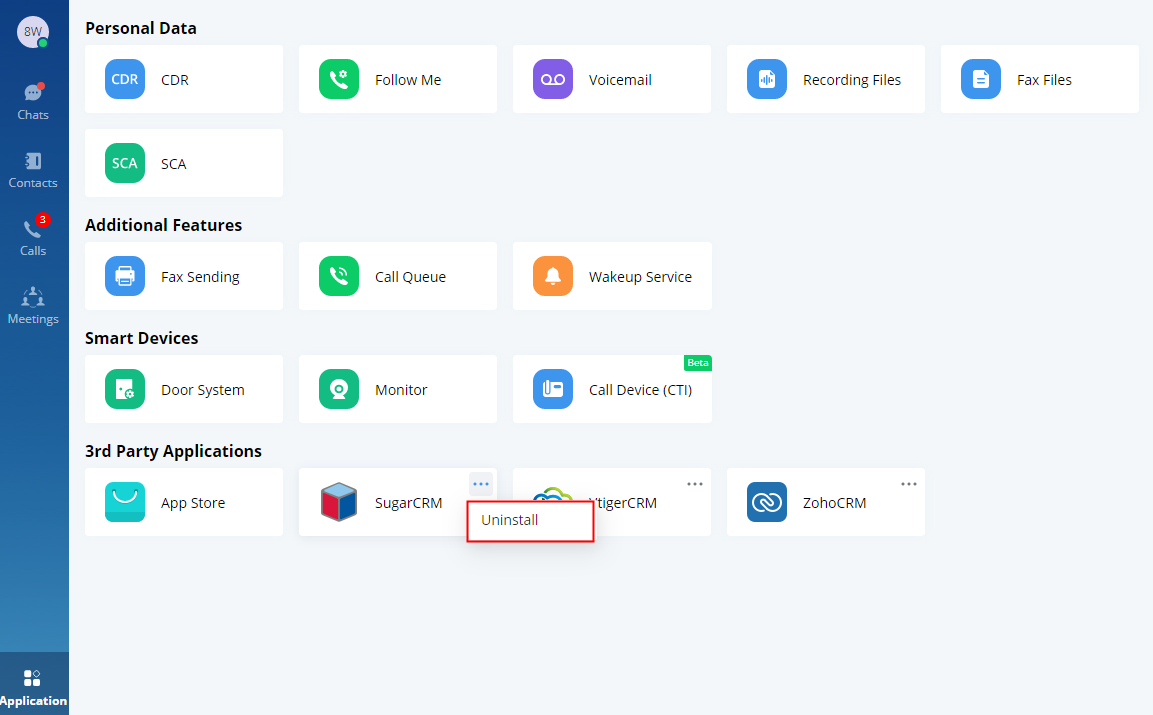
Uninstall Add-in
If the user wants to uninstall the CRM system add-in, the user can click the button “…” on the right upper corner of the add-in icon and click the “Uninstall” button to uninstall the add-in. Please see the screenshot below:
CONFIGURE CRM SYSTEM
ACT! CRM System
Login ACT! CRM System through Wave App
- The user can click to open ACT! CRM add-in in the “App Store” in the Wave application and enter the username and password to log in to the ACT! CRM system.
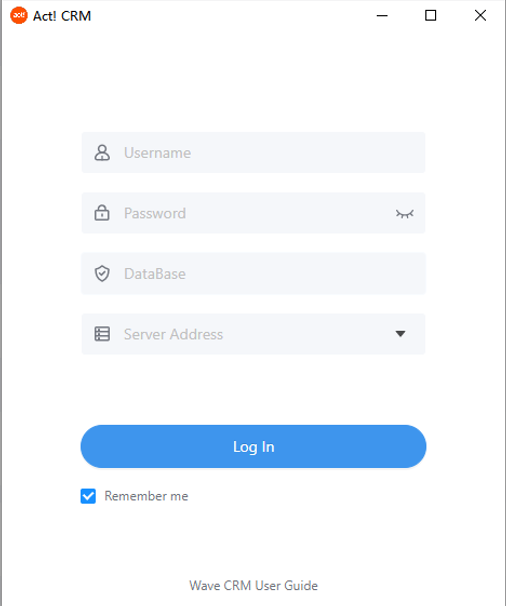
If you are using Act! Premium (On-premise), please refer to the filling rules below:
Username | The login username corresponding to your DataBase |
Password | The login password corresponding to your DataBase |
Database | The DataBase you are currently using |
Server Address | Fill in your local server address. Please refer to the video below: https://training-act.com/act/act-lib-con/?courseId=setup&videoId=2 |
If you are using Act! Premium Cloud, please refer to the filling rules below:
Username | The email you are using to log in in ACT! Premium Cloud |
Password | Your login password |
Database | Fill in the data base of Act! Premium Cloud. To get it, follow the steps below:
|
Server Address | Select the region where Act! Premium Cloud is located:
|
2. The user can click the “Log in” button to log in to the ACT! CRM system and the user will see the screenshot below:
Bitrix24 CRM System
Obtain Webhook URL of Bitrix24 CRM Account
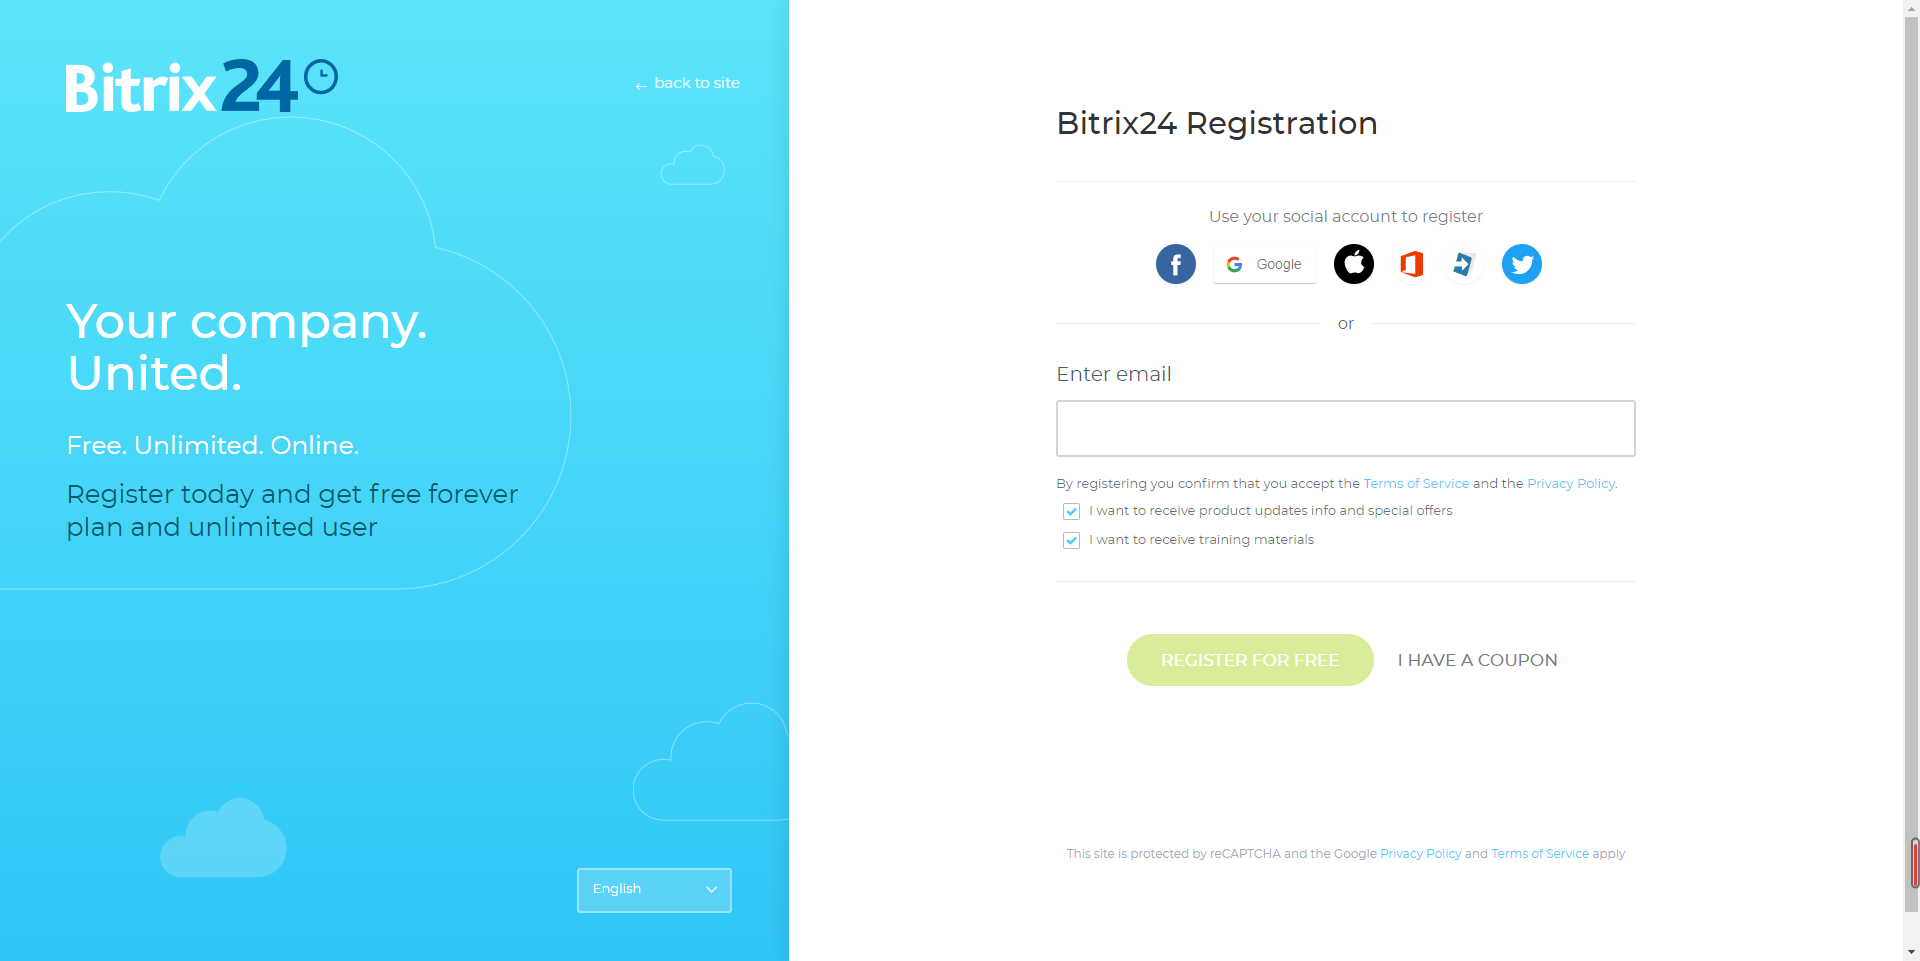
The user can sign up Bitrix24 CRM account at https://www.bitrix24.net/. If the user has an account for the Bitrix24 CRM system, the user can enter a phone number/email address and password to log in to the system. If the user does not have an account for the Bitrix24 CRM system, the user needs to sign up for a Bitrix24 CRM account. Please refer to the screenshot below:
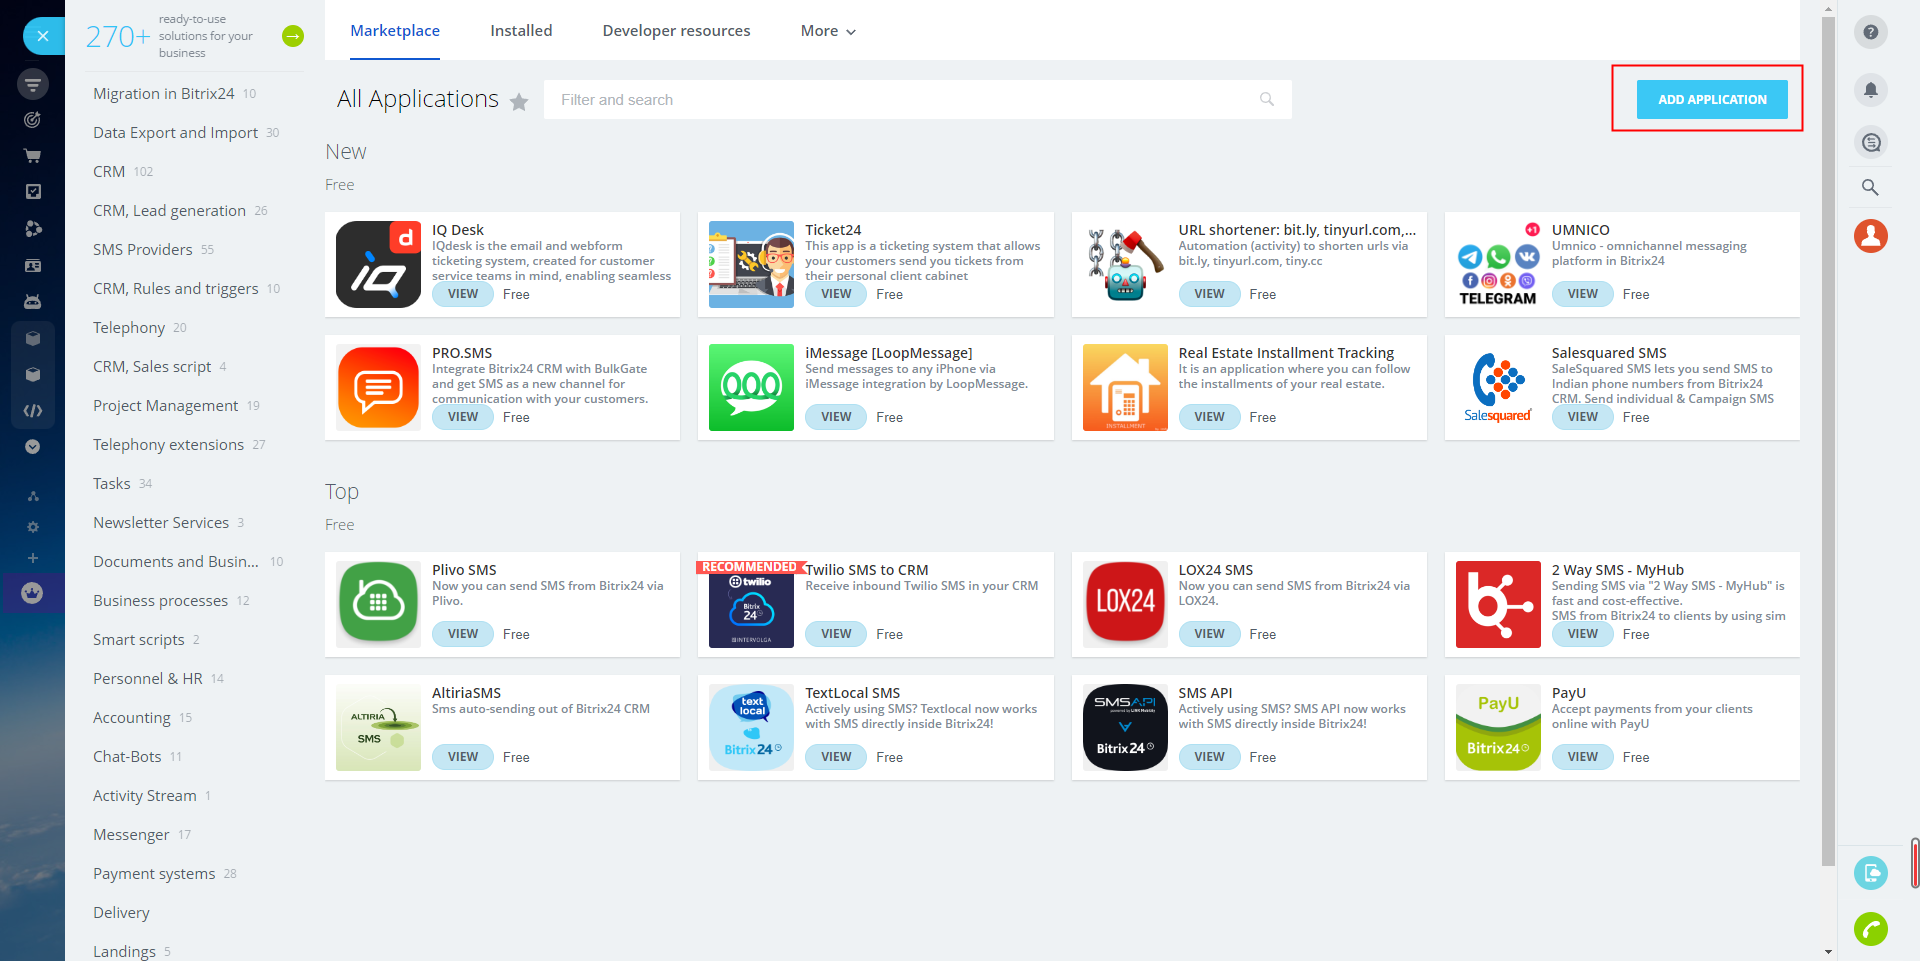
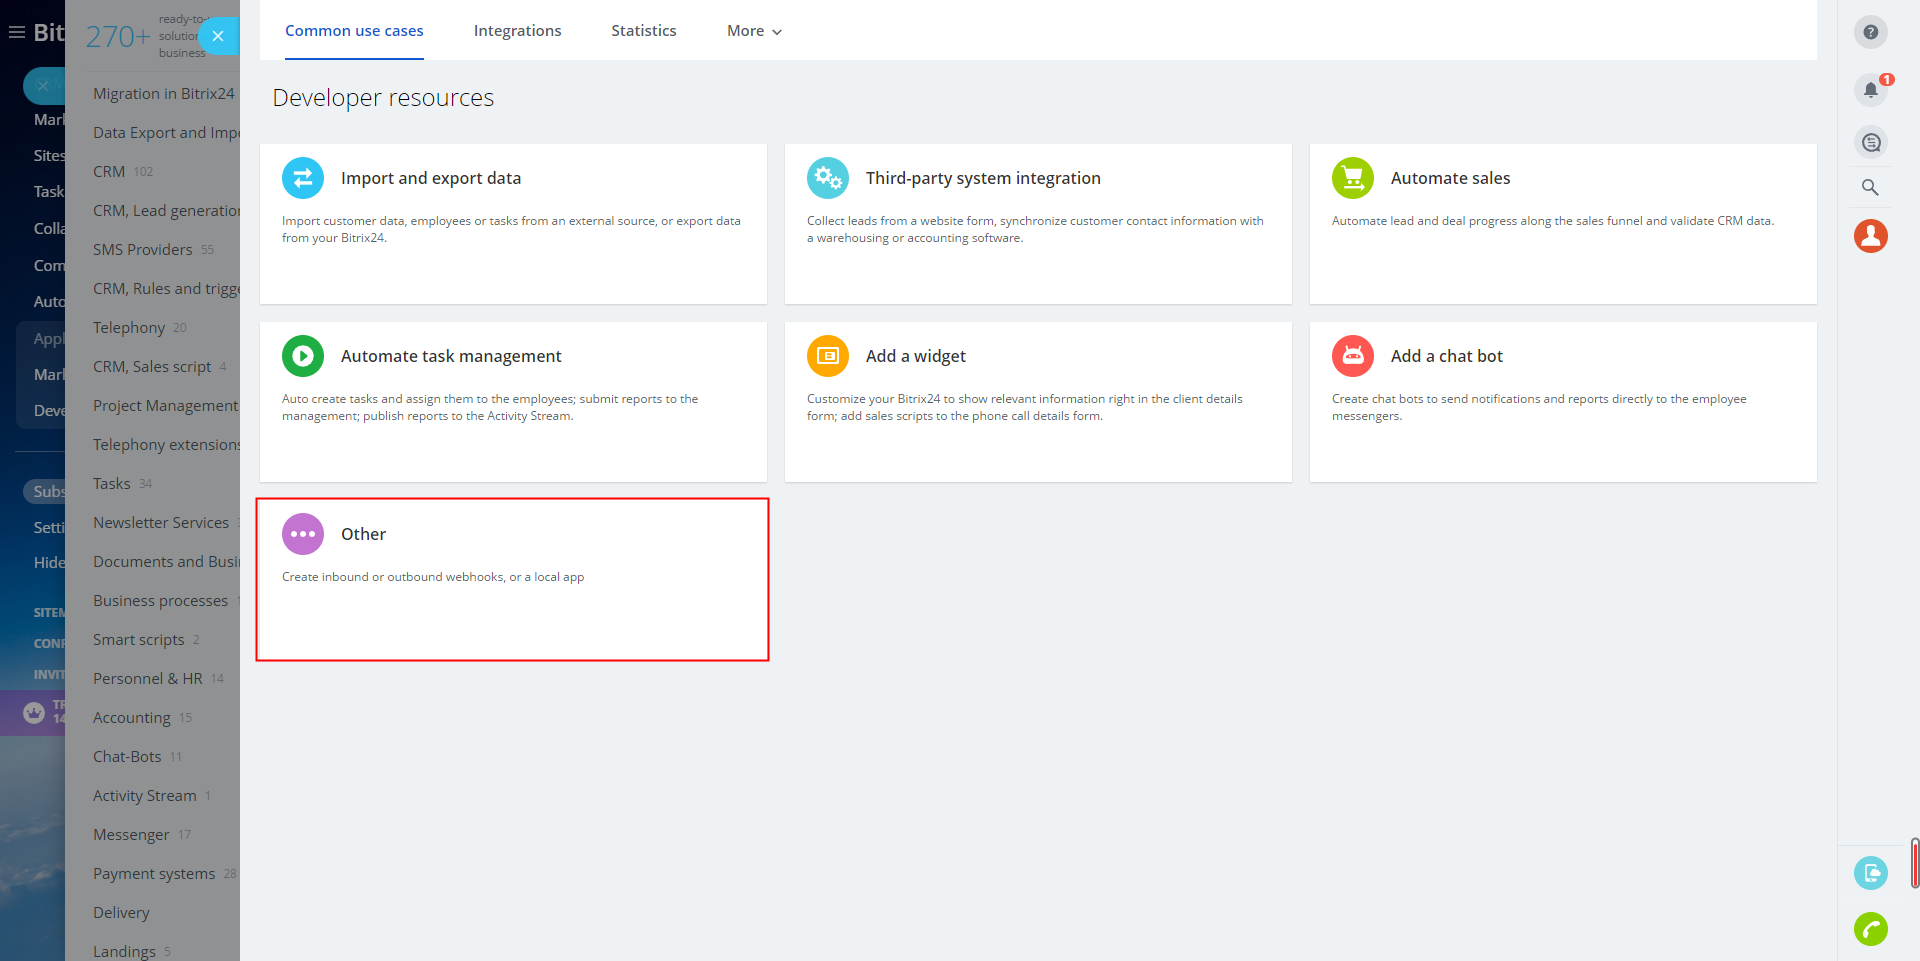
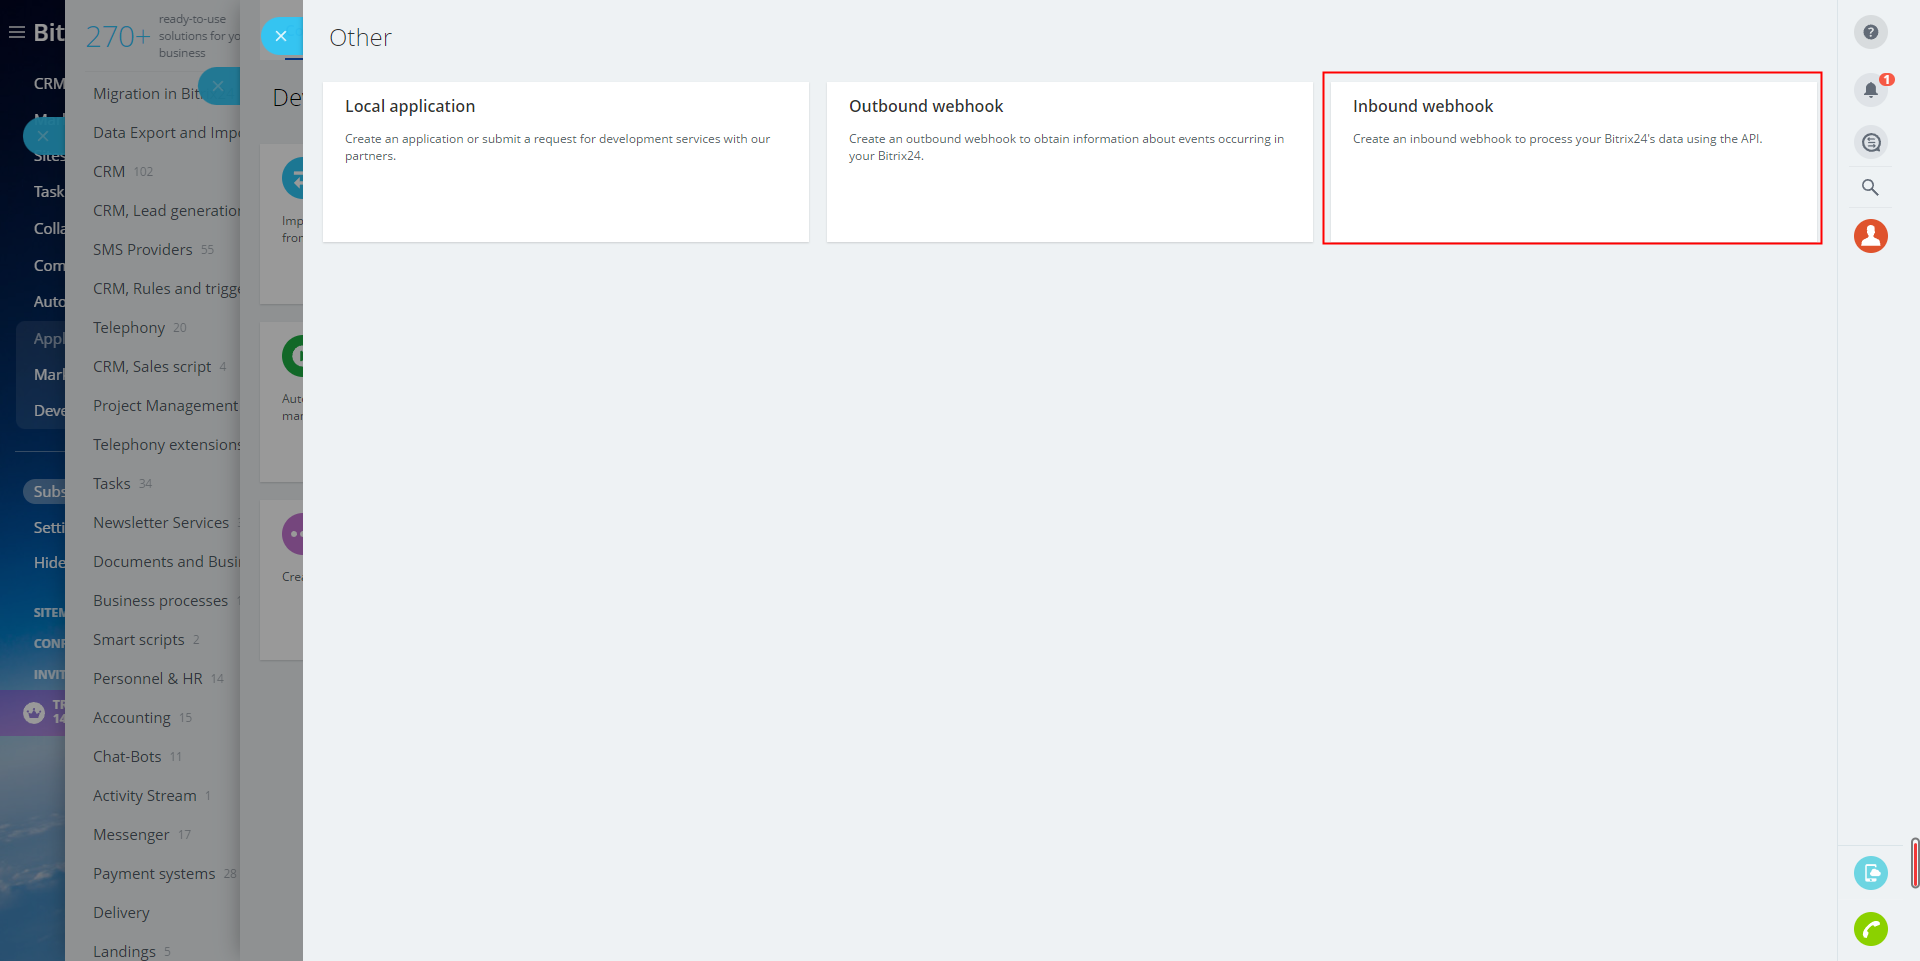
- After logging in Bitrix24 CRM system, the user can click the menu button on the left upper corner, and select “Application -> Market -> ADD APPLICATION” to access the “Common use cases” interface. Then, the user can click “Other -> Inbound webhook”. Please refer to the screenshots below:
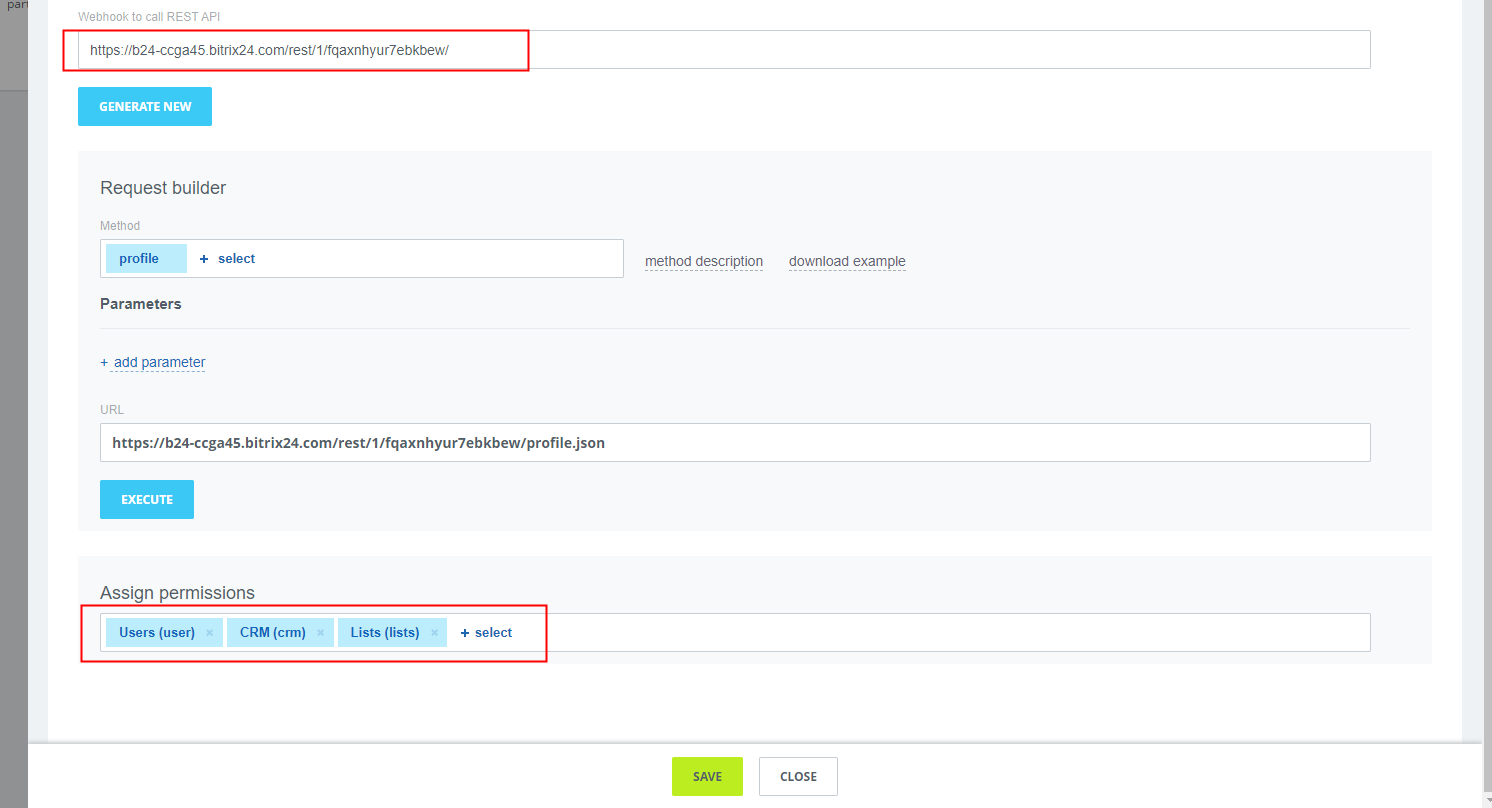
3. On the “Inbound webhook” interface, the user can scroll down to the “Assign permissions” section, select “CRM”, “Users”, and “Lists”, then click the “Save” button.
4. Under the title “Webhook to call REST API”, the user can copy the Webhook URL and click the “Close” button.
Login to Bitrix24 CRM System through Wave App
- The user can install and open the Bitrix24 add-in in the “App Store” in the Wave application and fill in the Webhook URL address to log in to the Bitrix24 CRM system.
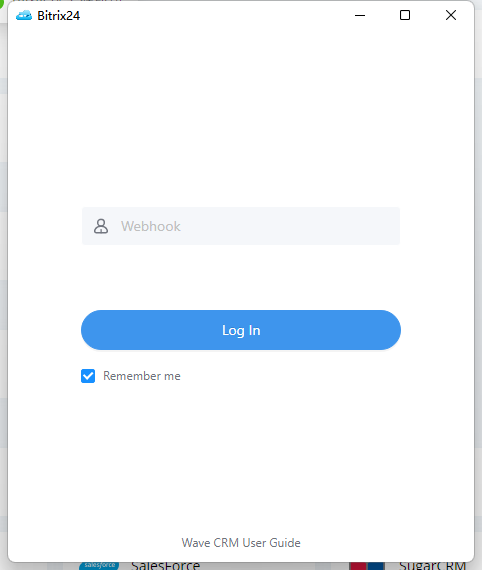
Webhook | Webhook URL address generated in Inbound Webhook. |
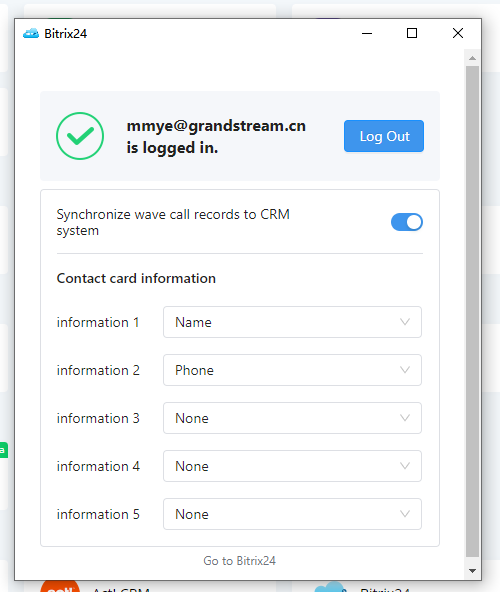
2. The user can fill in the copied Webhook URL address to the blank in the screenshot above the log in to the Bitrix24 CRM system.
Capsule CRM System
Log into the Capsule CRM System through the Wave App
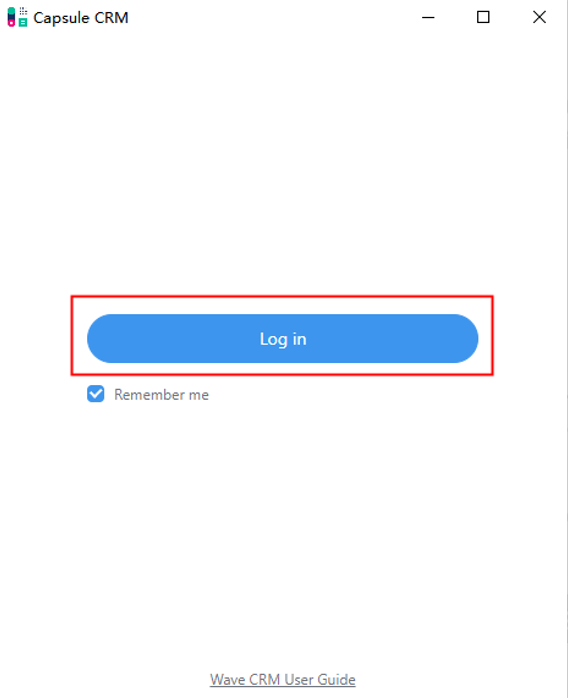
- The user can install and open the Capsule add-in in the “App Store” in the Wave application.
- Then, please click the “Log in” button on the following interface, and enter your system domain name:

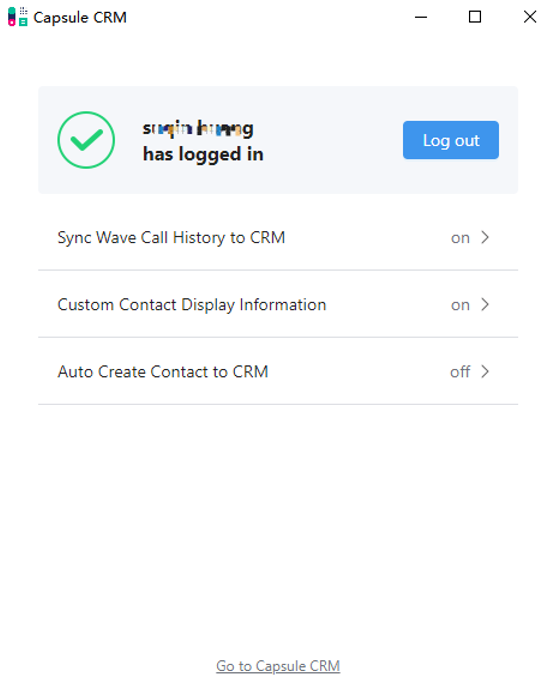
- Please click the “Allow” button on the screenshot below to authorize the Wave app to access your Capsule account:
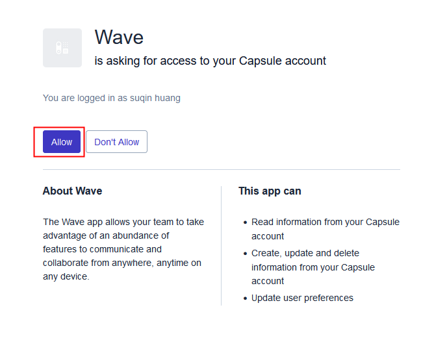
- After the authorization is successful, your Capsule CRM add-in can be successfully logged in.
Dynamics 365 CRM System
To integrate Dynamics 365 CRM with the Wave Desktop client, the user needs to provide the domain URL created on the Dynamics 365 CRM.
Integrate Dynamics 365 CRM System through Wave
- On the “application” page of the Wave Desktop application, the user can install and open Dynamics 365 add-in, and fill in the information below:
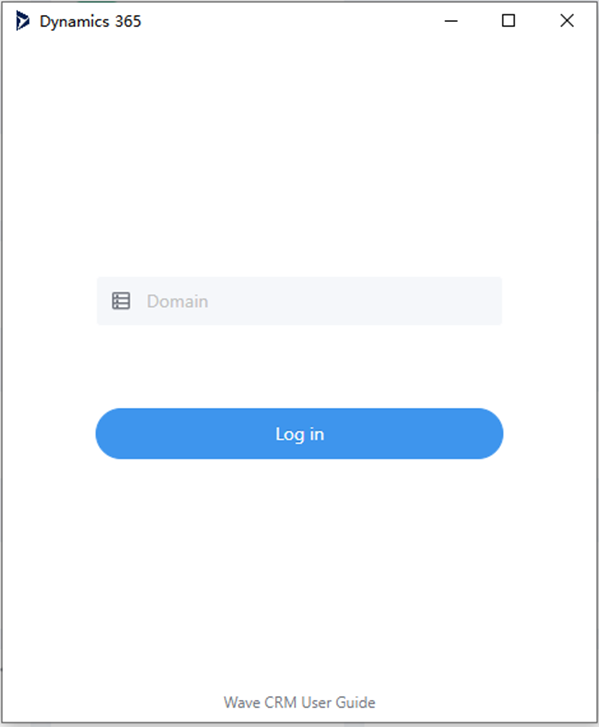
Domain | Enter the URL you use to access your Microsoft Dynamics 365 online account. E.g., "https://xxxxxxxx.ccrm4.dynamics.com/" |
2. After filling in the information above, the user can log into the Dynamics 365 online account to use the Dynamics 365 CRM system service.
Freshdesk CRM System
Obtain API KEY and Domain of Freshdesk CRM Account
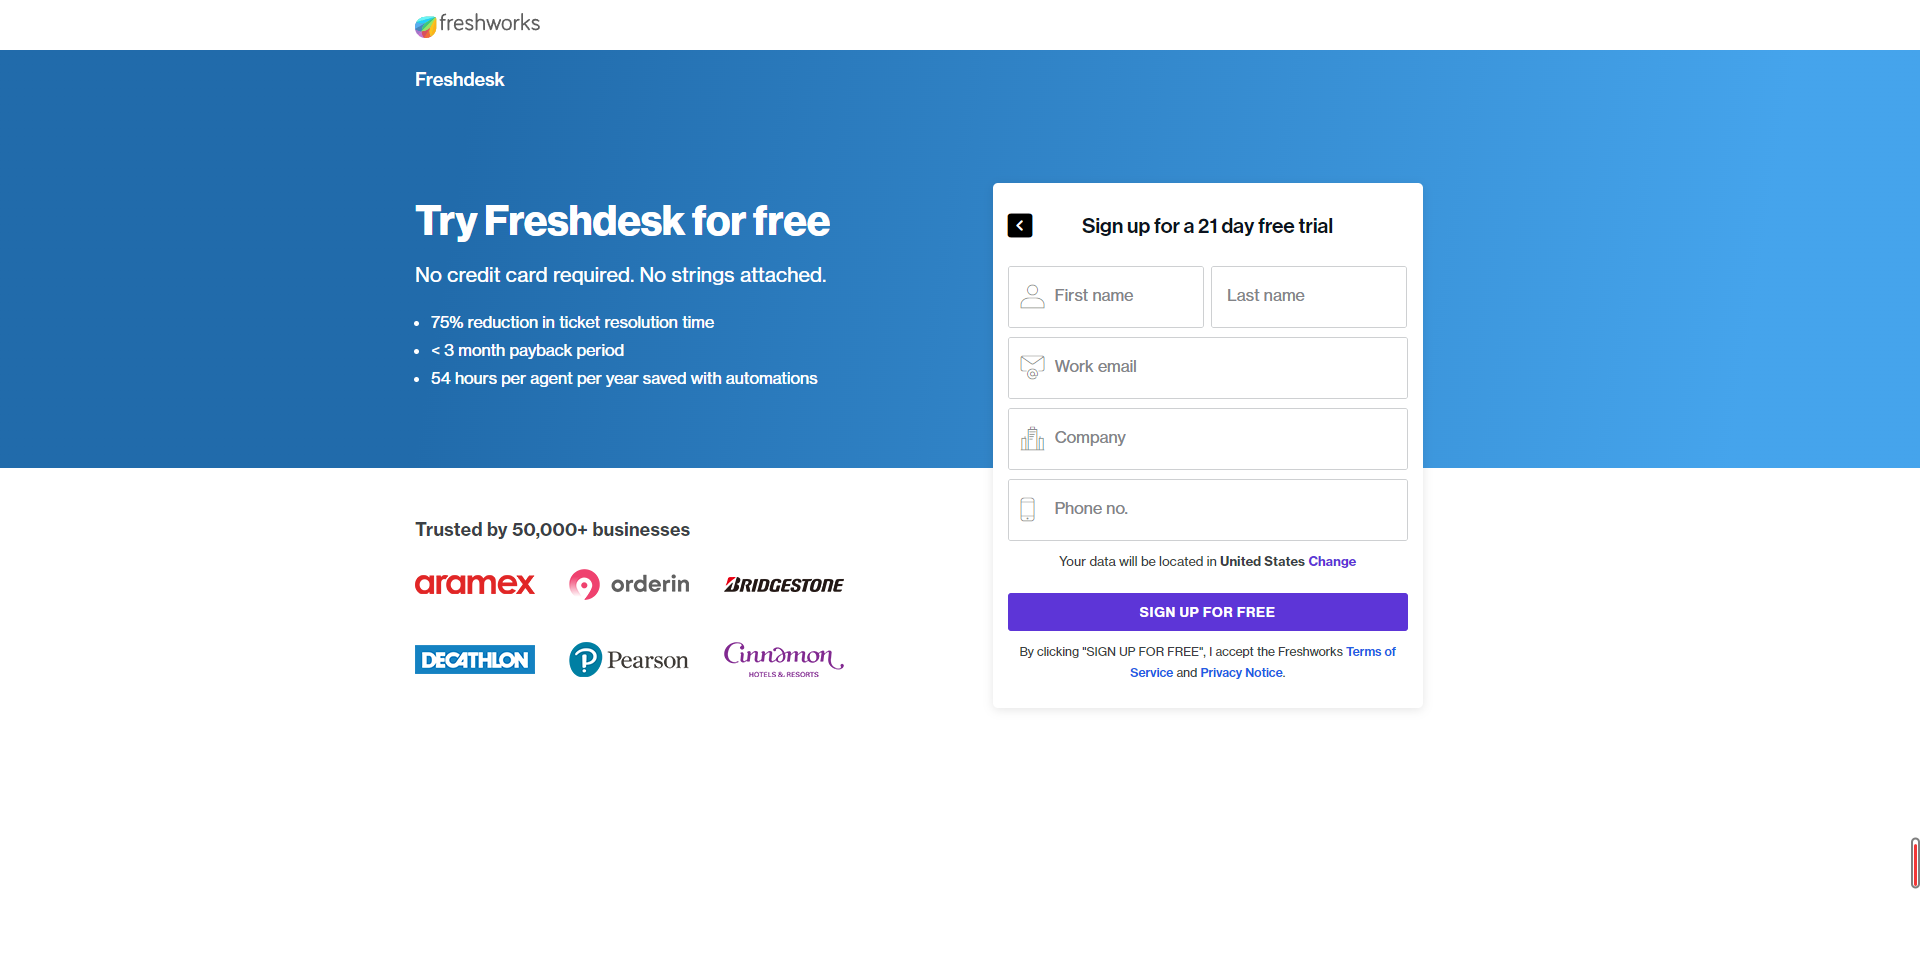
- The user can sign up Freshdesk CRM account at https://freshdesk.com/signup. If the user has an account for the Freshdesk CRM system, the user can log in to the system directly. If the user does not have an account for the Freshdesk CRM system, the user needs to sign up for a Freshdesk CRM account. The user can fill in the required personal information and click the “Sign up” button, the Freshdesk CRM system will send a confirmation email to the registered email address. Then, the user can click the “Activate Account” button to activate the account.
2. Obtain API KEY. After logging in Freshdesk CRM system, the user can click the avatar on the right upper corner and access the Profile Settings. The user can view the generated API KEY on the right side of the interface. Please refer to the screenshots below:


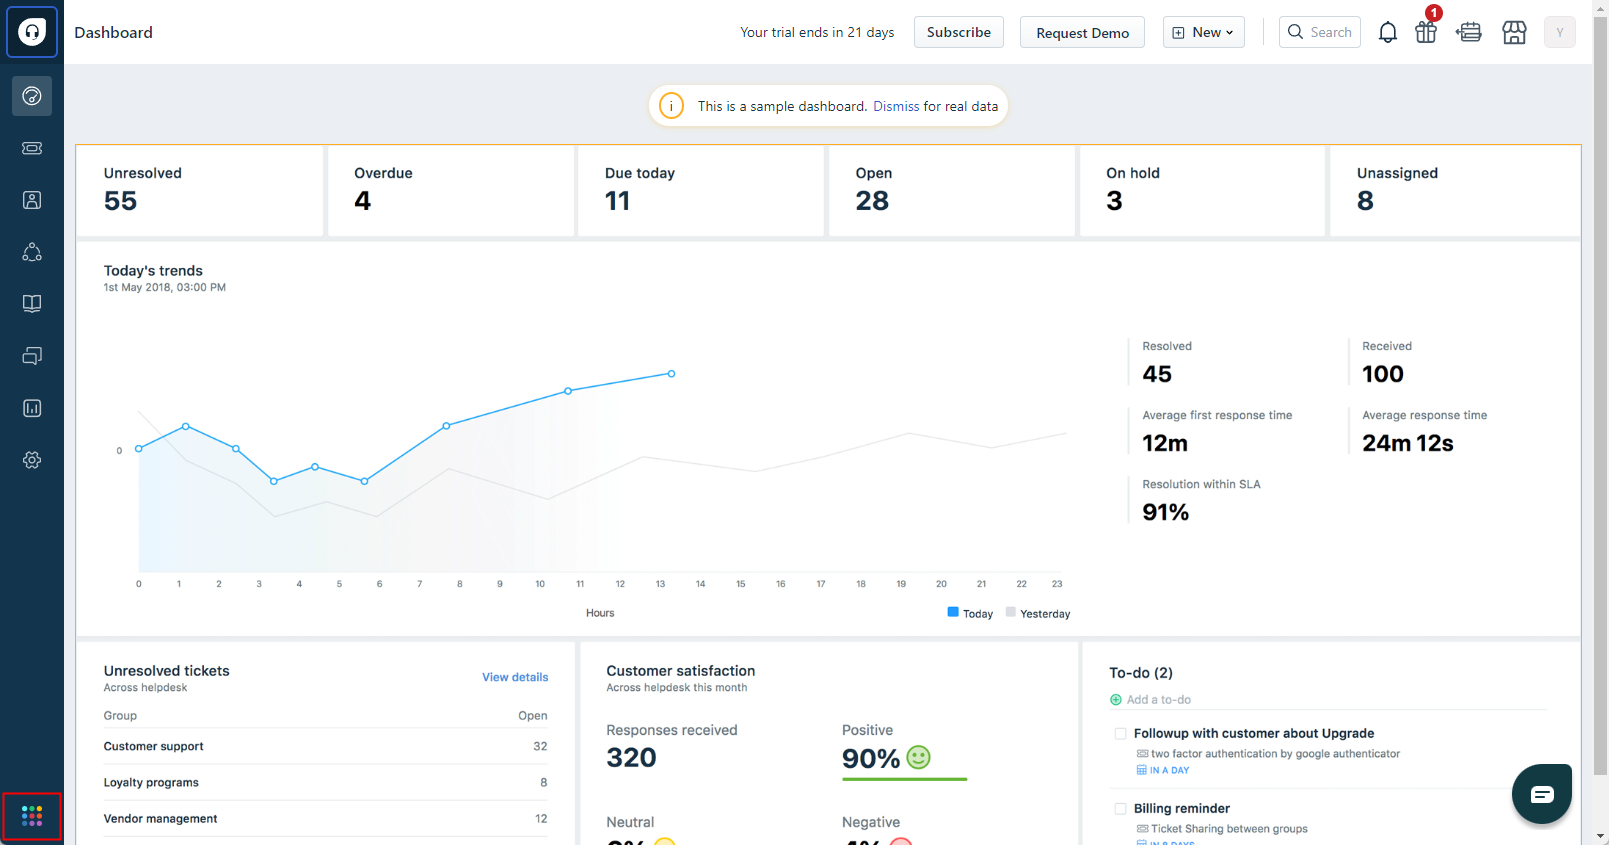
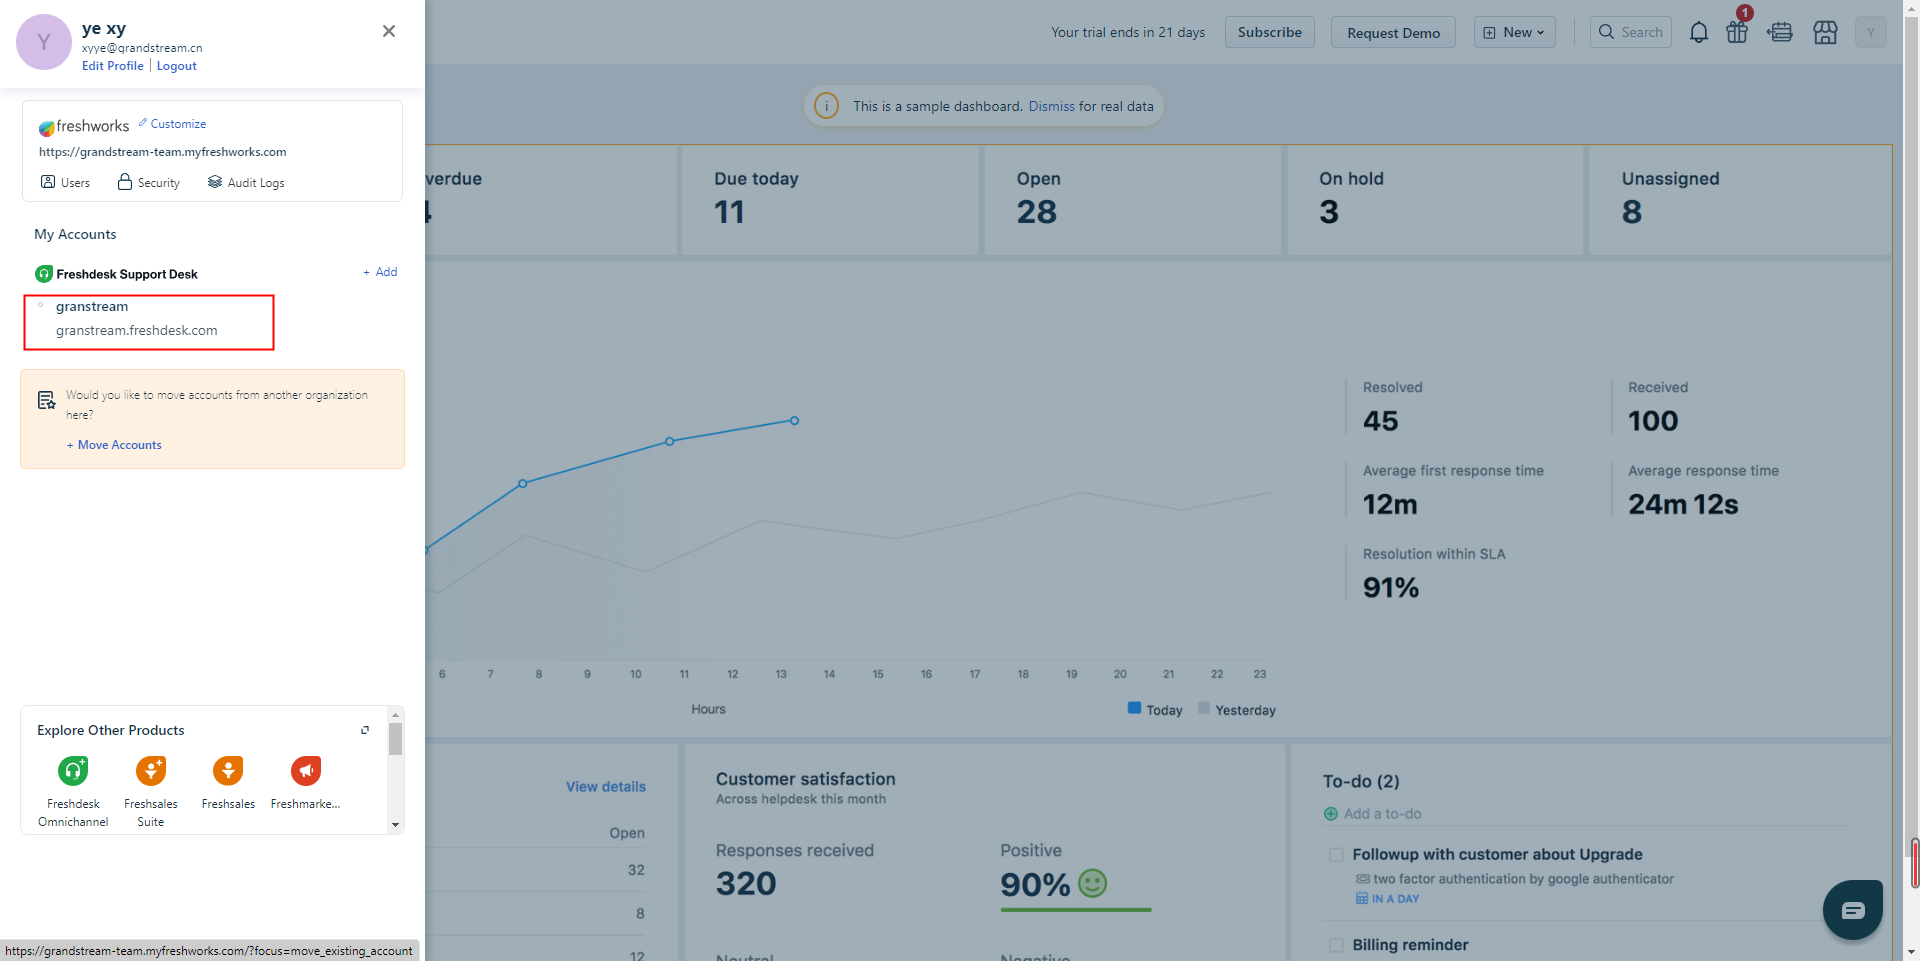
3. Obtain domain. The user can click the icon on the left bottom corner to view the personal information. The user can copy the “xxxx” contents on the link “xxxx.freshdesk.com” as the domain. Please refer to the screenshots below, the domain is “grandstream”.
Login Freshdesk CRM System through Wave App
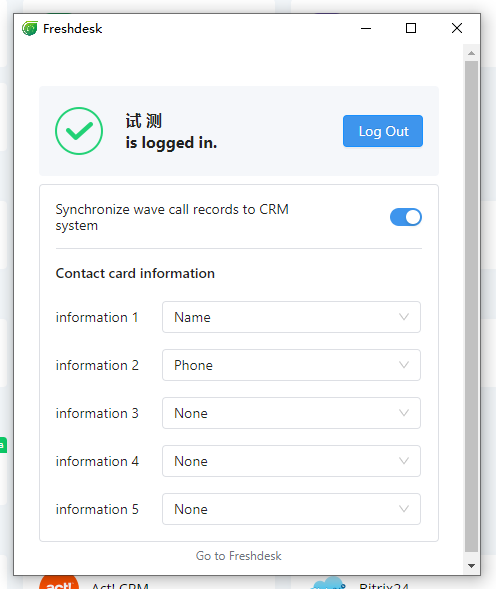
- The user can install and open the Freshdesk add-in in the “App Store” in the Wave application and fill in the domain and API KEY to log in to the Freshdesk CRM system.

Domain | Fill in the obtained domain information. |
API Key | Fill in the obtained API KEY information. |
2. The user can fill in the obtained domain and API KEY to the blanks in the screenshot above to log in to the Freshdesk CRM system.
HubSpot CRM System
Log into HubSpot CRM System through Wave App
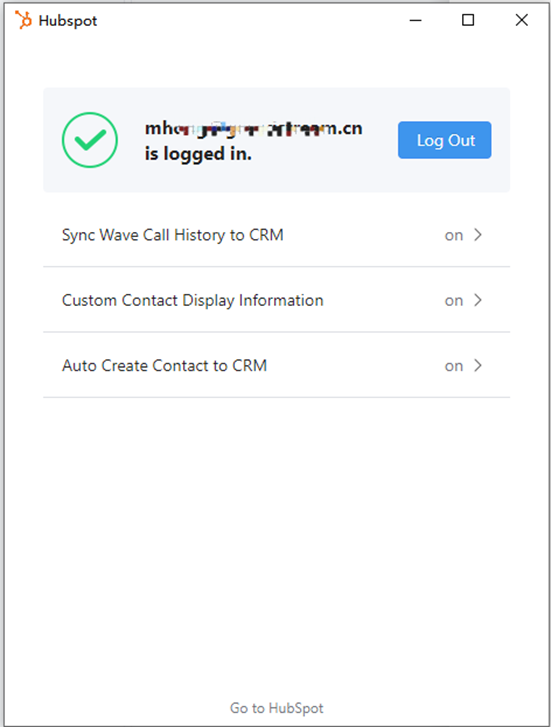
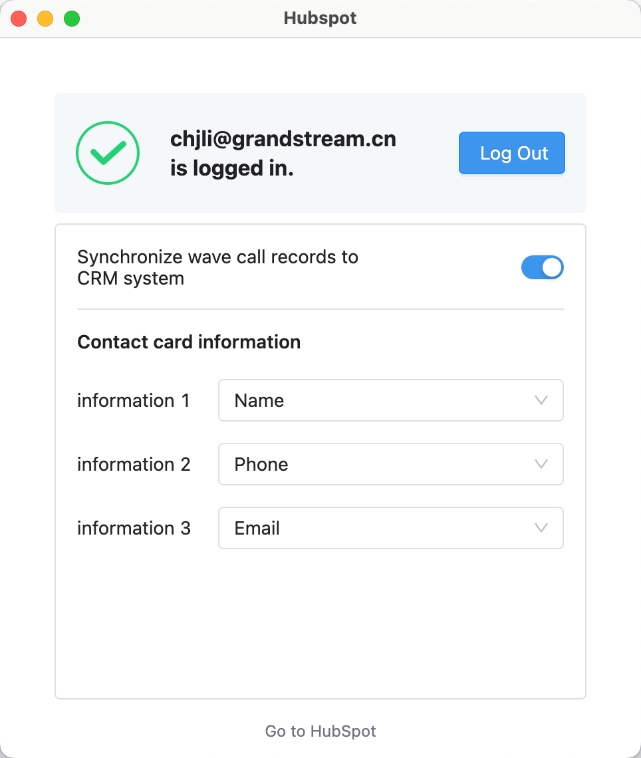
- The user can install and open the HubSpot add-in in the “App Store” in the Wave application and fill in the Email address and Password to log in to the HubSpot CRM system. Please refer to the screenshot below:
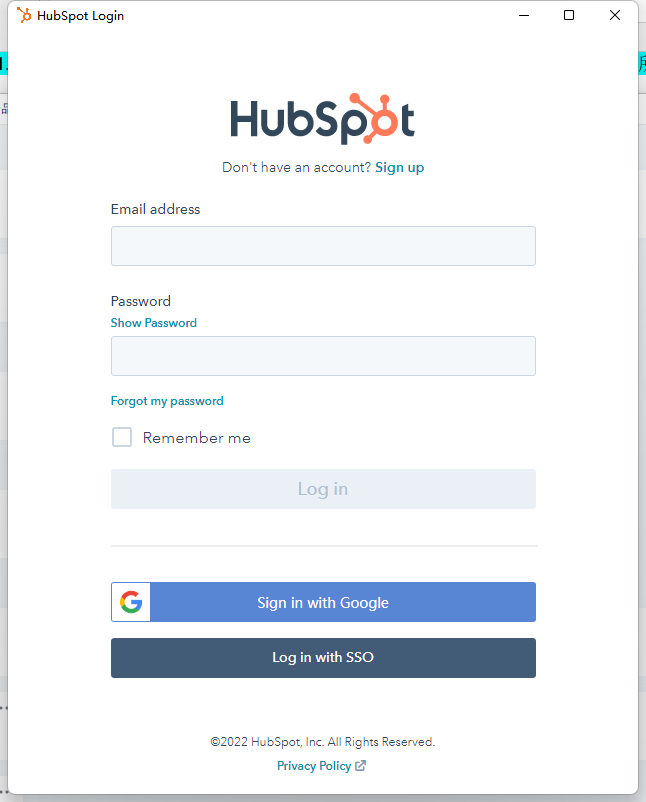
Email address | Fill in the email of the Hubspot account. |
Password | Fill in the password of the Hubspot account. |
2. The user can fill in the email address and password to the blanks in the screenshot above to log in to HubSpot CRM System.
Less Annoying CRM System
Obtain API Key
- Open https://www.lessannoyingcrm.com/ in your browser and log in your account.
- Then you can enable API access and create a new API key for your account on the Programmer API settings page.
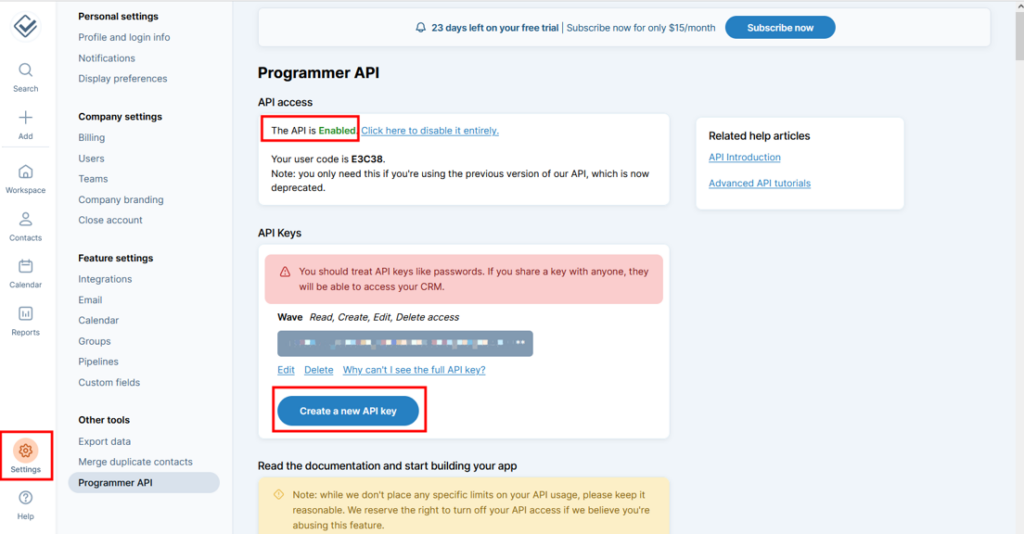
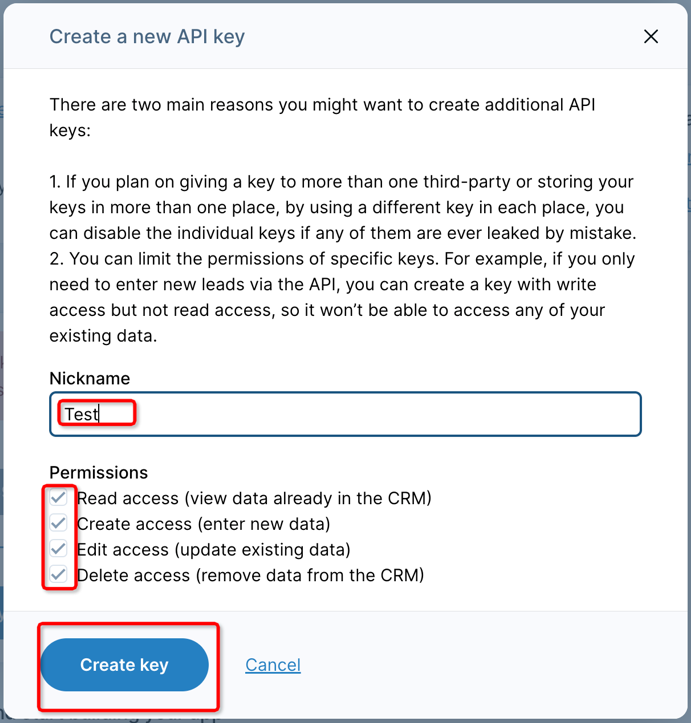
- You need to enter a Nickname when creating the API Key, select all the following permissions, and click to create the API Key.
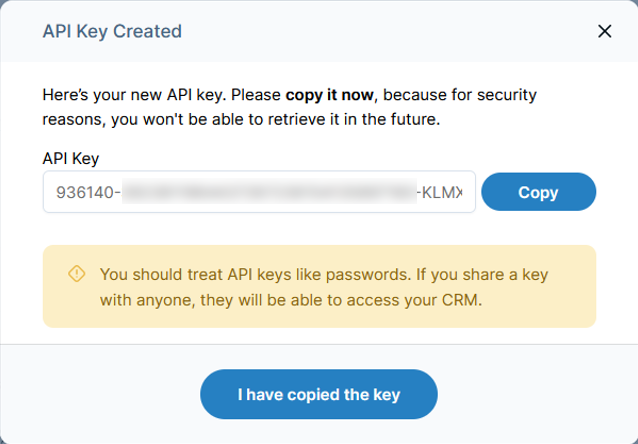
- You can copy the API Key after the API Key has been created successfully.
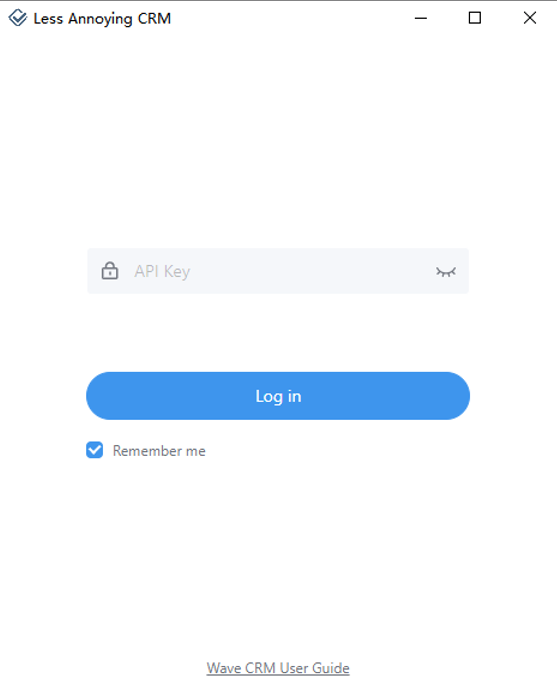
Log in to Less Annoying CRM System Through Wave App
Users can install the Less Annoying CRM add-in in the Application module of the Wave Desktop application, and enter the API Key to log in to the Less Annoying CRM system:
Monday Sales CRM System
Install the Wave add-in on the Monday Sales platform
- The administrator needs to log in to the Monday Sales platform and click the Apps icon
 in the upper right corner to enter the application market.
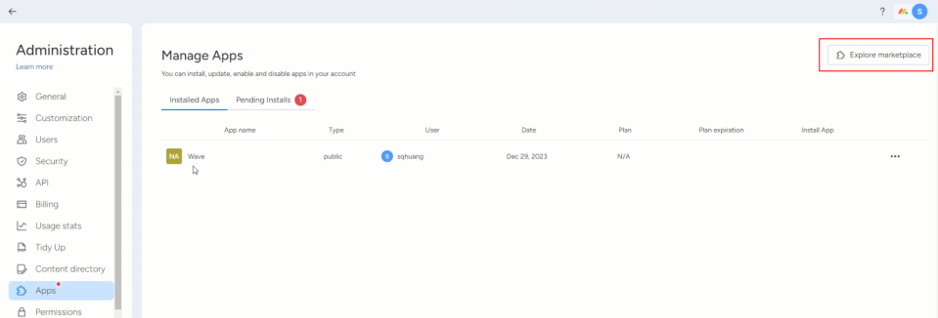
- Then search for the “Wave” add-in for installation.
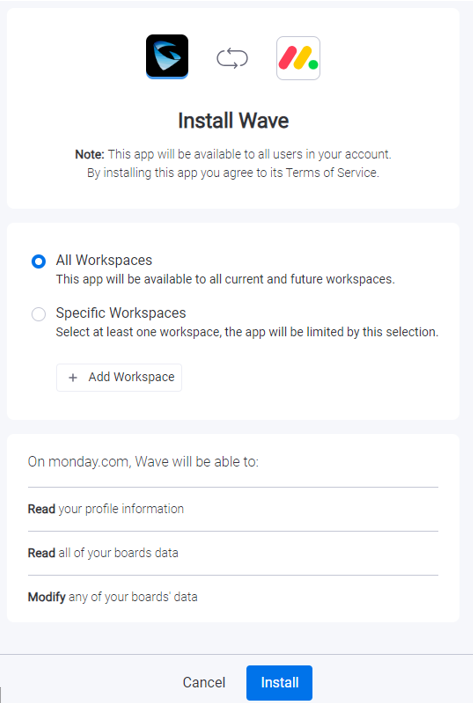
- After installation, the Monday Sales CRM system members can install the Monday Sales CRM add-in on the Wave Desktop application.
Log into Monday Sales CRM System Through Wave App
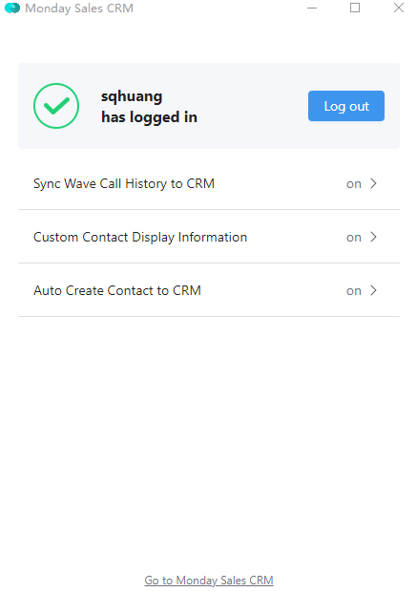
Users can install the Monday Sales CRM add-in in the App Store, click the “Log in” button, and authorize to log in to the corresponding CRM system:
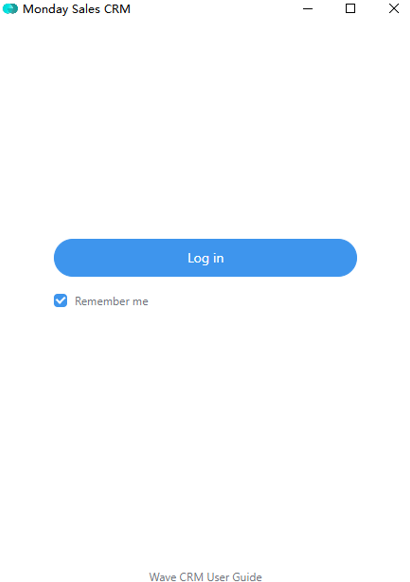
- Click the “Log in” button and authorize to log in to the system:
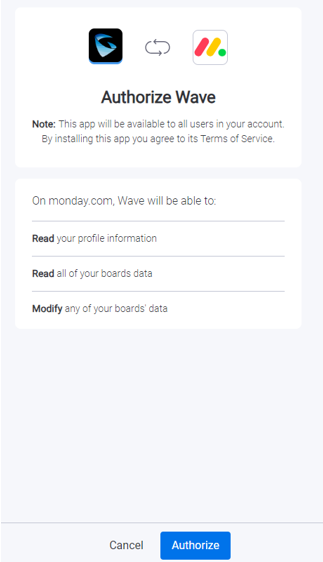
- After the authorization succeeds, that means the user has logged in the Monday Sales CRM add-in:
Odoo CRM System
Obtain API Key and Database Server Address
- Log into Odoo’s system on your browser.
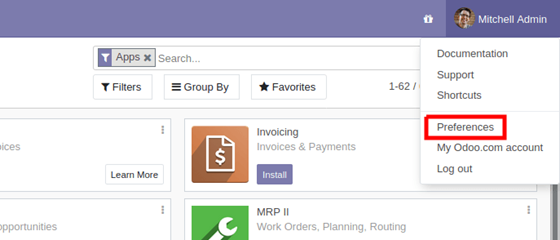
- In order to add a key to your account, simply go to your Preferences (or My Profile):
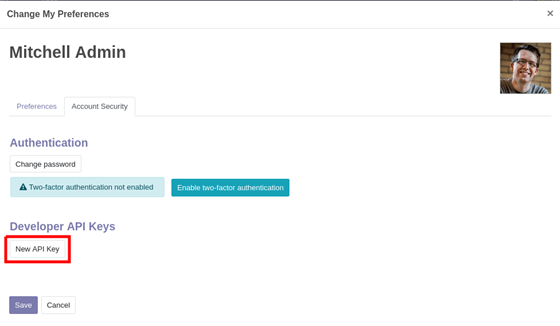
- Then open the Account Security tab, and click New API Key:
- Click New API Key, input a description for the key. This description should be as clear and complete as possible: it is the only way you will have to identify your keys later and know whether you should remove them or keep them around.
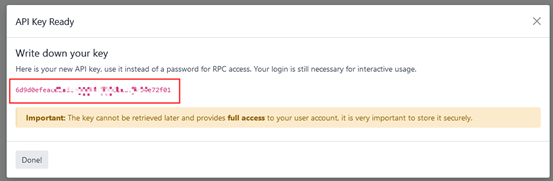
- Click Generate Key, then copy the key provided. Store this key carefully: it is equivalent to your password, and just like your password the system will not be able to retrieve or show the key again later on. If you lose this key, you will have to create a new one (and probably delete the one you lost).
- Then go to your Preferences (or My Profile) -> My databases, go to the database selection page to view your database name. You can also click the “Create” button to create a new database.

Log in to Odoo CRM System Through Wave App
- Users can install the Odoo CRM add-in in the Application module of the Wave Desktop application and enter the following information to log in to the Odoo system:
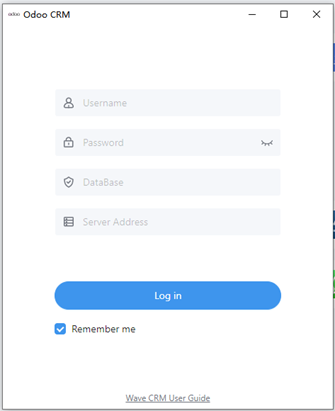
Username | Fill in your login email. |
Password | Fill in the obtained API KEY information. If you have your own local Odoo system deployed, enter the login password on your local server. |
Database Name | Fill in you database name. |
Database Server Address | Fill in the access service address in your browser, such as https://grandstream1.odoo.com, or fill in the database address of your local server. |
Oracle Netsuite CRM System
Oracle Netsuite administrator needs to configure the Token-based Authentication (TBA)
Before using the Oracle Netsuite CRM add-in on the Wave Desktop application, the administrator needs to configure the Token-based Authentication (TBA) following the steps below on the Oracle Netsuite system, and assign Token-based Authentication roles to users.
To set up TBA in your NetSuite account:
- Enable the Token-based Authentication Feature
- Set Up Token-based Authentication Roles and Token-based Authentication (TBA) Permissions
- Assign Users to Token-based Authentication Roles
References:
Log into Oracle Netsuite CRM System Through Wave App
Prerequisites: The Oracle Netsuite administrator has assigned a Token-based Authentication role to you Oracle Netsuite account.
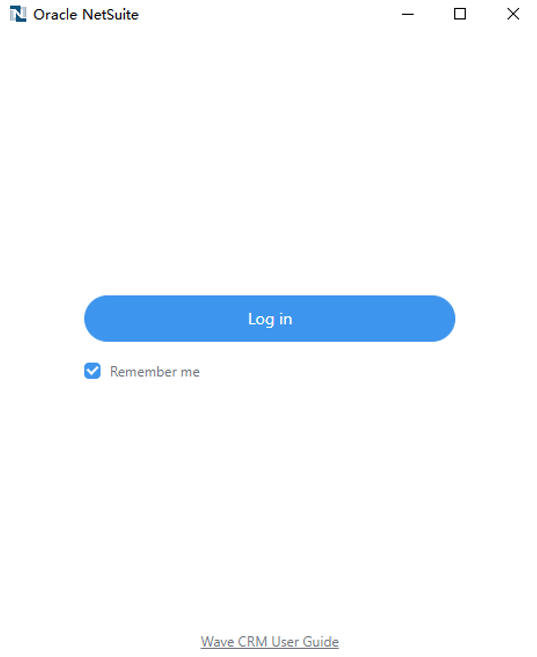
- The user can install and open the Oracle Netsuite add-in in the “App Store” in the Wave application.
- Then, please click the “Log in” button on the following interface, and enter the Oracle Netsuite account to log in to the add-in.
Salesforce CRM System
Login Salesforce CRM System through Wave App
- The user can click to install and open Salesforce CRM Add-in in the “App Store” in the Wave application. Once the add-in has been installed, the user can open the add-in and choose the server address from the drop-down menu, as shown in the screenshot below.
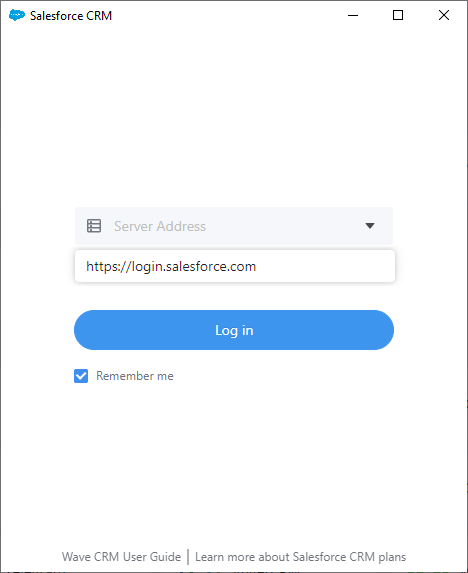
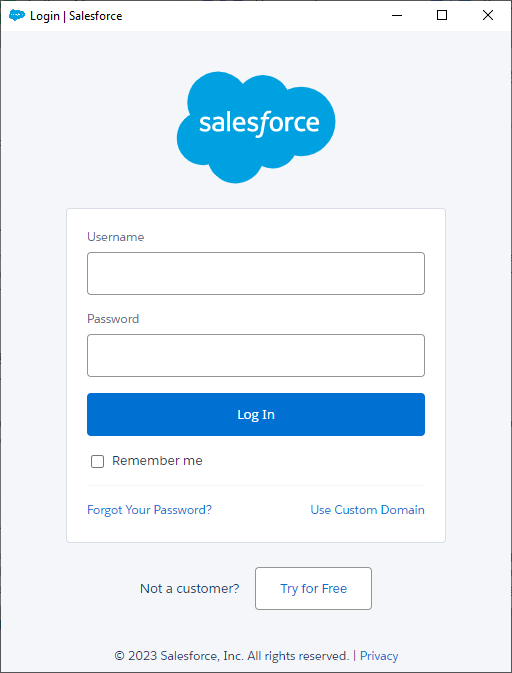
2. Click “Log in” then enter the username and password created on Salesforce website.
Sugar CRM System
- Set up Sugar CRM System
- Users need to set up the Sugar CRM system locally by using the related application. Users need to download the Sugar CRM system installation package “SugarCRM.exe”, install the application on the PC, and set the admin username, password, and Web server installation address/port during the installation process.
- After installing the application, users can run the Sugar CRM application, and log in to the Sugar CRM system with the admin username and password.
- Create New User
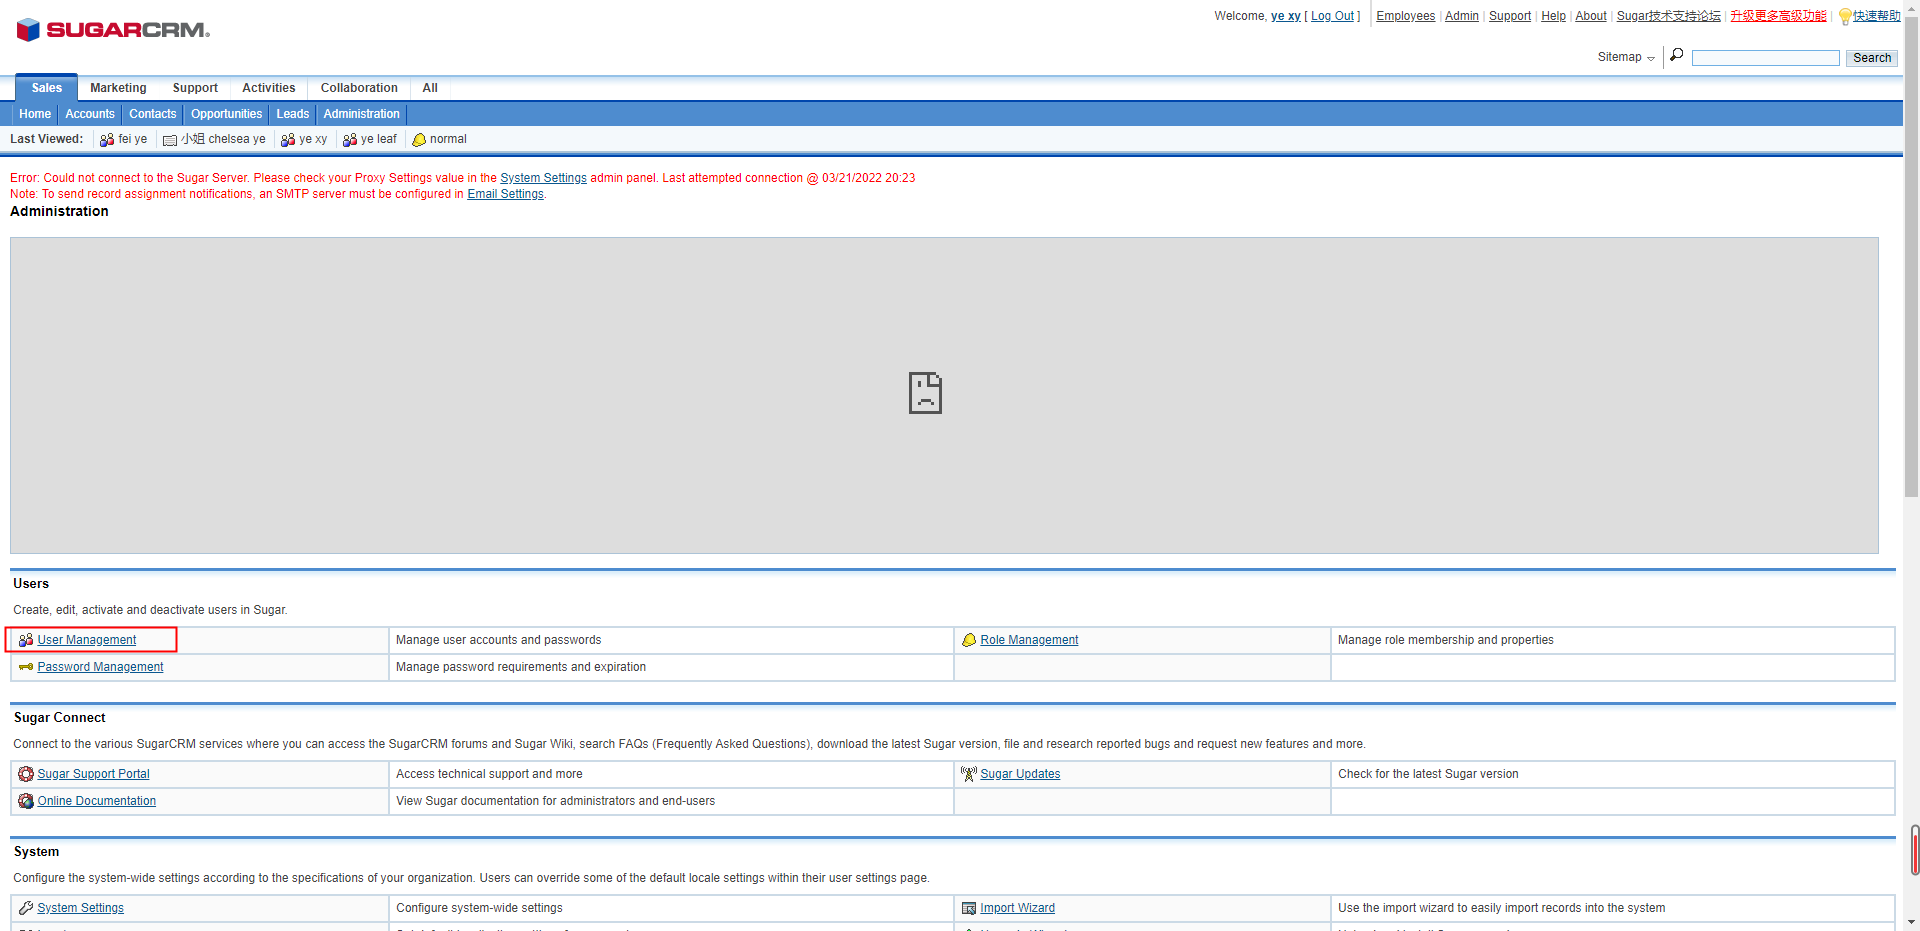
- When the administrator has logged in to the Sugar CRM system, the administrator can click the “Admin” option on the right upper corner of the main interface to access the system management interface. The administrator can click on the “User Management” option to view all users’ information in the current system, and it allows the administrator to make operations to those accounts.

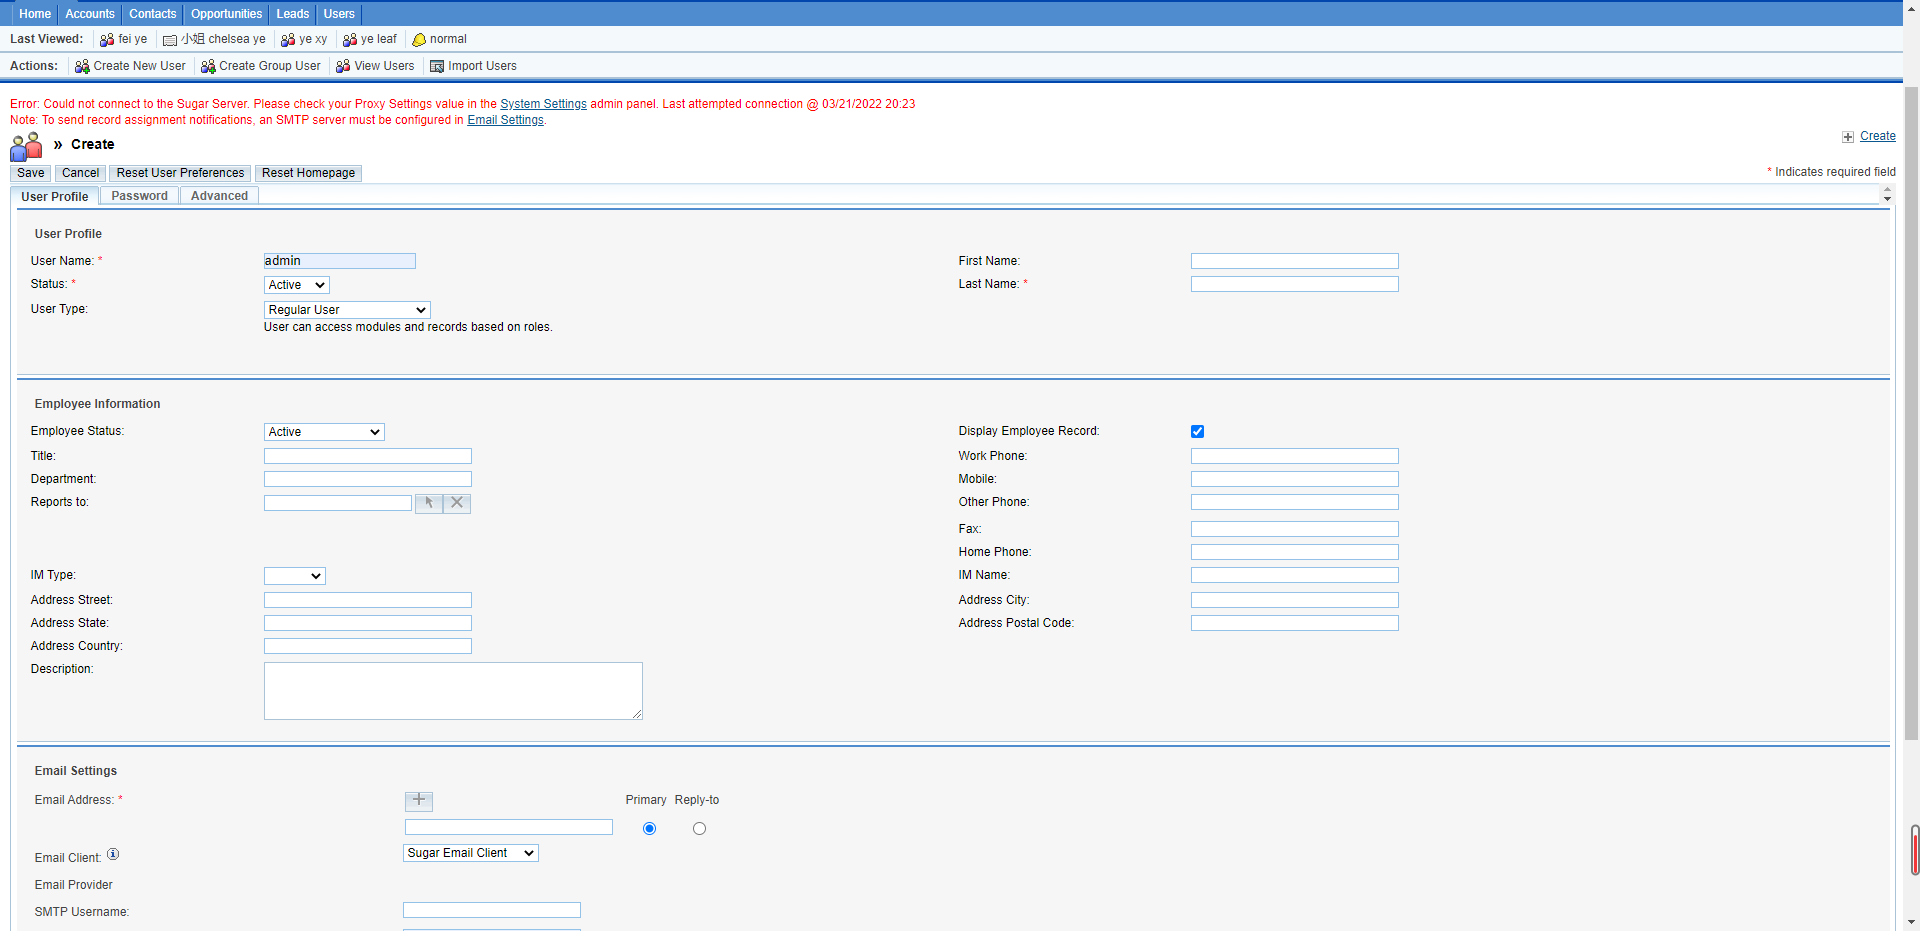
2. On the “Actions” bar, the administrator can click on the “Create New User” button to access the user-creating interface. The administrator can fill in the information of the new user, and click “Save” button to create a new user as the screenshot shows below:

3. After creating the new user, the user can log in to the Sugar CRM system with the corresponding username and password.
Login Sugar CRM System through Wave App
- The user can click to install and open Sugar CRM Add-in in the “App Store” in the Wave application and enter the username, password, and CRM server address to log in to the Sugar CRM system.
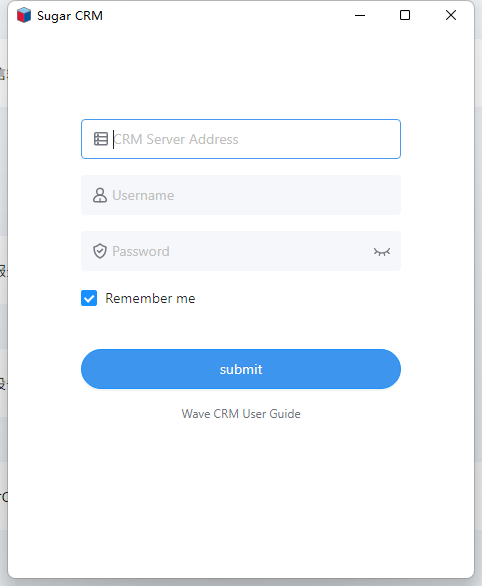
CRM Service Address | Configure CRM Service Address following the format “http://IP:Port/sugarcrm”. In the URL, the “IP” is the IP address of the Sugar CRM system operating environment, and the “Port” is the Web server installation port that has been configured during the installation process. |
Username | Please fill in this field with the Sugar CRM account username. |
Password | Please fill in this field with the Sugar CRM account password. |
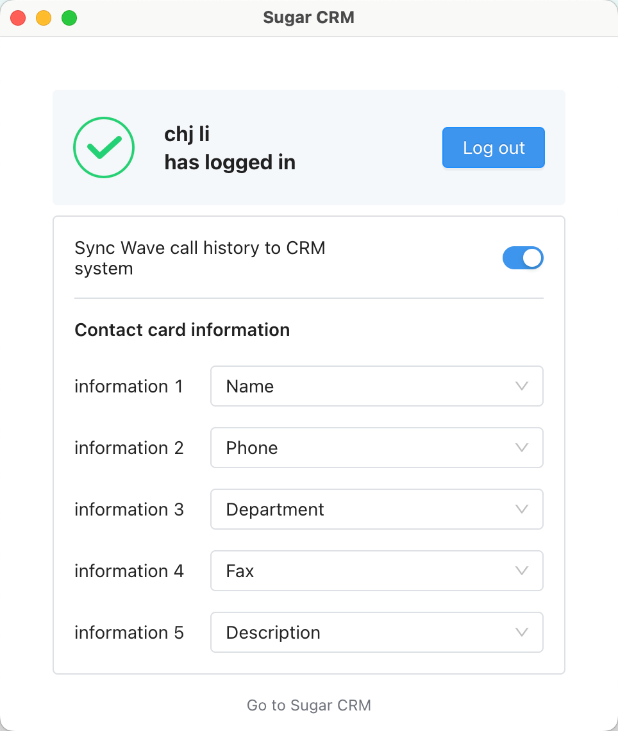
2. After filling in the login information and clicking on the “Log In” button, the user can log in to the Sugar CRM system as the screenshot shows below:
Vtiger CRM System
- Set up Vtiger CRM System
- Users need to set up the Vtiger CRM system locally by using the related application. Users need to download the Vtiger CRM system installation package “vtigerCRM620.exe” from the open-source download website below:
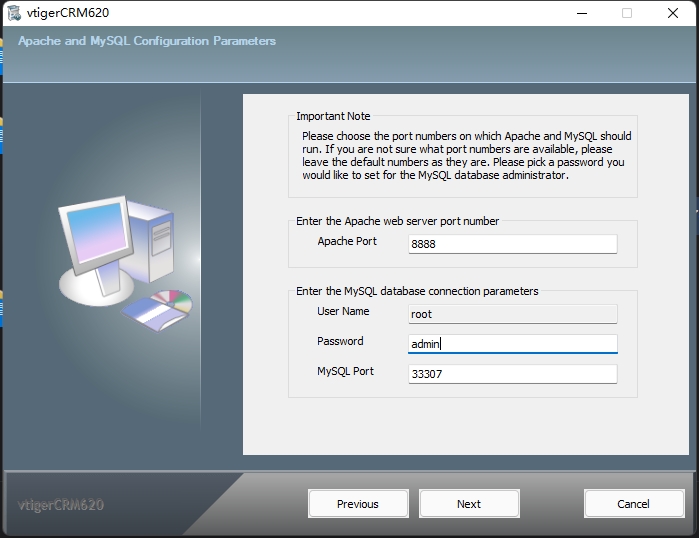
http://sourceforge.net/projects/vtigercrm/files/vtiger%20CRM%206.2.0/Core%20Product/vtigerCRM620.exe - Install the Vtiger CRM system on the local PC. Users need to set the Apache Web port, specify the MySQL user/password/port, and set the admin username, password, and email address during the installation process.
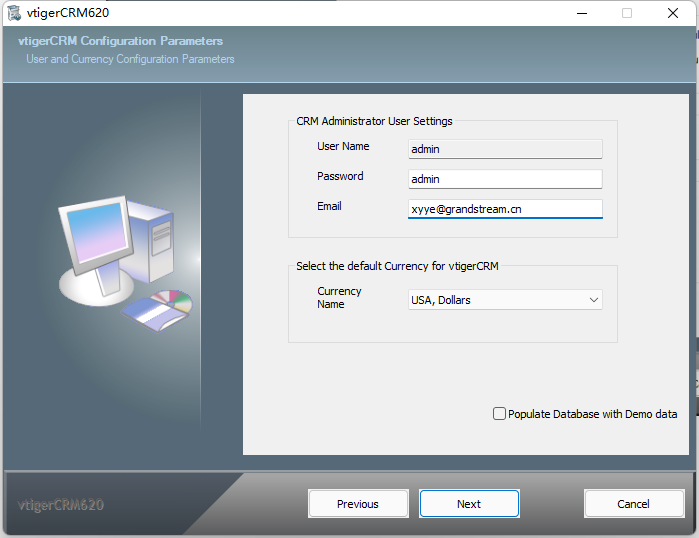
3. After installing the application, users can run the Vtiger CRM application, and the user will be directed to the Vtiger CRM service page for confirmation purposes. Then, the user can log in to the Vtiger CRM system with the admin username and password.
- Add a User
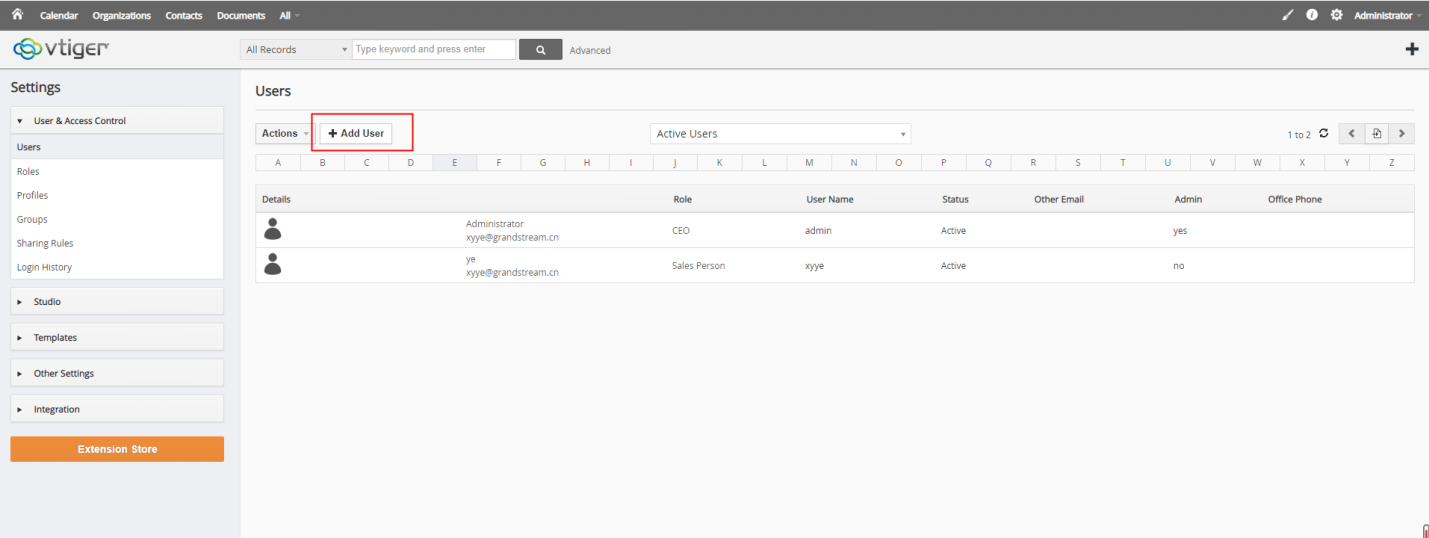
- When the administrator has logged in to the Vtiger CRM system, the administrator can click on the “Manage Users” option in the right upper corner of the main interface to access the users’ management interface. The administrator can click on the “Add User” option to access user creating interface to fill in the new user information. After clicking on the “Save” button, the new user will be created, then the new user can log in to the Vtiger CRM system with the username and password.

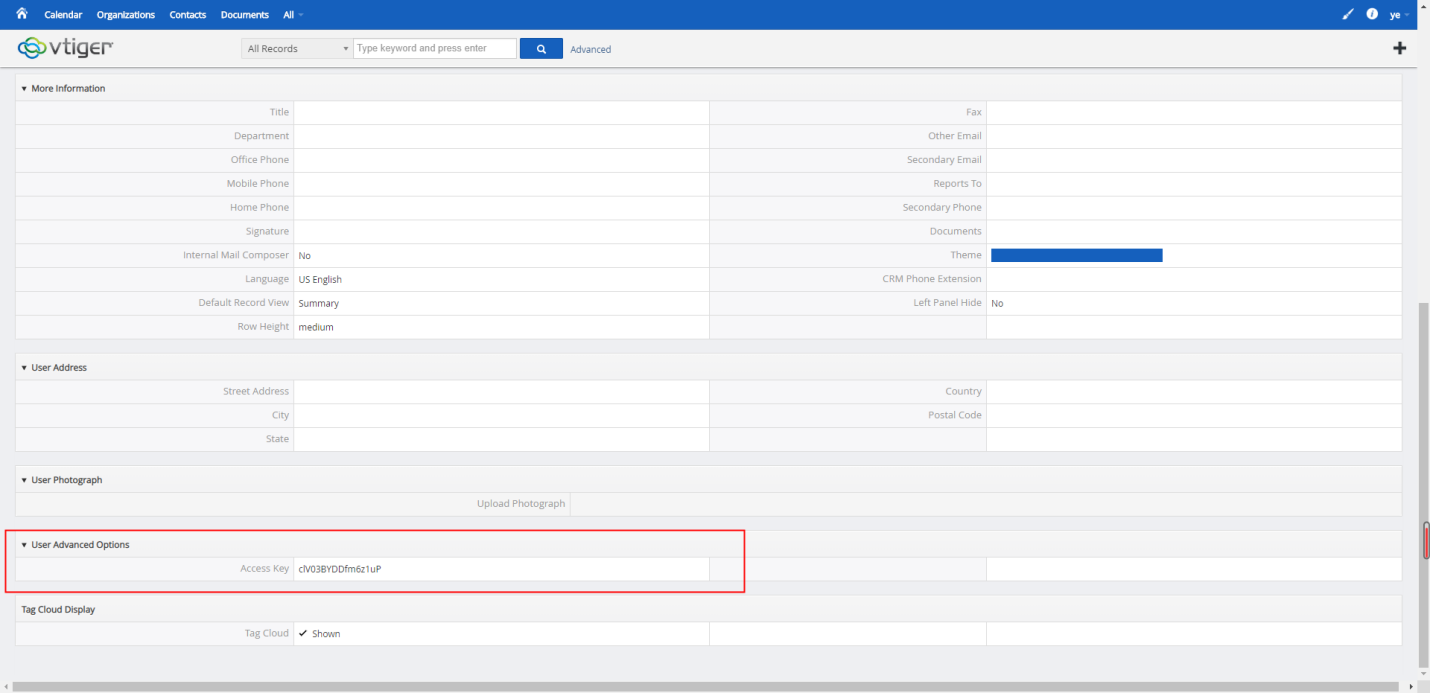
2. After logging in to the Vtiger CRM system with the username and password, the user needs to generate an access code for the new account, so that the user can access the Vtiger CRM system with the username and access code through the Wave application. After logging in to the Vtiger CRM system, the user can click on the “My Preferences” option on the right upper corner of the main interface and direct to the “User Advanced Options” section to obtain the access code. Please see the screenshots below:

Login Vtiger CRM System through Wave App
- The user can click to install and open Vtiger CRM Add-in in the “App Store” in the Wave application and enter the username, access code, and CRM server address to log in to the Vtiger CRM system.
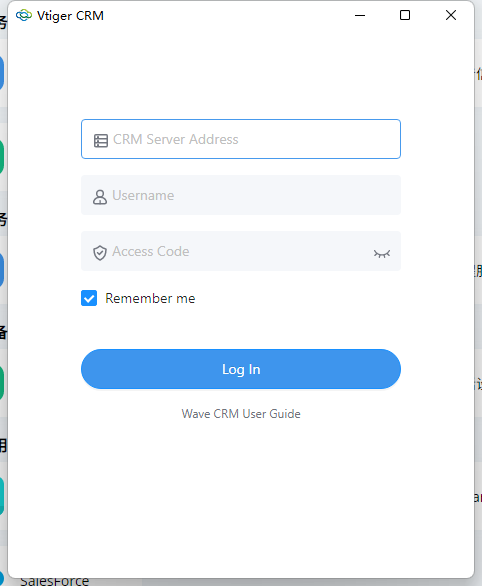
CRM Server Address | Configure CRM Service Address following the format “http://IP:Port”. In the URL, the “IP” is the IP address of the Vtiger CRM system operating environment, and the “Port” is the Apache web port which has been configured during the installation process. |
Username | Please fill in this field with the Vtiger CRM account username. |
Access Code | Please fill in this field with the Vtiger CRM account access code. |
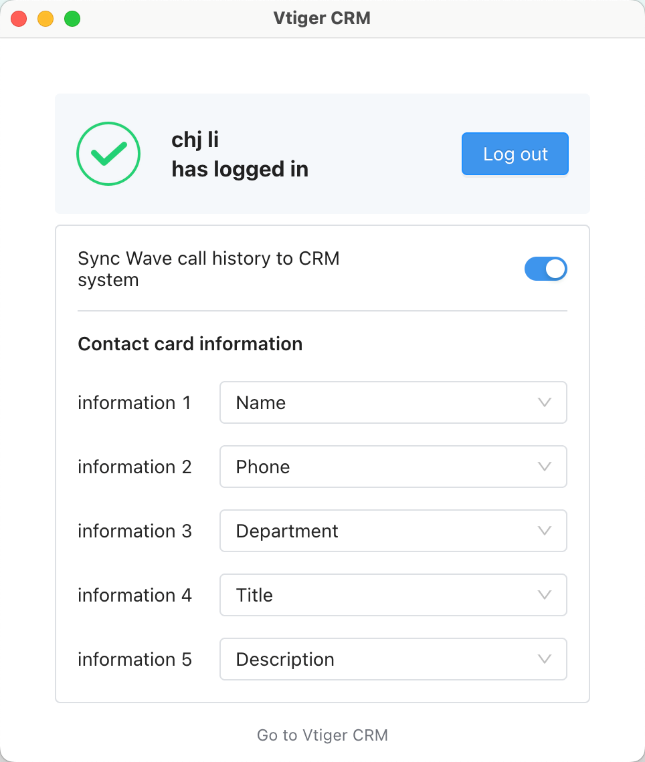
2. After filling in the login information and clicking on the “Log In” button, the user can log in to the Vtiger CRM system as the screenshot shows below:
Zendesk CRM System
Obtain API Secret of Zendesk CRM Account
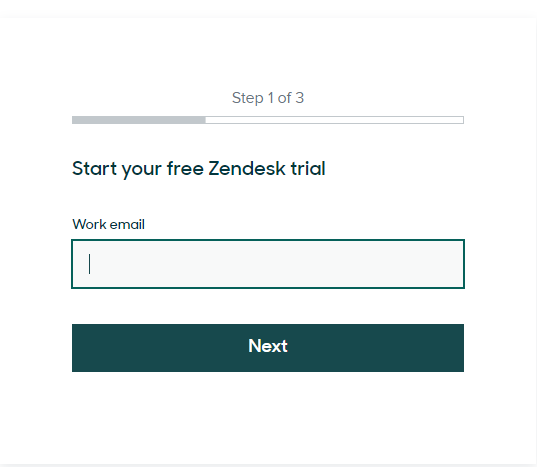
- The user can sign up Zendesk CRM account by accessing https://www.zendesk.com/login If the user has an account for the Zendesk CRM system, the user can log in to the system directly. If the user does not have an account for the Zendesk CRM system, the user needs to sign up for a Zendesk CRM account. The user can fill in the personal information, and send the confirmation email to the configured email. Then, the user can click the “Verify your account” button to start using the Zendesk CRM system.
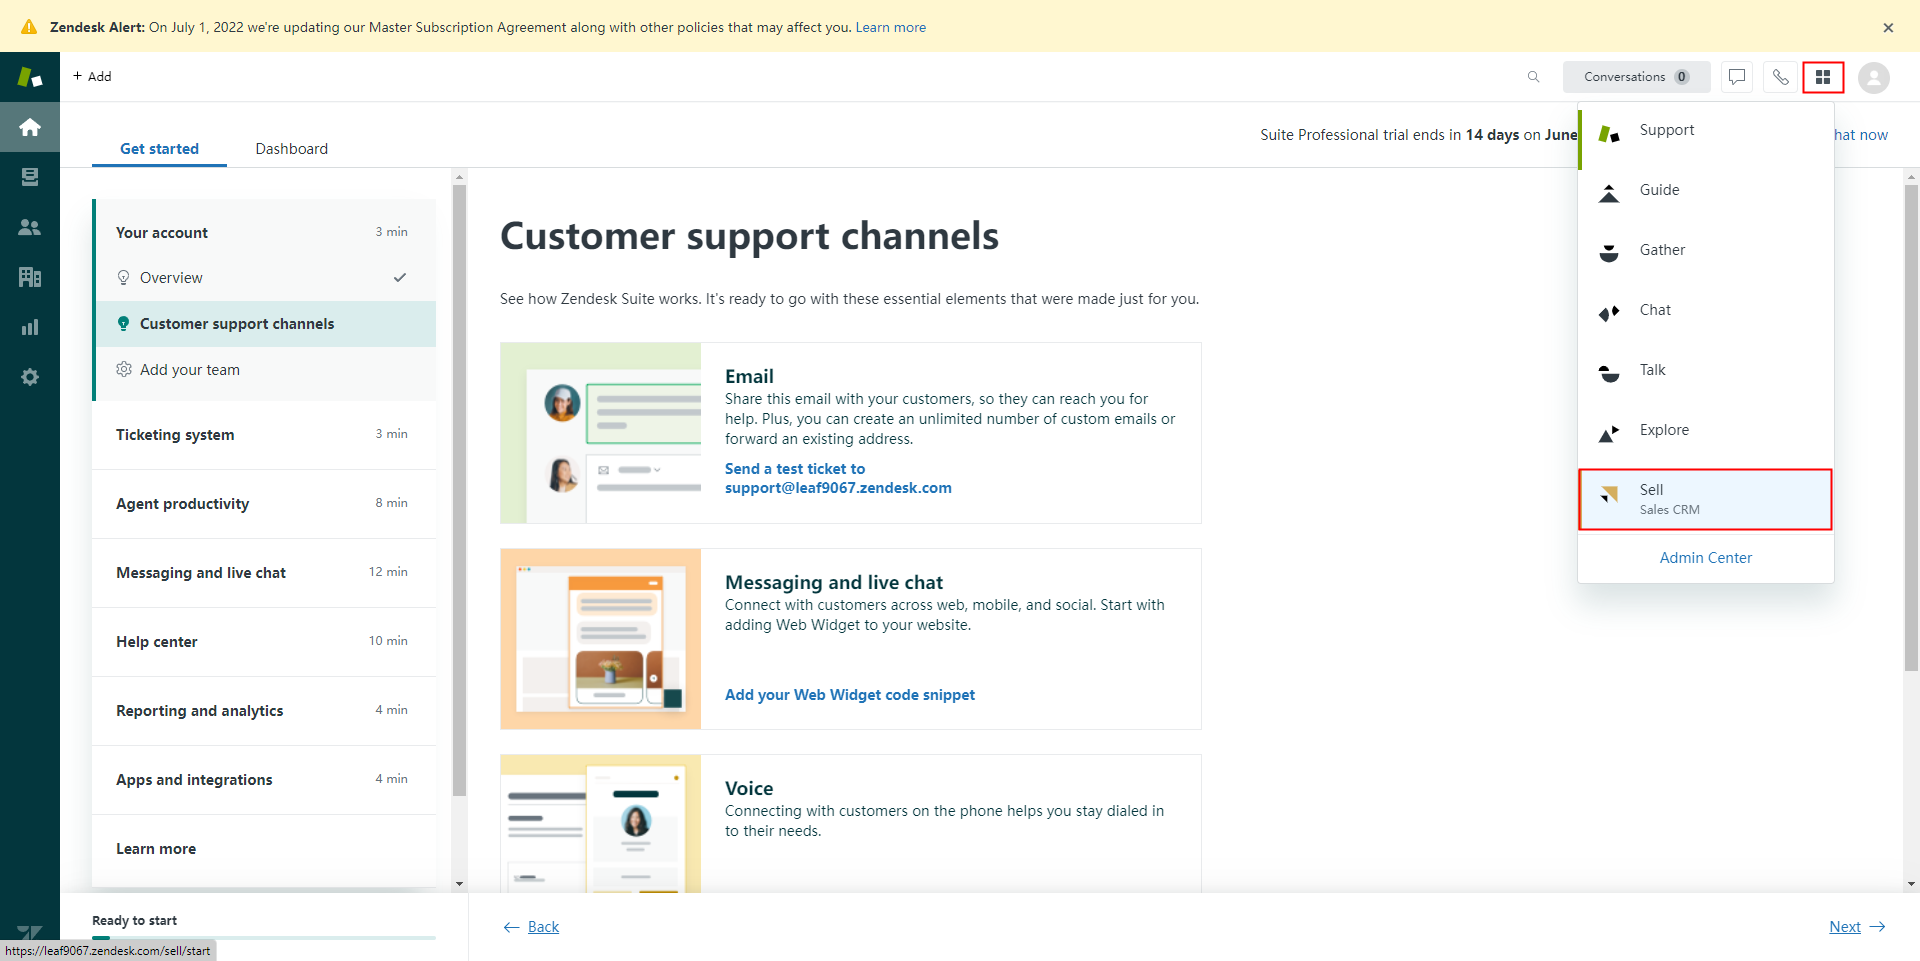
2. On the main page of the Zendesk CRM system, the user can click the icon ![]() on the right upper corner, and click the “Sell” option to access the interface of the Zendesk CRM system. Please refer to the screenshot below:
on the right upper corner, and click the “Sell” option to access the interface of the Zendesk CRM system. Please refer to the screenshot below:
2. Obtain API Secret.
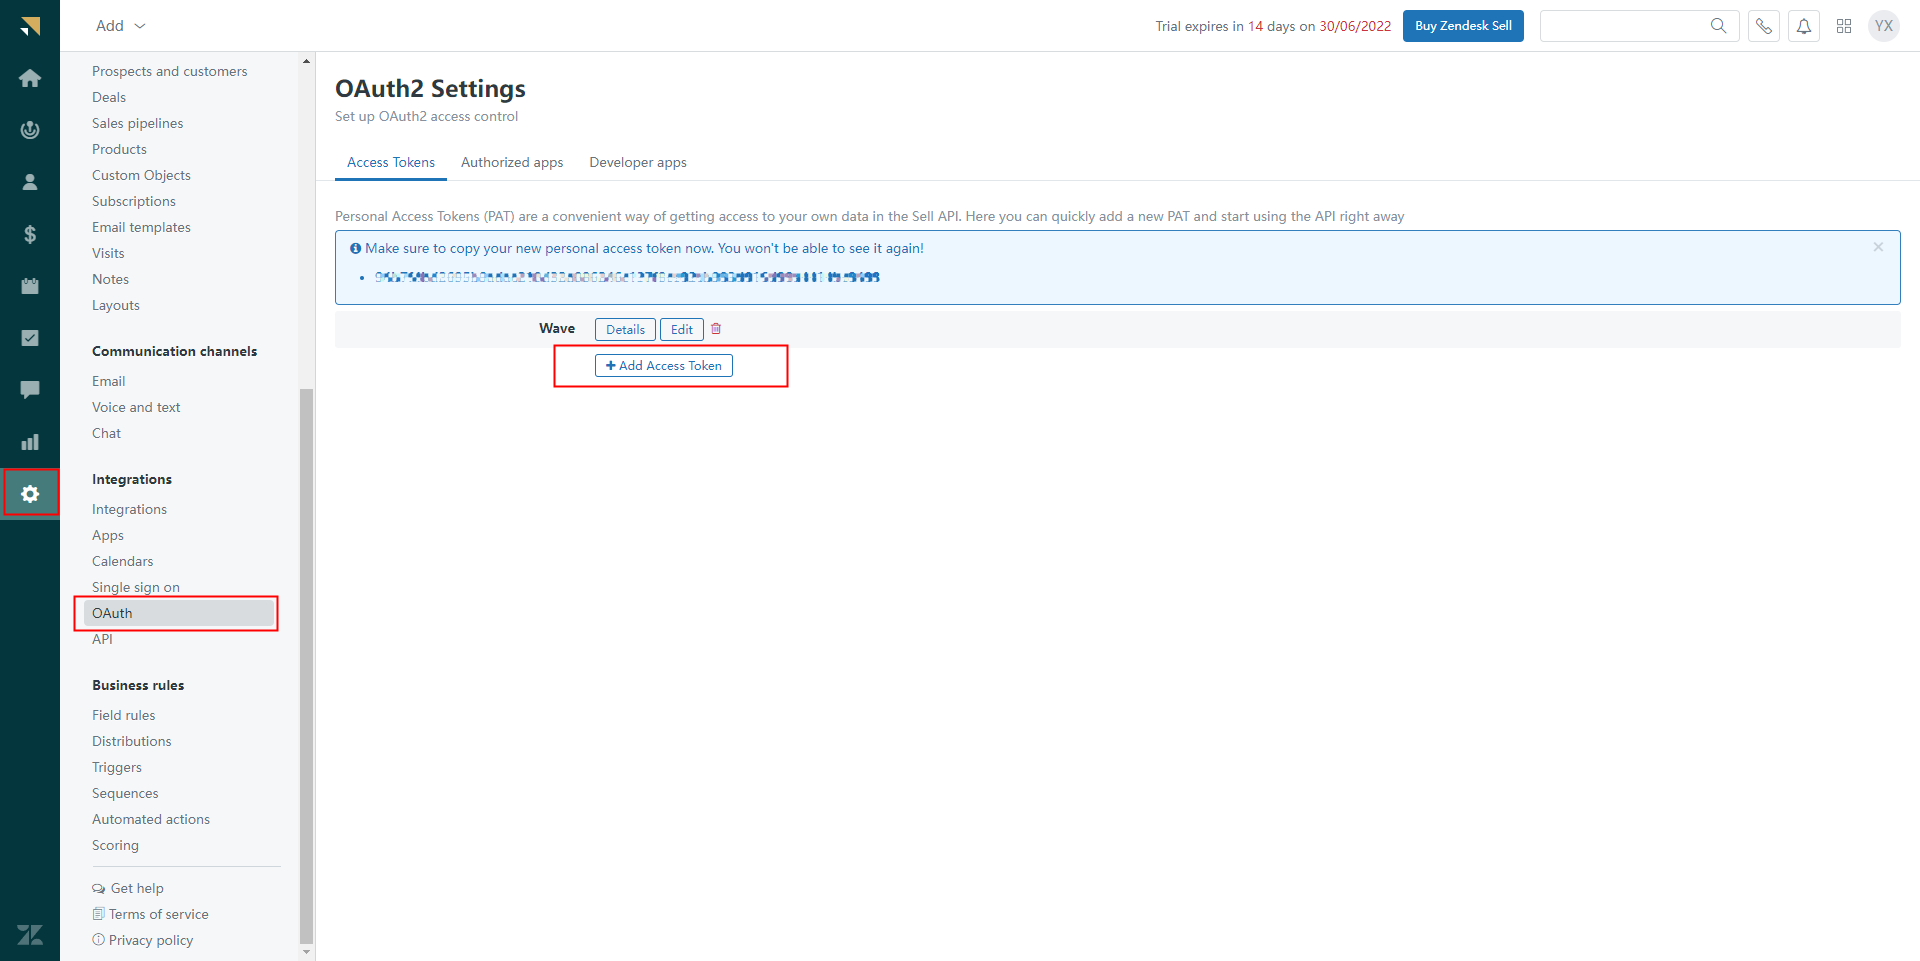
- On the “Sell” module, the user can click the icon
 on the left menu to access the Settings interface. Then, the user can select Integrations -> OAuth to access the OAuth2 Settings interface.
 - The user can click the “Add Access Token” button, fill in descriptions, and click the “Save” button to generate the API secret.
Log Into Zendesk CRM System through Wave App
- The user can install and open the Zendesk add-in in the “App Store” in the Wave application and fill in the Email address and Password to log in to the Zendesk CRM system. Please refer to the screenshot below:
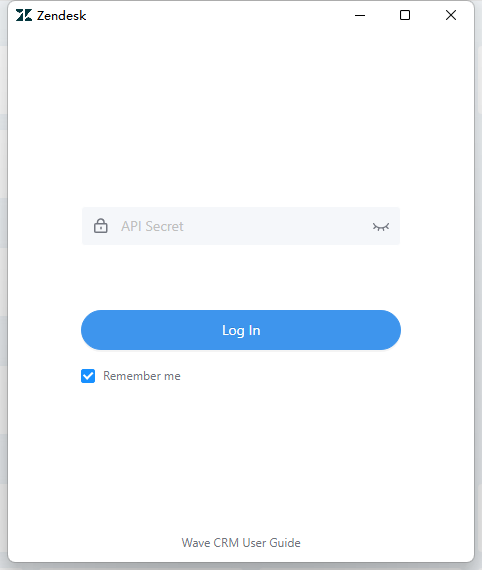
API Secret | Fill in the API Secret obtained from Zendesk CRM system. |
2. The user can log in Zendesk CRM system after filling in the API Secret.
Zoho CRM System
The Zoho CRM system server is a cloud server, and it has been deployed in different regions of the world. The regional servers are as follows:
- US: https://accounts.zoho.com
- CN: https://accounts.zoho.com.cn
- EU: https://accounts.zoho.eu
- IN: https://accounts.zoho.in
- AU: https://accounts.zoho.com.au
The servers in different regions are independent, but the functional flows are the same.
This document introduces the Zoho CRM system based on the China regional server. The only difference between each regional server is the domain name address suffix.
Log Into Zoho CRM System through Wave App
The user can click to install and open Zoho CRM Add-in in the “App Store” in the Wave application and proceed to verify the identity.
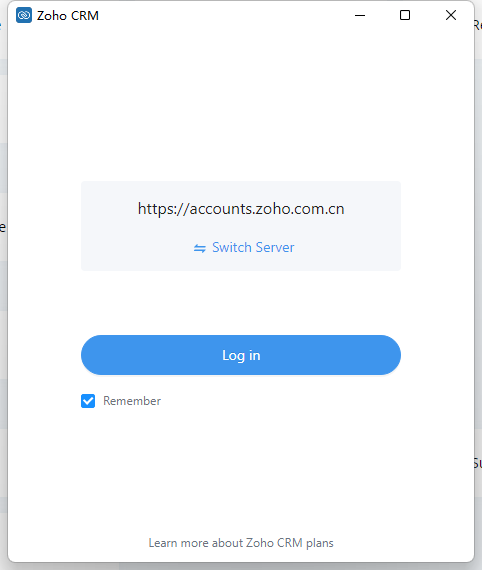
- The user needs to select the preferred CRM server address and click on the “Identity Authorization” button to access the identity verification interface.
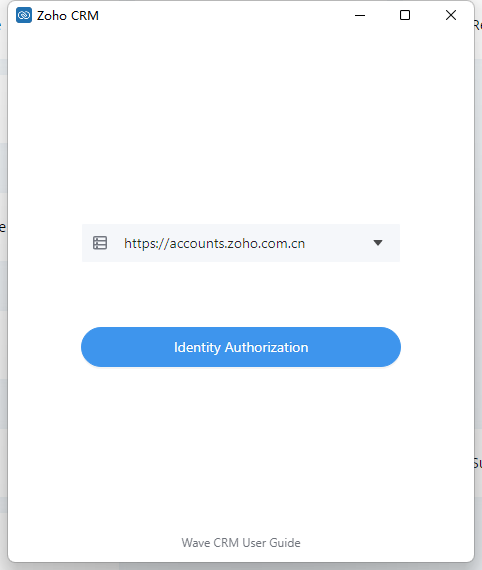
CRM Server Address | (China regional server) |
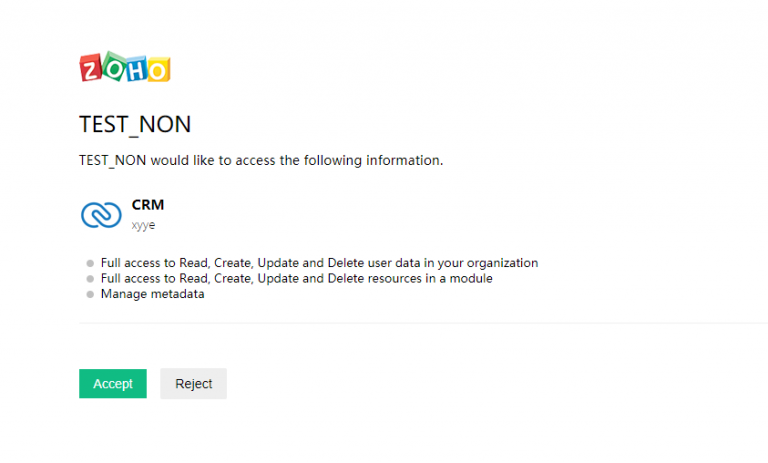
2. The user will be directed to the identity authorization interface. If the user has not logged in to the Zoho CRM system yet, the user needs to log in to the system first, and then click on the “Accept” button, so that the Wave application will synchronize the user information in the Zoho CRM system.
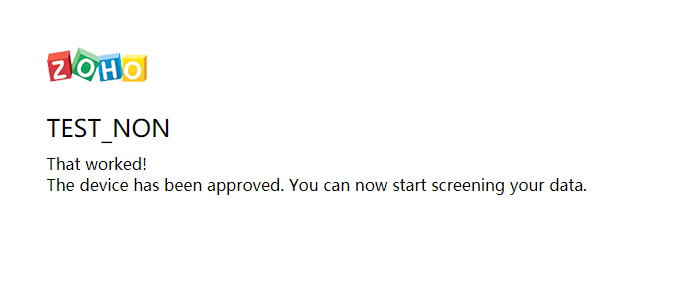
3. When the identity authorization process is complete, the user can go back to the Wave application -> App Store -> Zoho CRM add-in, and click on the “Log In” button, then the Wave application will obtain the user’s identity information in the Zoho CRM system for login purpose. If the user wants to switch servers during the login process, the user can click on the “Switch Server” button to authenticate identity again.
Please see the screenshots below: