
Property Management System (PMS) is a software application used in the hospitality industry to automate some hotel functions such as guest booking, guest details, etc…
Grandstream UCM63XX series has integrated a lightweight Local PMS providing the following hospitality features: set Room Status, Wake-up call, and more. For the use of small and medium properties without the need to integrate a 3rd party PMS software.
Supported PMS Features
The UCM63xx supports a built-in PMS system targeting budget chain hotels, it gives the possibility to UCM administrators and Hotel staff to operate the check-in / check-out and log customers’ check-in information through the PMS user interface.
The features available on the Default PMS are as shown below:
Features |
Room Management ( Add Rooms) |
Room Status (Check-in/Check-out records, Room availability view) |
Wake-up service |
Maid Service |
Basic Settings
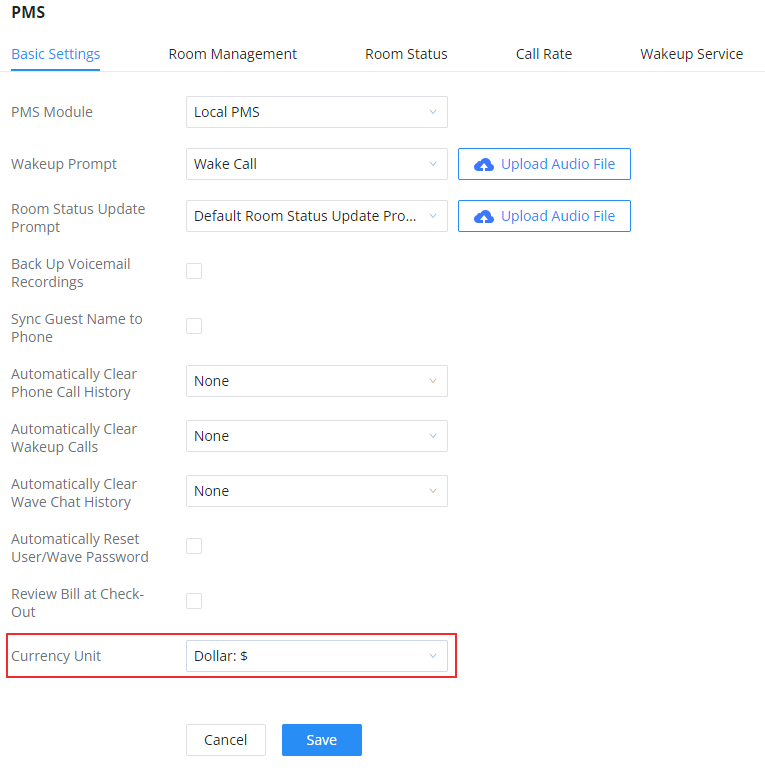
To use the Local PMS service on your UCM63XX, the PMS Module needs to be defined and set to “Local PMS”, this configuration can be done on the Basic settings tab as shown in the screenshot below, to access the PMS settings, Click on Other Features, and Choose PMS on the drop-down menu:
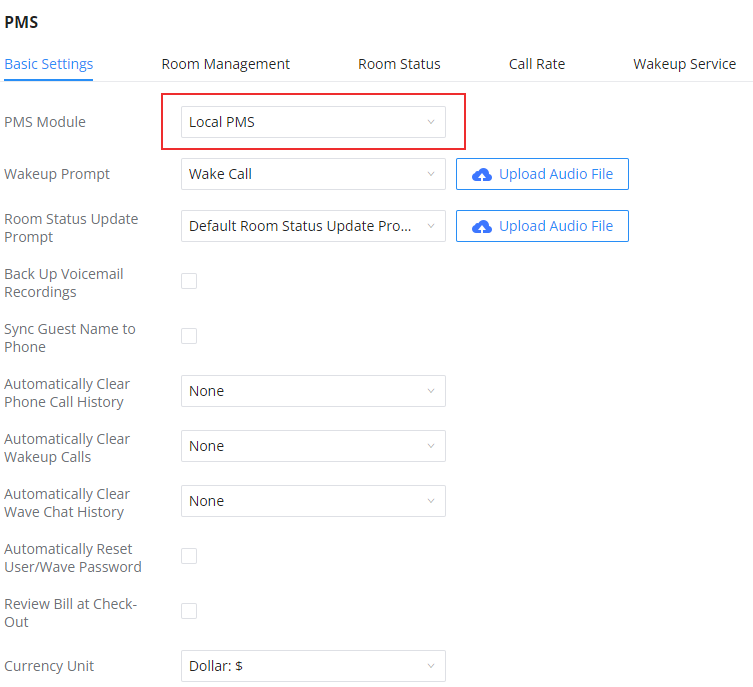
Below are the definitions of the configuration parameters available for the Local PMS.
Parameter | Description |
Wakeup Prompt | A customized prompts that can be played when the wakeup call is answered. To customize it please navigate to PBX Settings 🡪 Voice Prompt 🡪 Custom Prompt |
Room Status Update Prompt | Choose a previously uploaded prompt or upload the prompt which will be played when the room status is changed. If the room status codes have been change, please update the Room Status accordingly. |
Back Up Voicemail Recordings | Back up voicemail recordings to external storage after check-out, When Enabled, The user can set the SFTP server for storage purposes by defining the following attributes :
|
Sync Guest Name to Phone | Provisions the name of the checked-in guests to endpoints via Zero Config. |
Automatically Clear Phone Call History | Configures whether or not the call history of phones will be automatically cleared upon check-in or check-out. Currently only supported on Grandstream phones.
|
Automatically Clear Wakeup Calls | Scheduled wakeup calls for rooms can be cleared upong checking in or checking out.
|
Automatically Clear Wave Chat History | If enabled, room Wave chat history will be automatically cleared upon check-in or check-out. |
Automatically Reset User/Wave Password | If enabled, the User/Wave password of the room extension will be automatically reset to a random password upon check-out. |
Review Bill at Check-Out | If enabled, a pop-up window with all the charges will appear during guest check-out for reviewing purposes. |
Currency Unit | The currency unit for the call rate. These are the supported options which you can choose from:
|
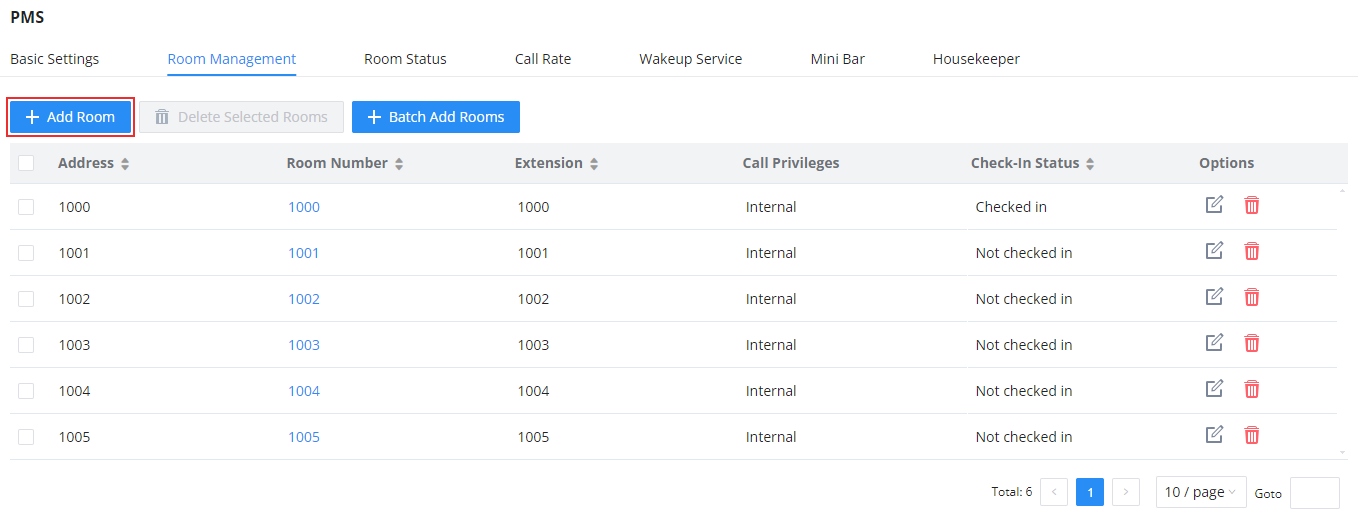
Room Management
The room management service offers the possibility to manually add rooms to the Local PMS User interface, either individually or by applying a batch addition for multiple rooms.
To do that, select Room Management, then either:
Add Room Manually
Enter the address, room number, and two extensions that match the room number from the list of available extensions,
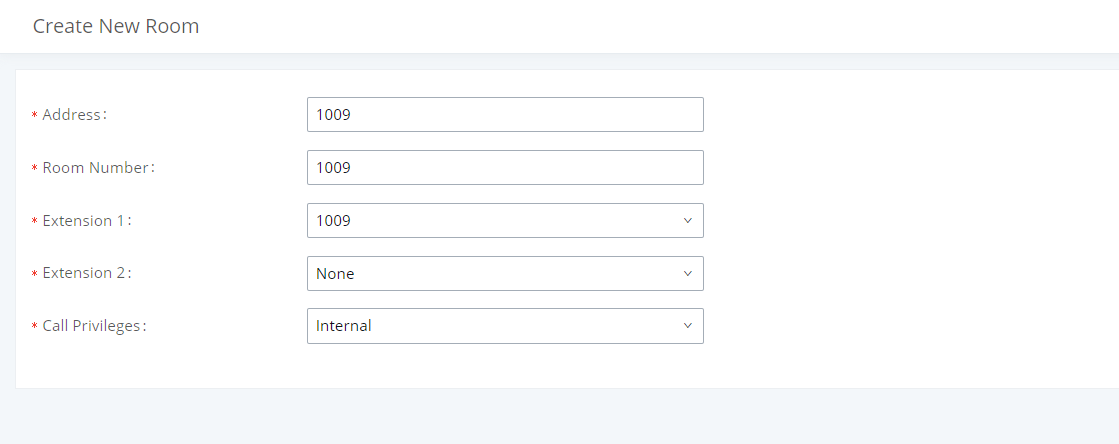
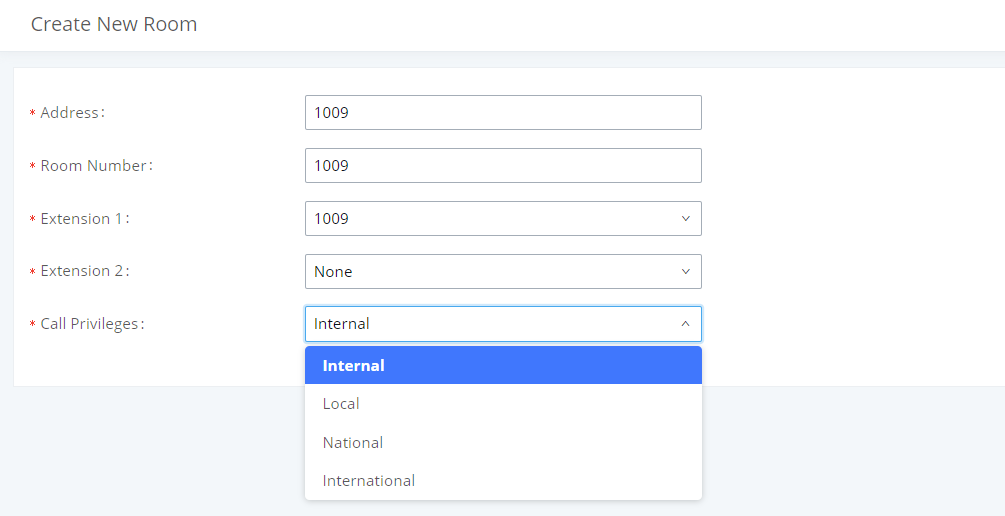
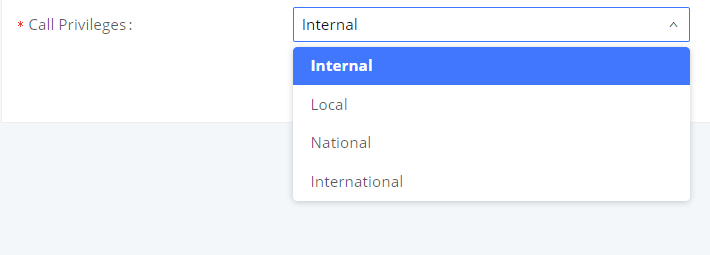
After the Extension(s) is set, Define the Call Privilege to be one of the following options: Internal, Local, National, or International
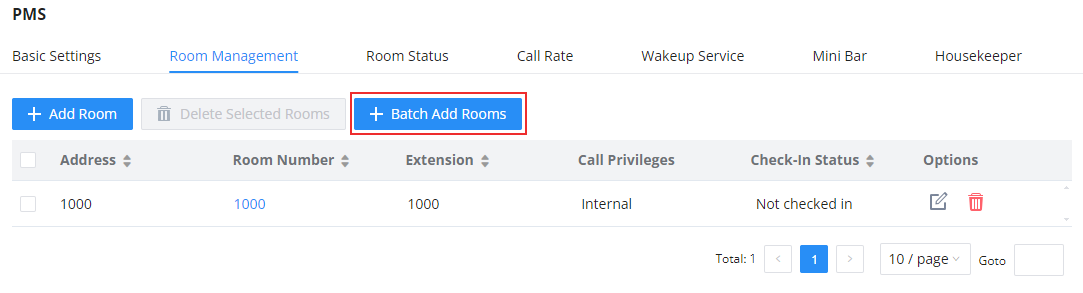
Batch Add Rooms
Click on “Batch Add Rooms”
Begin with the Start address number, the Start room number, and the Start extension number,
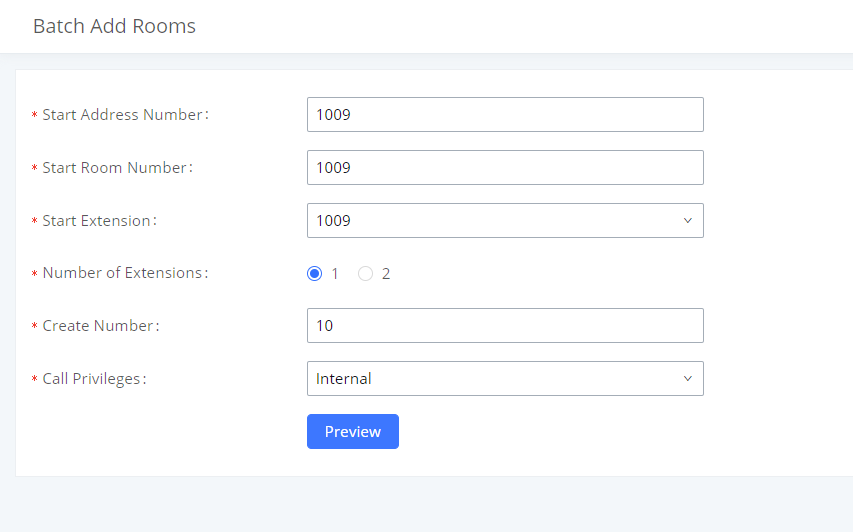
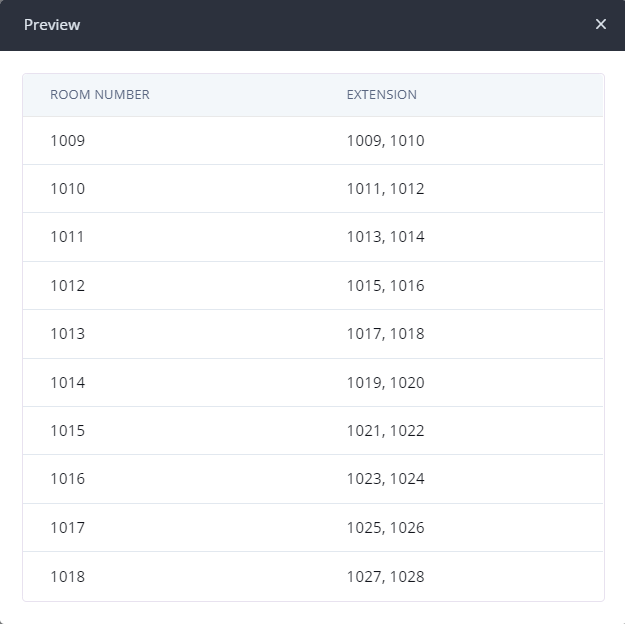
In case you want to configure two extensions Per Room, Switch the number of extensions from one extension to two, this will generate two extensions per Room number, as shown in the example below :
then add the create number that defines the total number of rooms with the corresponding extension(s):
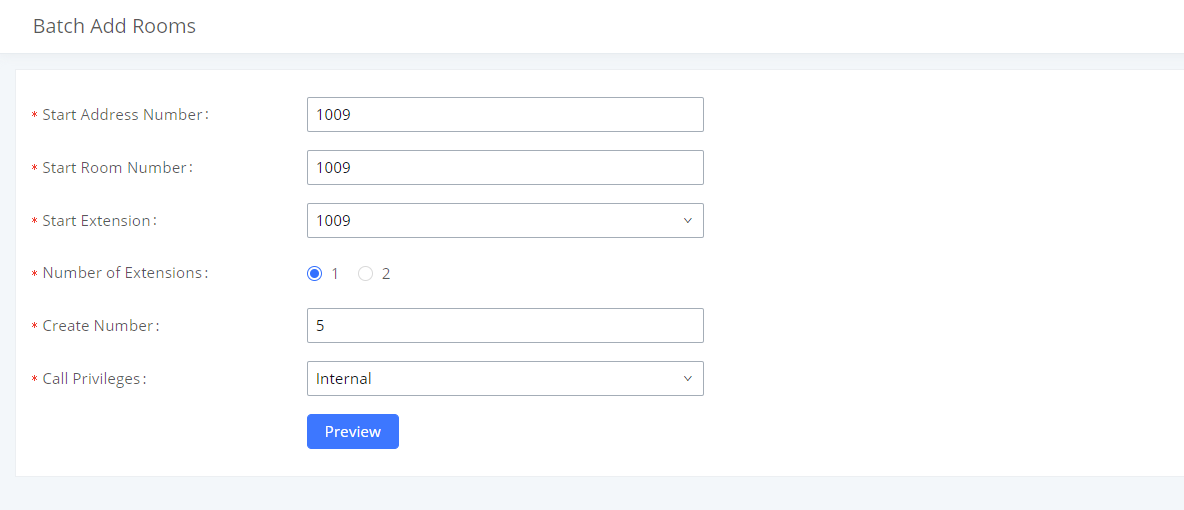
Furthermore, the Call Privilege can be configured to set call types to Internal, Local, National, and International
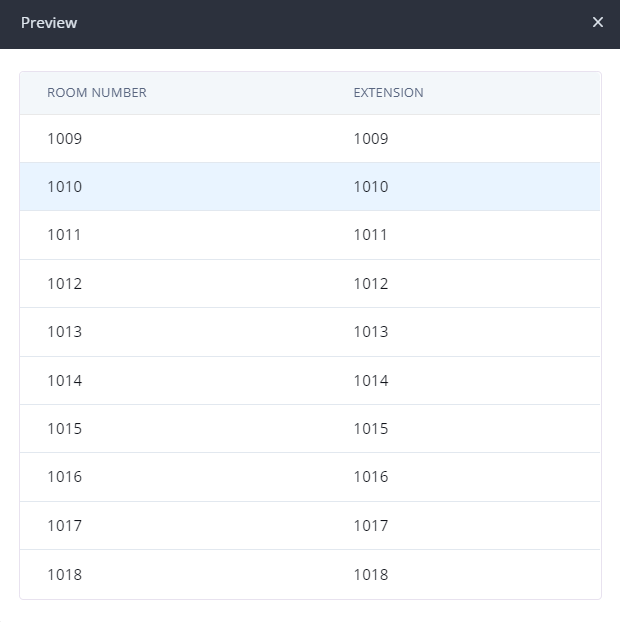
Finally, you can preview the created Rooms with their corresponding extension(s) by clicking the button ![]() . The previewing will be displayed as follows:
. The previewing will be displayed as follows:
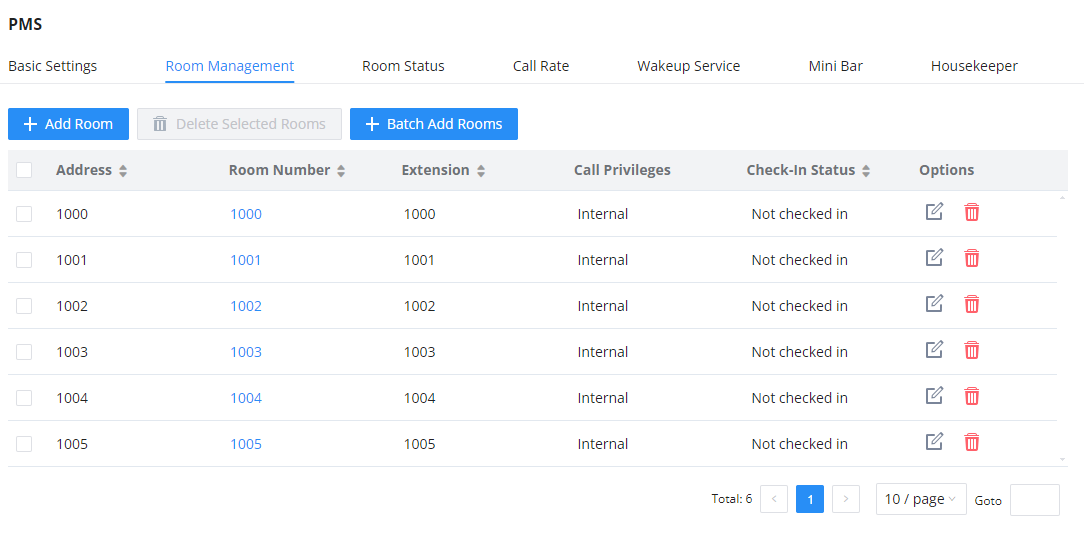
Once the rooms are added with their corresponding extensions, the User can have an overview of the Address, the Check-in status ( defined on the room status tab ), and the Extensions of the available rooms.
Delete Selected Rooms
To delete a specific room, Click the icon ![]() and then confirm the deletion by pressing “OK”
and then confirm the deletion by pressing “OK”
To delete Multiple rooms, check the box corresponding to each Room :

then Click on the  button to perform the action.
To delete all rooms, select all available rooms then click
Room Status
Once the rooms are created, they will all be displayed in the Room status section with the status being either Check-out or Check-in, The attributes that are displayed are :
- Room Number: Displays the Room Number.
- Check-in status: Displays Check-in Status, either Checked-in or Not Checked-in.
- Check-in / Check-out: Changes the Check-in state of the room.
- Room Status: Displays the current Room Status of the room, it can be set to Available, Cleaning, Repairing, Cleaned, Room dirty, or Room closed, this gives the hotel staff a global view of the current state of all Property Rooms.
- Customer name: Displays the Customer’s first and last name.
- Guest Category Code: Displays the Guest Category code, Guest codes are individualized to residents so they can be issued to their visitors.
- Arrival date: Displays the Customer’s Arrival date.
- Expected departure date: Displays the Customer’s Expected departure date.
- Options:
- By clicking the icon
 you can configure other hidden attributes related to the Room occupation.
 - By clicking the icon
 you can check the fees that have been billed for a guest during his/her stay. Note: This icon appears only when the room status is “Checked in”.
- By clicking the icon

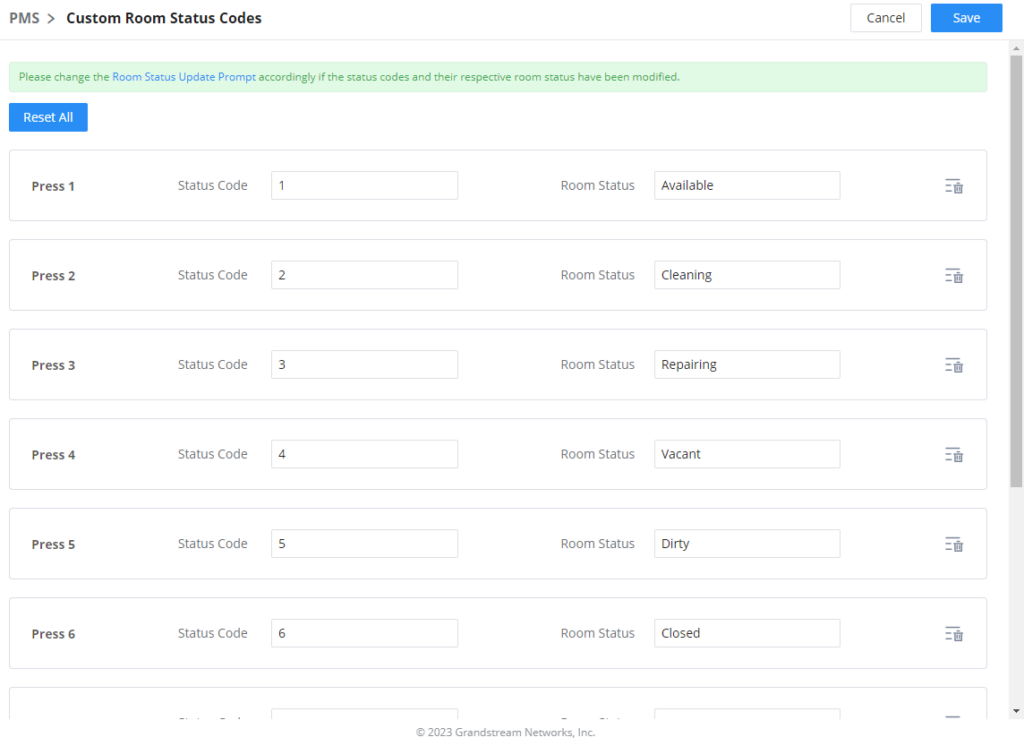
Custom Room Status Codes
The user can customize the existing room statuses or add more statuses along with the corresponding name. The user can customize the status code to up to 16-digit code. To customize room status, please click on  .
.
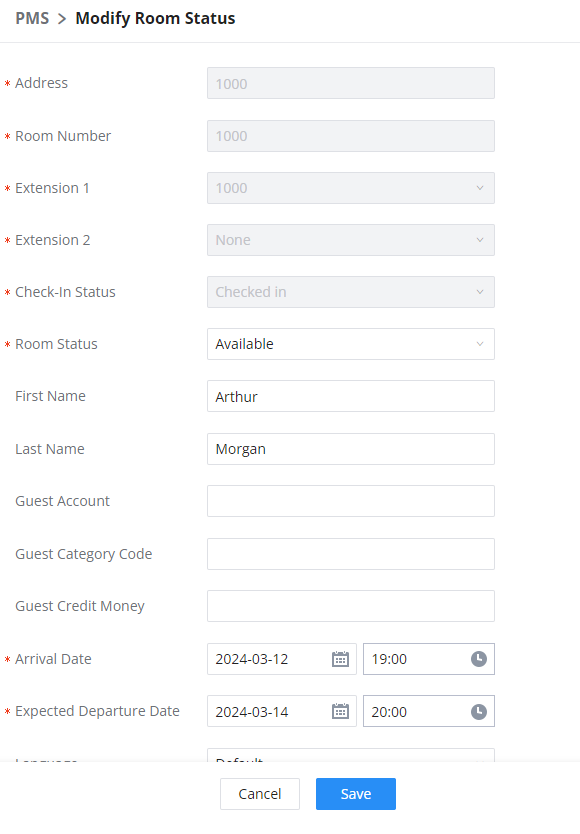
Modify Room Status
Once the room is created, you can configure additional attributes that are not displayed on the main page, to do that:
- Click the Edit Options icon
- the mandatory fields with the red star next to them will be already set since a Room status can not be marked as Checked-in if these attributes are not defined.
- Define additional attributes such as Guest account, Guest Credit Money, Guest’s Language, Call privileges ( Set to internal by Default ), and the housekeeper code that is defined on the housekeeper service tab.
Check-in Procedure
The Check-in Procedure requires the hotel staff member to enter specific attributes about the Guest’s information, We will look at the example below to understand the procedure:
- The hotel staff member clicks on the Check-in Icon

- The following prompt is displayed :
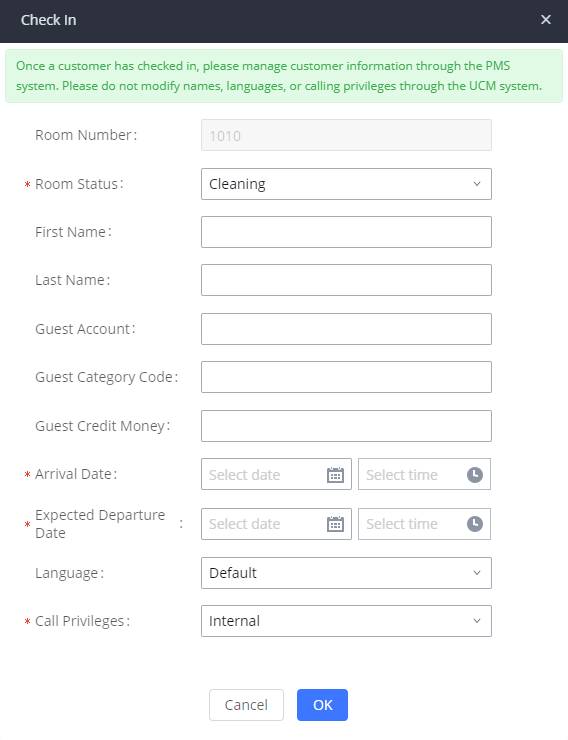
- The Hotel staff member defines the Room Status from the drop-down menu, Fills in the mandatory fields that are: The Arrival date, Expected Departure date, and Call Privileges.
- The Hotel staff member can also fill in the optional fields such as the first and last name of the Customer, Guest Account, Guest Category Code, Guest Credit Money, and Language.
- Finally, Click on “OK” and the Check-in status will be set to “Checked-in”
Check-out Procedure
Once a customer has left the property, the status of the room should change to “Not Checked-in” by Default. To do that Click on the icon ![]() and then Click “OK”
and then Click “OK”
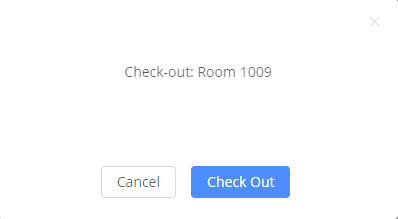
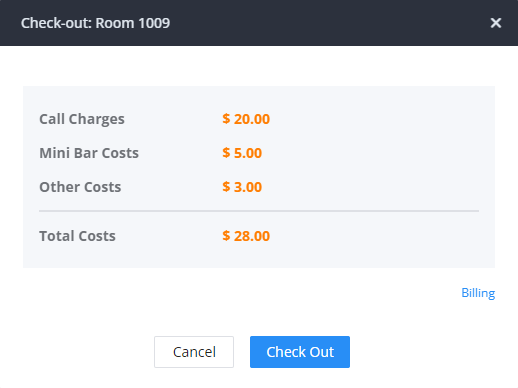
If “Review Bill at Check-Out” has been activated, billing information will appear when the user clicks on the “Check-out” button.
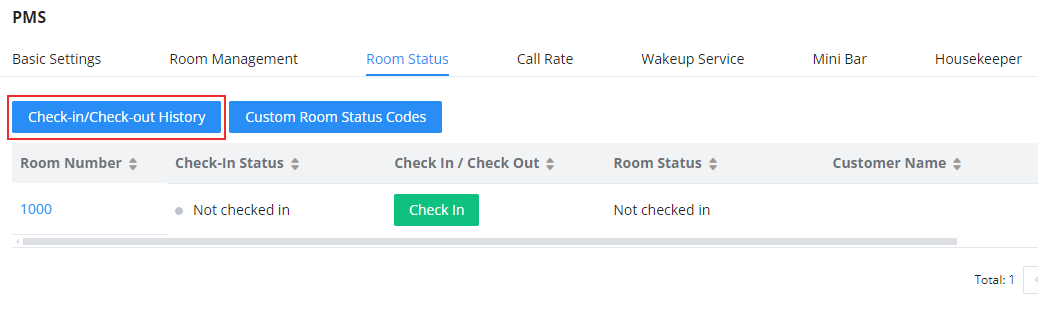
Check-in and Check-out History
You can check the records of Check-in/Check-out actions by clicking on the  as shown in the screenshot below :
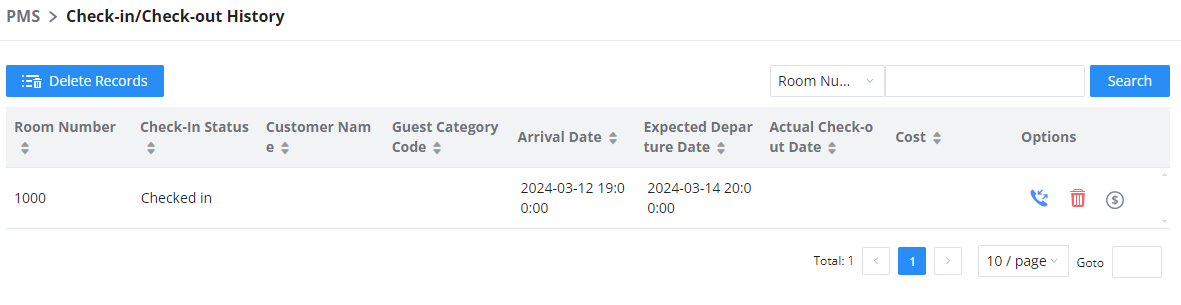
Once on the Check-in-Check-out History page, you can choose to delete a specific entry by clicking the icon ![]() next to the Record.
next to the Record.
You can also search for a specific entry in the search filter, you can search by Room Number, Customer name, Arrival date, or Actual Check-Out date.
To delete all the records, Click on the ![]() icon.
icon.
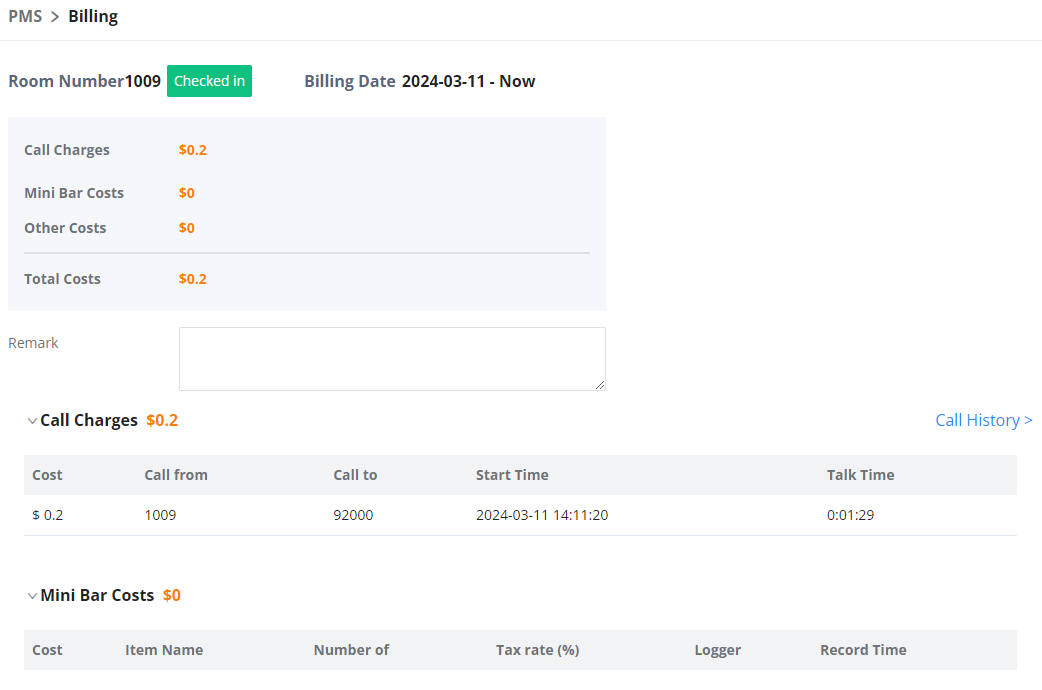
Check-in Fees
To check the fees that have been billed for a guest during his/her stay, the user may access the web UI of the PBX, navigate to Integrations > Room Status, and click on the button ![]() .
.
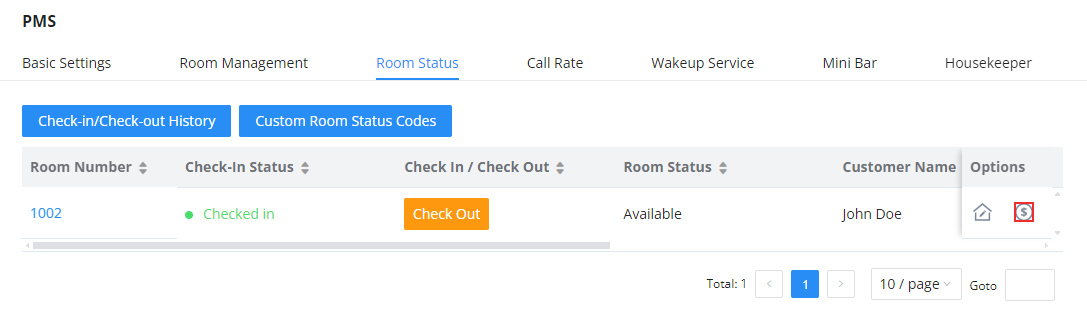
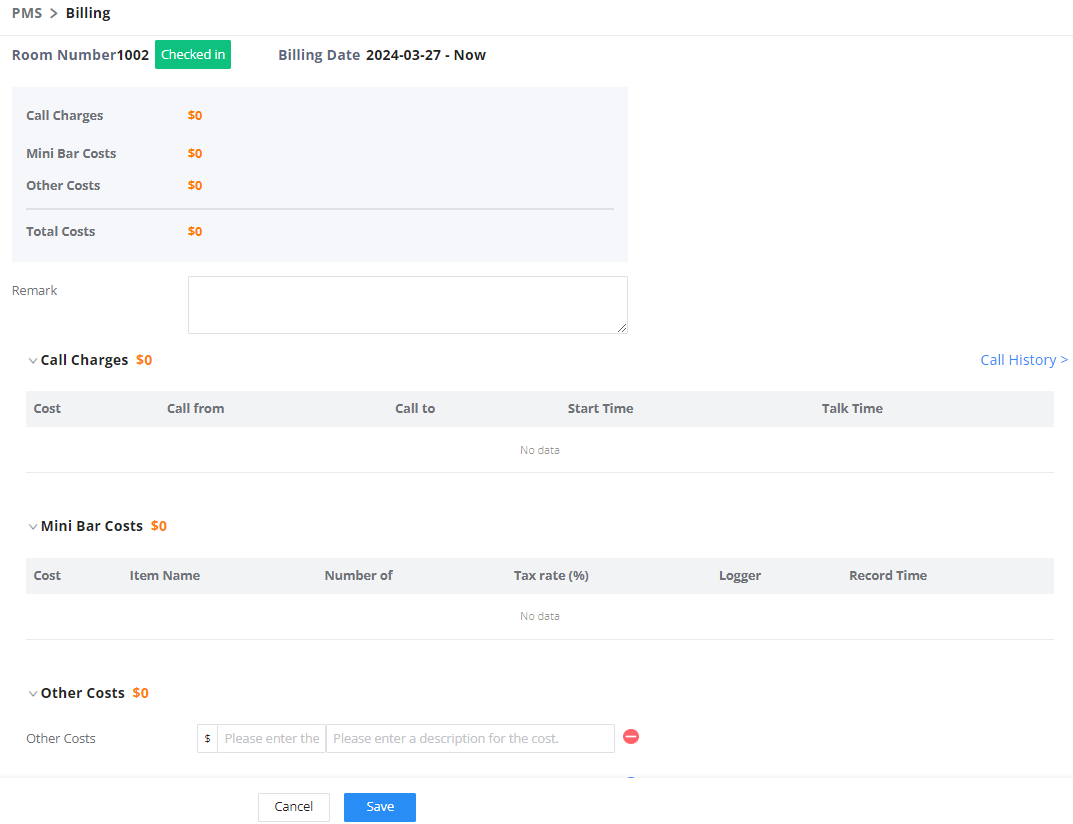
On this page, can view the charges for calls which are billed automatically. The mini bar costs are billed by the housekeeper, and for any additional costs, the user can bill them in the Other Costs section by entering the fee manually and adding a description to it.
Call Rate
Call Rate is an option that defines the cost of the calls emitted by the guests. To set up this feature properly, the administrator should create a call rate configuration for different types of calls, the call rates apply based on the prefix used for the call emitted. For example, if the administrator wants to create a call rate for national calls, he/she can set a call rate configuration with a prefix that corresponds with an outbound route pattern. In this example, the outbound route allows emitting national calls, thus, the national call rate will apply. We will use this example for the configuration.
On “Basic Settings”, choose the currency of the billing as shown in the figure below.
Create Call Rate
- To create a Call Rate, please access the web UI of the PBX, then navigate to Integrations > PMS > Call Rate.

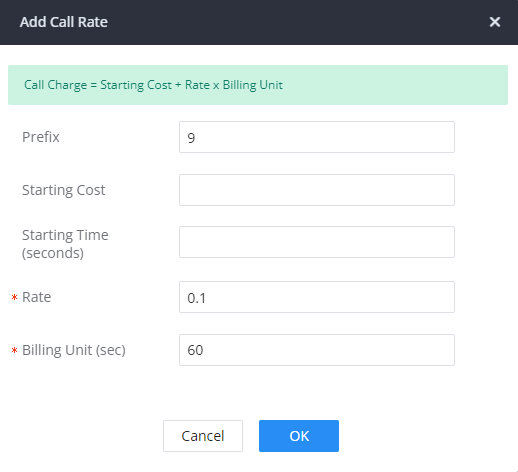
Prefix | Enter the prefix to be used for outgoing calls that should correspond with an outbound route pattern. If left blank, outgoing calls will not require a prefix, and any number can be dialed. |
Starting Cost | Configure the device role. When set as a media server, This UCM's PBX-related features will be disabled. |
Starting Time (seconds) | Sets the starting time period for call billing. If the length of a guest's external call does not exceed the starting time, only the starting cost amount will be charged. Example: If the starting cost is set to 0.2, and the starting time is set to 60, the first 60 seconds of a call will be charged a flat amount of 0.20 dollars (or other currency). If the starting time is set to 0 instead, the first 60 seconds will be free. |
Rate | Sets the billing rate of a call after the starting time period has ended. This is used with Billing Unit (sec) to calculate the cost of a call (Rate x Billing Unit = Telephone Cost). |
Billing Unit (sec) | Sets the billing unit used after the starting time period has ended. This is used with Rate to calculate the cost of a call (Rate x Billing Unit = Telephone Cost). Partial units are rounded up (e.g., If the billing unit is set to 60 seconds, and the call lasted 90 seconds (1.5 units), the guest will be billed for 120 seconds (2 units)). |
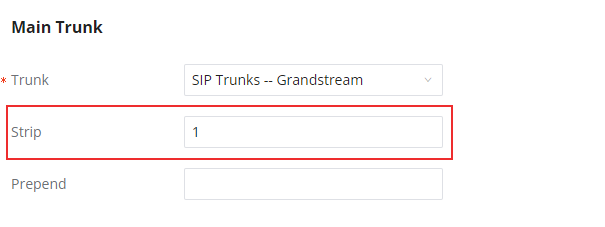
- Once the call rate has been added, please add an outbound route with a pattern that matches the prefix set for the call rate and a number of digits that correspond to national calls. For the sake of simplicity, we are assuming that a national number consists of 4 digits. We have added a pattern of 5 digits, with the prefix set as a fixed number.
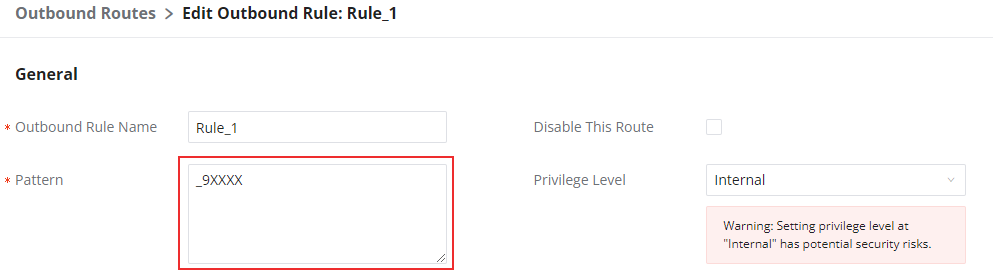
- The prefix is used only to allow the caller to use this outbound route, therefore it should not be sent as a part of the caller ID. To do that, we need to strip it from the caller ID sent by the UCM through the trunk. To do that, we will set the outbound route to strip one digit before sending the caller ID.
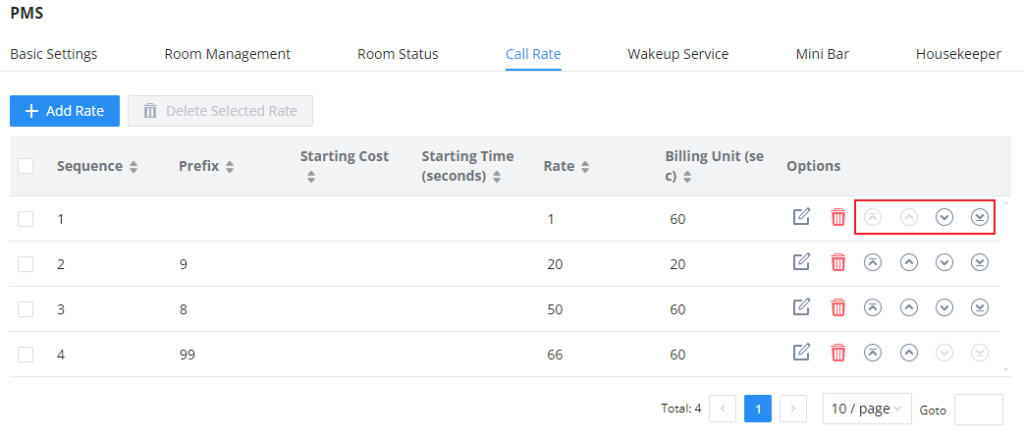
Call Rate Priority
The administrator can create multiple call rates with different and unique prefixes, then he/she can use the sorting buttons to sort the call rates based on the priority. The call rates at the top of the list are considered to have a higher priority than the ones at the bottom, therefore, they will apply first, given that they have a common digit in the prefix.
The figure below represents different call rates, and based on the order of the call rates on the list, we can infer that the call rate with the prefix 9 has a higher priority than the call rate with the prefix 99, therefore, the former will apply first when dialing a number with the prefix 9 and the first digit of the phone number happens to be 9 as well.
Wake-up Service
In some cases, guests will request the hotel staff to wake them up at a specific time, you can do that by configuring a wake-up time related to the room number of the guest, where the specific IP phone on that room will ring the extension related to the room number at that specific time, this option is supported on the integrated local PMS on the UCM63XX.
Wake-up service creation
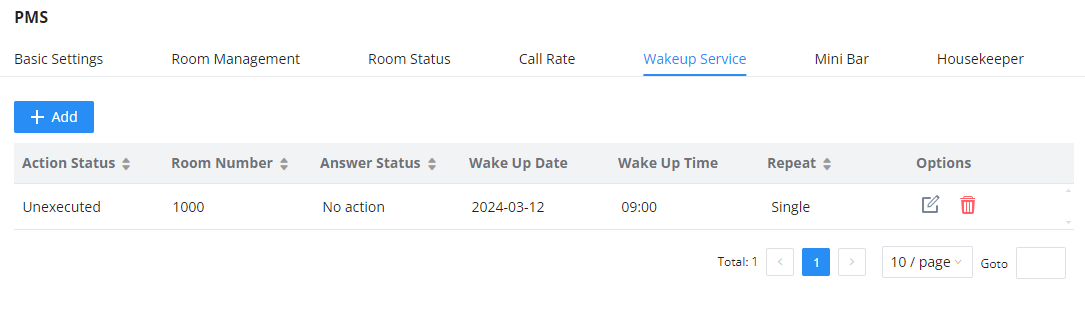
The settings can be defined as follows :
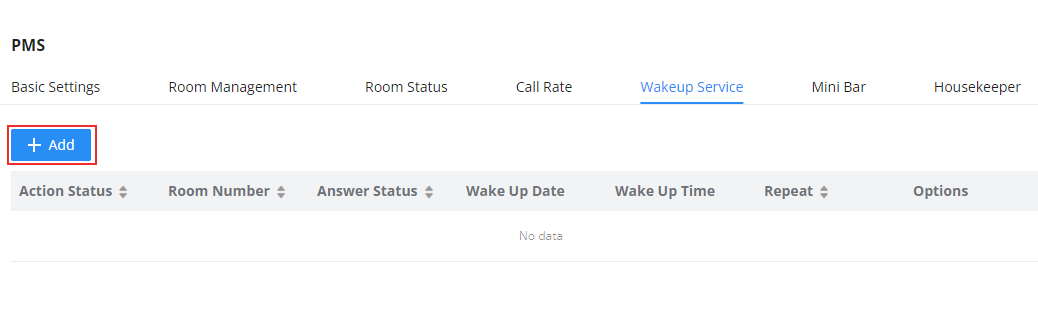
- Select the wake-up service tab, click
 to create a new wake-up schedule
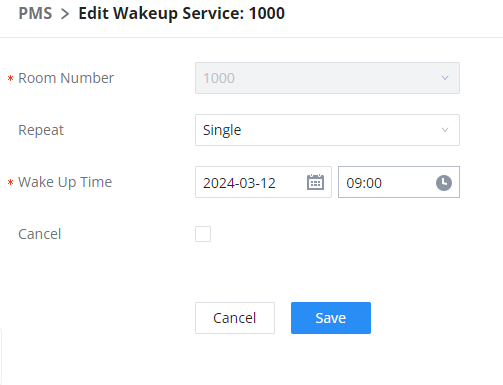
- The configuration consists of defining some attributes such as :
- Room number: The room number on which the phone extension will ring at a specific time.
- Repeat Cadence: Determines whether the wake-up service will be repeated daily or once
- Wake-Up Time: Specifies the exact wake-up time.
- Once saved, the status will be marked as shown below :
Wake-up service change
- To change an already-defined wake-up service, click the icon
 , there will be an option to cancel the Wake-up service, if already defined, you can also change the repeat cadence to daily if desired.
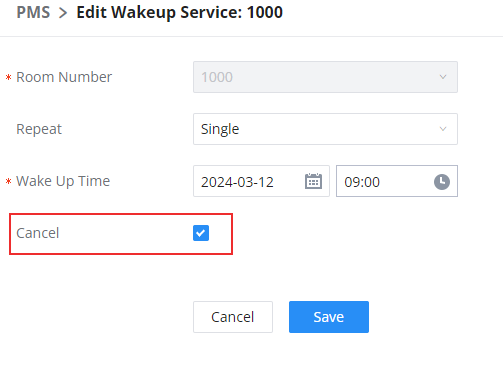
- The newly displayed entry will be :

Wake-up Service Deletion
- To delete a specific wake-up service, Click the icon
 and confirm the deletion by Clicking “OK”
Mini Bar
The mini bar feature allows billing for the goods consumed by the guest during his/her stay. The housekeeper can dial the feature code configured for “Increase Mini Bar Usage Code” or “Decrease Mini Bar Usage Code” to bill the goods.
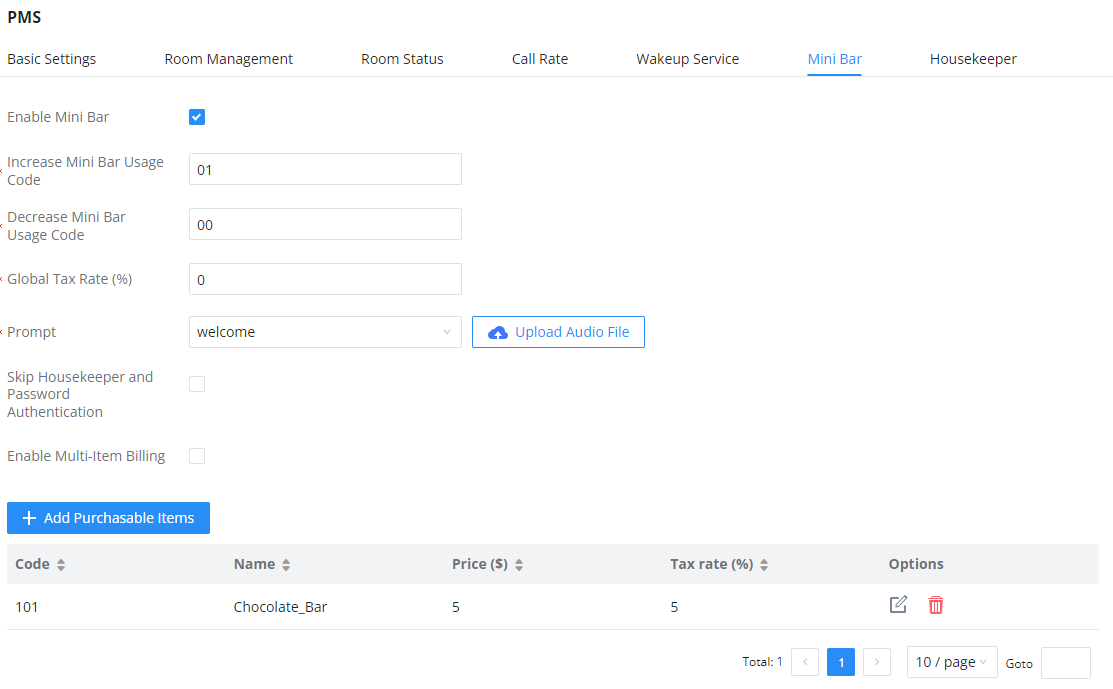
Enable Mini Bar | If enabled, feature codes can be used to increase and decrease usage of Mini Bar items. |
Increase Mini Bar Usage Code | Dial this code + the item code to increase usage of the Mini Bar item for billing purposes. |
Decrease Mini Bar Usage Code | Dial this code + the item code to reduce usage of the Mini Bar item for billing purposes. |
Global Tax Rate (%) | Set the tax rate and configure it for an additional tax charge. If no personal tax is configured for a commodity, the global tax rate of the Mini Bar will prevail. |
Prompt | This tone will be played when a housekeeper dials a number to enter the Mini Bar and can be used to indicate the corresponding goods code. |
Skip Housekeeper and Password Authentication | If enabled, the default housekeeper code is 0000. |
Enable Multi-Item Billing | If enabled, users can enter multiple goods in a single call by separating each good code with star ( * ). |
Add Purchasable Items
The administrator can add new purchasable items to the Mini bar by clicking ![]() button, the following window will appear:
button, the following window will appear:
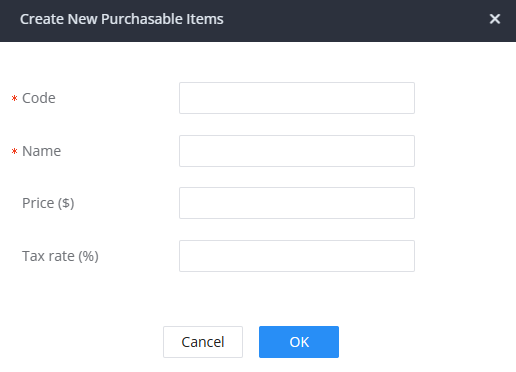
Code | Enter the item code. Note: Digits only (2-18 digits). Required field |
Name | Enter the item name. Note: Required field. 64 characters max. |
Price ($) | Enter the item price. Note: Up to 12 characters. |
Tax rate (%) | Enter the tax rate. |
In the example given above, the housekeeper should dial the code 01 to bill an item or 00 to remove an item from the bill. Once that number is dialed, the housekeeper will be prompted to enter his/her code along with the password, then the housekeeper can enter the code of the item to either add or retract from the bill.
When an item is added to the bill, the user can view it by navigating to Integration > Room Status, and then clicking on the ![]()

Housekeeper
The cleaning services in hotels and properties can be managed using the Housekeeper service configuration option, this can be done by assigning a specific code and password to each available housekeeper, these credentials will be used by the housekeepers to change the status of the room to “Cleaning” or “Cleaned” by entering the specific PMS feature code followed by their credentials on the IP phone related to the room number, this will help the property manager to control the current state of the rooms, the specific person that was responsible for the cleaning task and also to enhance security protocols.
To configure the housekeeper service on the PBX:
- Click on the housekeeper of the Local PMS, Then Click
 to add new housekeeper credentials
 - Add the housekeeper code and password
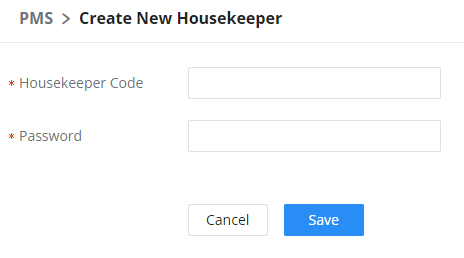
- Once confirmed, click save and the housekeeper credentials will be displayed on the main page.
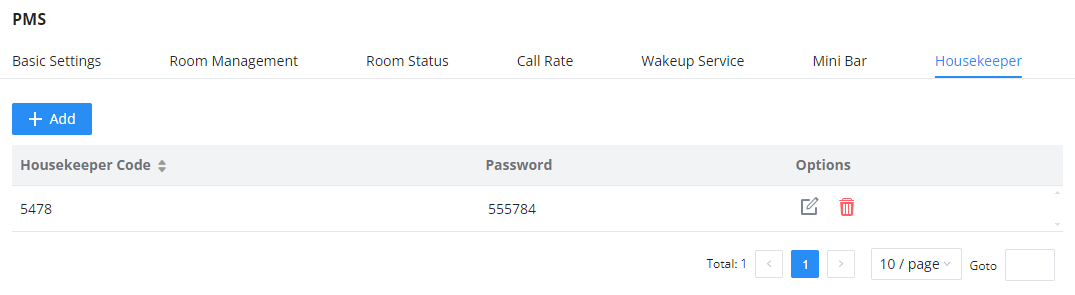
The housekeeper credentials defined on the UCM are unique and can be linked to any available room defined on the room management with the corresponding extension, this can be done by setting up a feature code specific to each housekeeper credential.
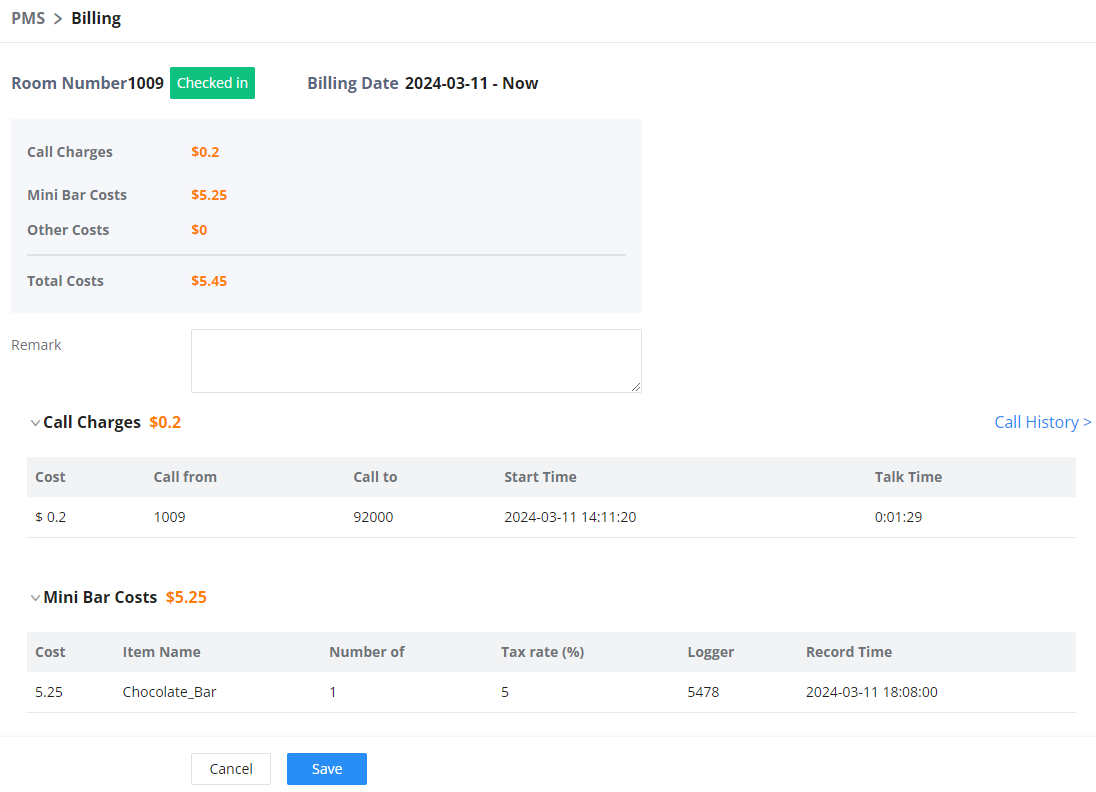
Retrieve Billing Information
When the guest wants to initiate a call, he/she needs to dial the number with the prefix configured in the outbound route. Per the example given in [Create Call Rate], if the user wants to initiate a call to the number 2000, the user needs to dial the number with the prefix 9 to be able to use the outbound route. The CDR entry below shows the number dialed and the trunk used.

The administrator can check anytime the fees that are calculated for the calls that the guest has initiated. To check the billing for the calls, please navigate to Integrations > PMS > Room Status, then click on ![]() as shown below.
as shown below.
The billing information including the call charges along with the mini bar charges will be displayed as shown in the figure below.
Review the bill at check out:
If the user has enabled “Review Bill at Check-out”, the bill information will be displayed when checking out the guest.

Clicking on the check-out button will display the billing information before finalizing the checking-out of the guest.

Other Costs
The user can bill costs that have not been covered by either the call rate or the minibar to the bill of the guest. To do that, the user can scroll down to the bottom of the billing page and add the costs manually as the figure below shows.
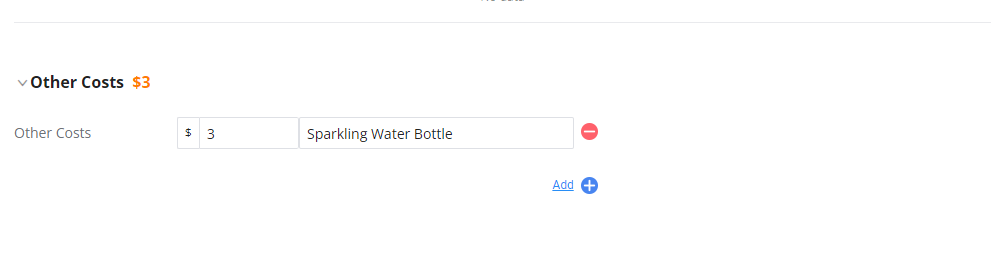
The user can add either one item or multiple items at the same time by entering the price and the description of the fee.
PMS Feature Codes
The Local PMS service includes a pre-defined feature codes section exclusive for the PMS actions such as :
- PMS Wakeup service
- Update PMS Room Status
- PMS Remote Wake-up Service
The feature codes can be accessed on the UCM, by accessing Call Features> Feature Codes > Feature Codes tab.

These feature codes are dialed from the endpoint available in the hotel room or from the reception to trigger a specific action, these actions are communicated by an IVR system in the IP phone to give the user options to choose which action to perform.
PMS Wakeup Service
The PMS Wakeup Service can be accessed by dialing the feature code *35. PMS Wakeup Service can be added, updated, activated, or deactivated based on the choices given by the IVR system, pressing a specific number can trigger the corresponding action.
For example, the IVR will be programmed to prompt the user to press “1” to add a wake-up service, Press “2” to update a wake-up service, Press “3” to activate a wake-up service, or Press “4” to deactivate a wake-up service
Update PMS Room Status
The status of the Room can be updated in two ways
1. Dial the room status feature code + housekeeper code, listen to the prompt and then dial the appropriate key for the desired room status, this will trigger an IVR response asking you to choose either “Room Cleaning service” by clicking “1”, or Room repair service by clicking “2”
Example: A housekeeper with the code 0001 dials *230001, listens to the room status options prompt, and then dials 1 to change room status to Available.
2. Dial room status feature code*housekeeper code*desired room status option key to quickly change the room status without needing to go through the system voice prompts.
Example: Housekeeper with housekeeper code 0001 dials *23*0001*1 to change room status Available, that is in the case where the housekeeper already knows the corresponding codes for each room status
PMS Remote Wakeup Service
Dial this code to add, update, activate, and deactivate the PMS wakeup service for other extensions. this feature is used in the reception to manage many endpoints at the same time, to do that you can enter the Room’s Extension number followed by the Pound “#” key.