
CloudUCM is a cloud PBX that integrates audio and video calls and collaborative work. Users can register extensions on terminals for communication, including using Grandstream IP phones, Wave Desktop applications, Wave Web clients, and Wave mobile applications for calls/meetings, chats, remotely managing and synchronizing extensions, cloud storage, alerts, statistics reports, etc.
This document describes how to configure CloudUCM services on IP phones so that users can register with CloudUCM on external and internal networks.
Configuring SIP Accounts on End Devices
IP phones can be registered to the CloudUCM in external and internal network environment for internal communication and remote communication.
Method 1: Configure SIP Account from End Device Web User Interface
In this method, the user needs to configure the SIP server on the end device web GUI using the CloudUCM SIP Server Address and configure NAT to STUN.
Please refer to the below configuration example on GRP2604P.
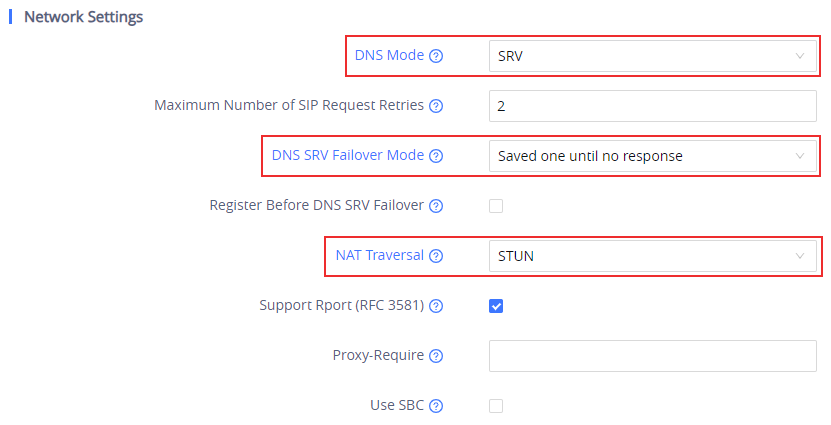
Step 1: Log in GRP2604P web UI as admin, navigate to Account->Basic Settings page and configure the following:
- SIP Server: Enter the CloudUCM SIP Server Address. This information can be found under UCM Web GUI -> CloudUCM Plan page.
- DNS Mode: Set to “SRV” (this parameter is recommended)
- DNS SRV Failover Mode: Set to “Saved one until no response”
- NAT Traversal: STUN

Step 2: Go to Account 🡪 SIP Settings and configure the SIP transport protocol.
Step 3: Go to Account -> SIP Settings page, you can configure REGISTER Expiration and Session Timer following the configurations below. The configurations are not required, but if your network is unstable, it is recommended to configure those settings, so that the CloudUCM services will be more stable.
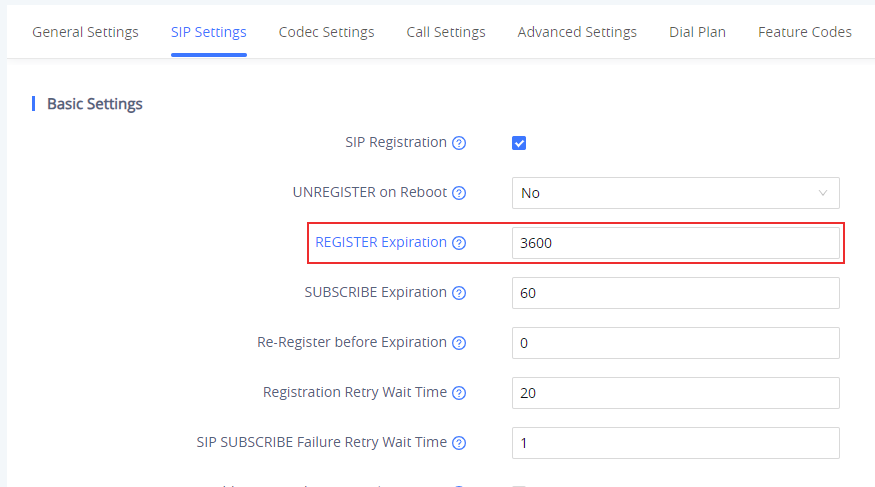
REGISTER Expiration (m) | 3600 |
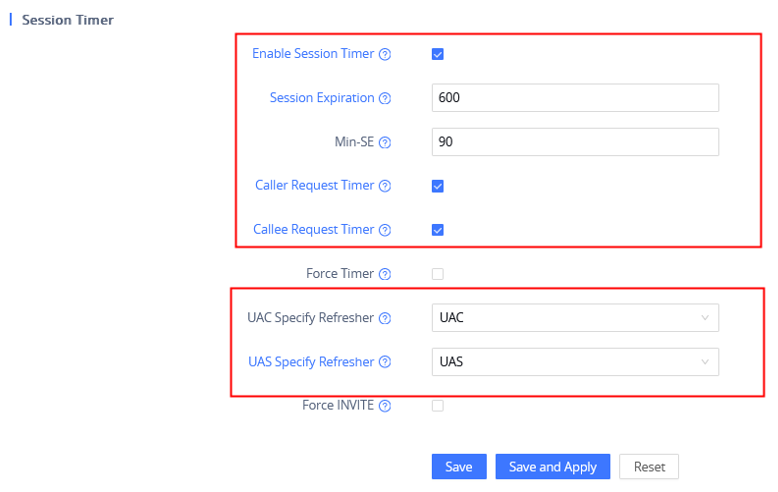
Enable Session Timer | Yes |
Session Expiration (s) | 600 |
Min-SE (s) | 90 |
Caller Request Timer | Yes |
Callee Request Timer | Yes |
UAC Specify Refresher | UAC |
UAS Specify Refresher | UAS |
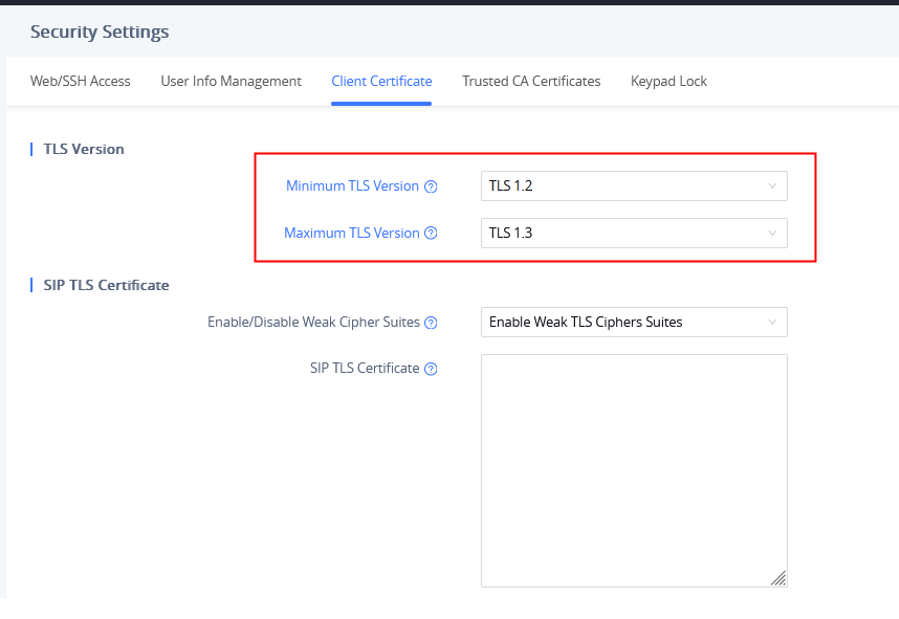
Step 4: Go to the phone’s web UI🡪System Settings🡪Security Setting🡪TLS page, configure “Minimum TLS Version” and “Maximum TLS Version” to be 1.2 or 1.3
Method 2: Assign SIP Account for End Device from GDMS
In this method, user needs to log in GDMS to assign SIP account to the end device.
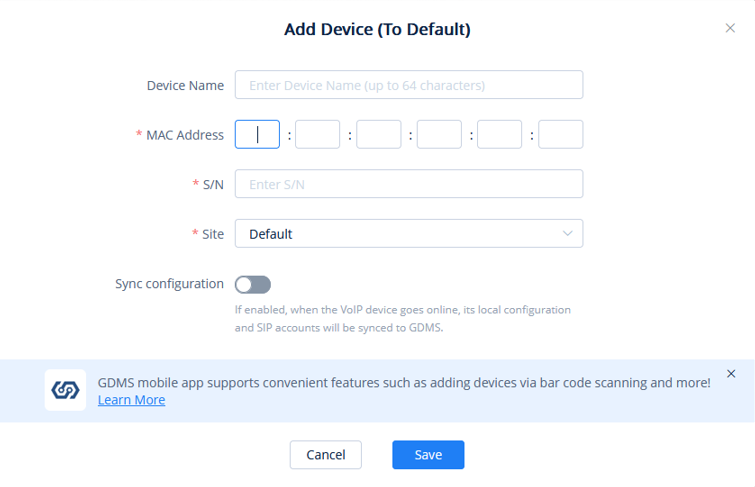
Step 1: Add the end device as VOIP Device to GDMS. Click on “Save” to save the configuration.
Step 2: There are two methods to assign the SIP accounts for the end device on GDMS.
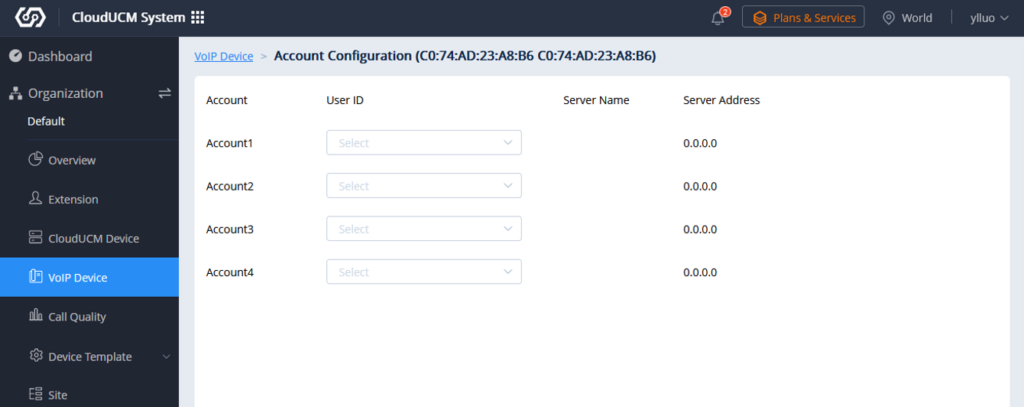
Assign Method (1): Configure SIP Accounts from VoIP Device Page
- In the VoIP Device Page, click on
 to enter the Account Configuration page.
 - In this page, users can choose to deploy the extensions from the Extension page to the device. They can also change the existing extension to another or remove existing extensions.
- Save and apply the configuration.
Assign Method (2): Assign SIP Account from Extension Page
Step 1: Select “CloudUCM System” on the upper left page in GDMS and go to the Extension page, select the extension that needs to be assigned to the phone, and click ![]() to assign an account.
to assign an account.
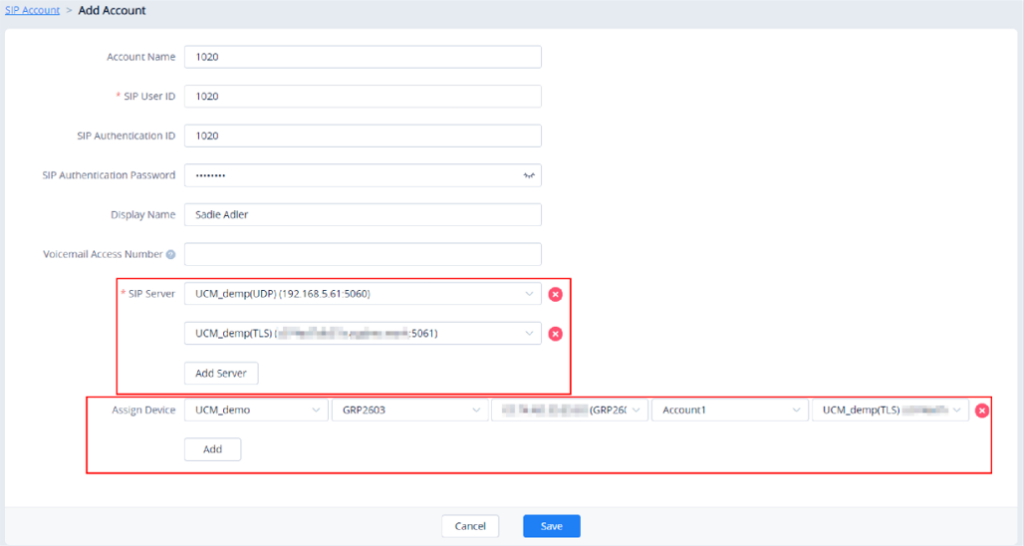
Step 2: Click the “Add Server” button and select the server address that the user wants to add for the extension.
Step 3: Assign the server to the phone. Select the site, device, MAC address, account location and the CloudUCM server address to assign.
Step 4: Click the “Save” option to complete assigning the extension to the phone.
Make calls using IP Phones
After configuring the IP phones with CloudUCM service, users can use the phone to make audio/video calls and join GS Wave audio/video meetings.