
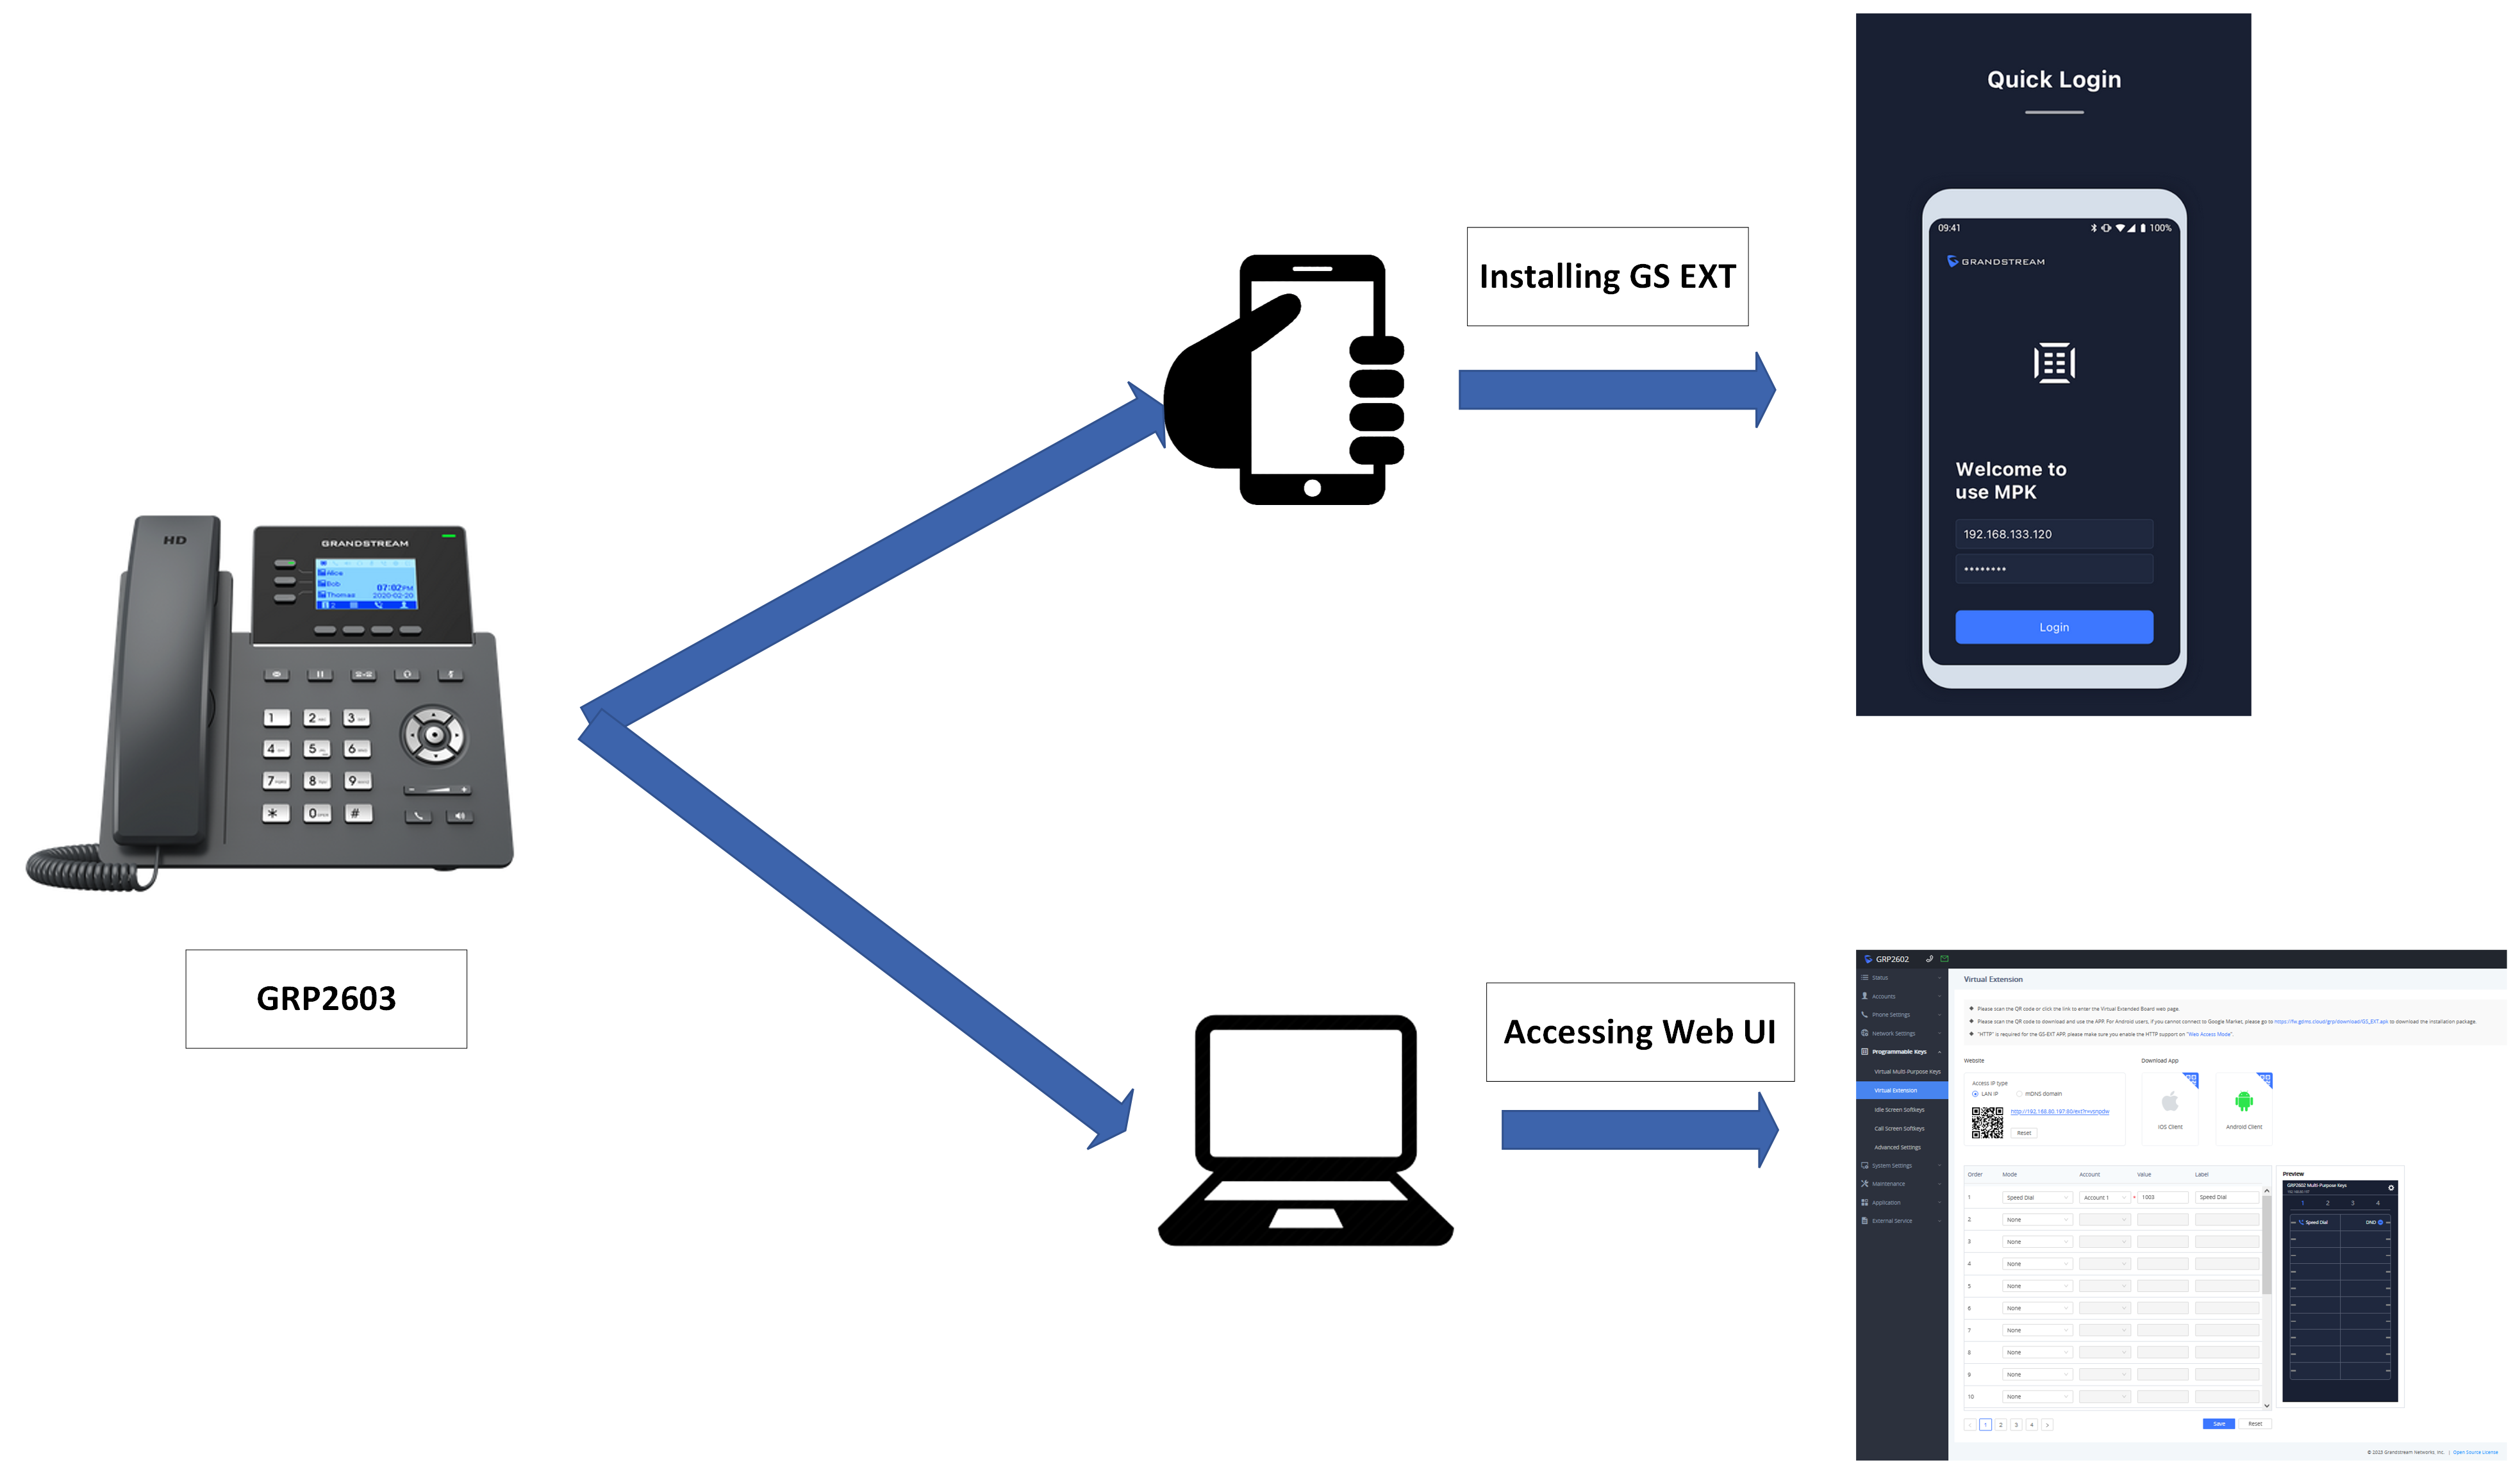
Introduction
Grandstream’s GRP260x series introduces an innovative “Virtual Extension” feature, enabling users to establish additional virtual extension associated with their physical IP phones. These extensions function similarly to separate accounts within a single device, enhancing communication by allowing the management of multiple accounts concurrently. Notably, these Virtual extension can be conveniently controlled via the dedicated “GS EXT” app on the phone or through a web interface, offering enhanced flexibility. This feature combines cost efficiency, easy central management, and smooth integration with different functions, all improving communication and meeting the changing needs of modern workplaces.
Prerequisites
In order to set the Virtual Extension feature to work, you will need the following criteria:
- Use a GRP260x unit running firmware version 1.0.5.19 or higher.
- Have access to a laptop or smartphone connected to the same local area network (LAN) as the GRP260x unit, or alternatively, install the GS EXT mobile application from either the App Store or Google Play Store.
Accessing Virtual Extension from the Web UI
To configure Virtual Extension for your GRP260x IP phone, you have the option to use either your laptop or smartphone. Here’s how to do it:
- Access the web User Interface (UI) of your GRP260x IP phone from your laptop or smartphone.
- Navigate to “Programmable keys” and select “Virtual Extension” from the options.
- Open the configuration panel within this section.
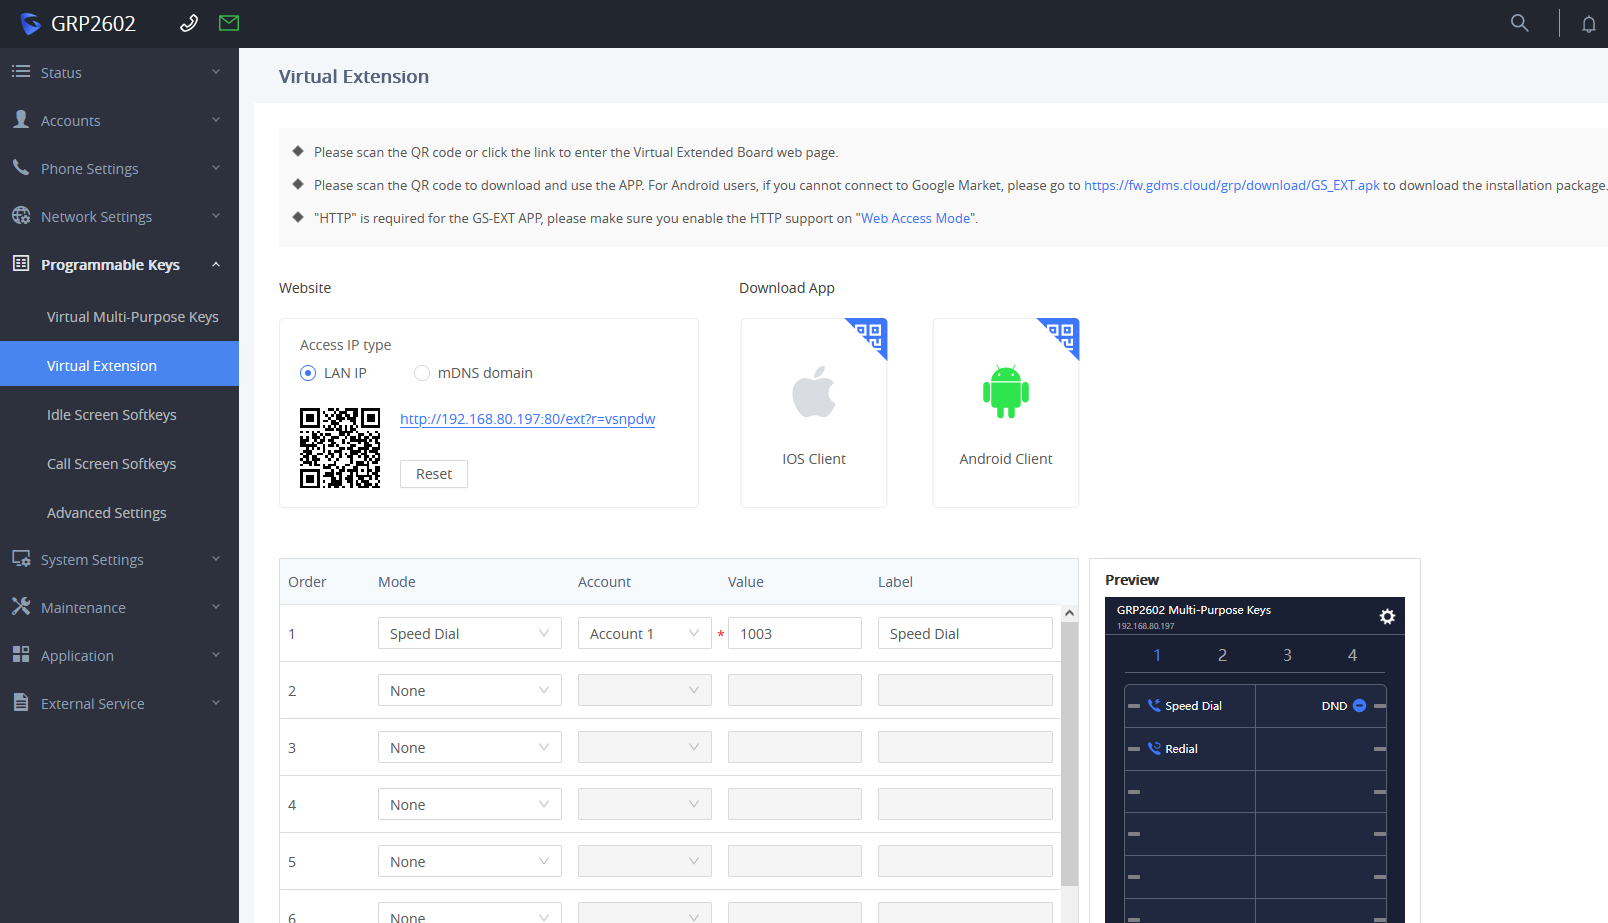
- From here, you can:
- Access the virtual extension web page by scanning the provided QR code.
- Alternatively, use the LAN IP link or mDNS domain to access the virtual extension page.
- Depending on your smartphone’s operating system, you might also have the option to scan the QR code to install the GS EXT web application.
Access the Web Page by scanning the QR code
In case you want to access the virtual extension feature from your smartphone, you can simply scan the QR code highlighted below:
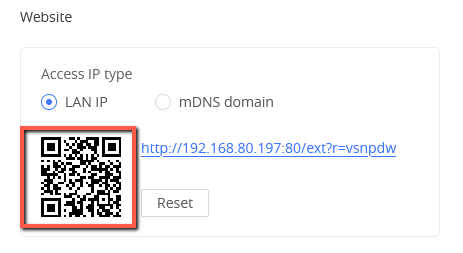
You can scan the QR code using the built-in Camera app on your smartphone.

You will be automatically redirected to the web page on your smartphone.
Use LAN IP or Multicast DNS domain
An additional option for accessing the configuration of virtual extension is to directly click on the link provided within the virtual extension panel’s website section or use the multicast DNS domain given:
LAN IP
In GRP260x web UI , and Under Access IP type:
- Click the link that appears on the screenshot below .
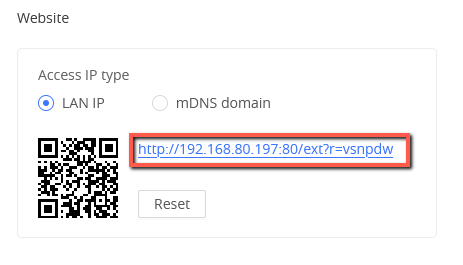
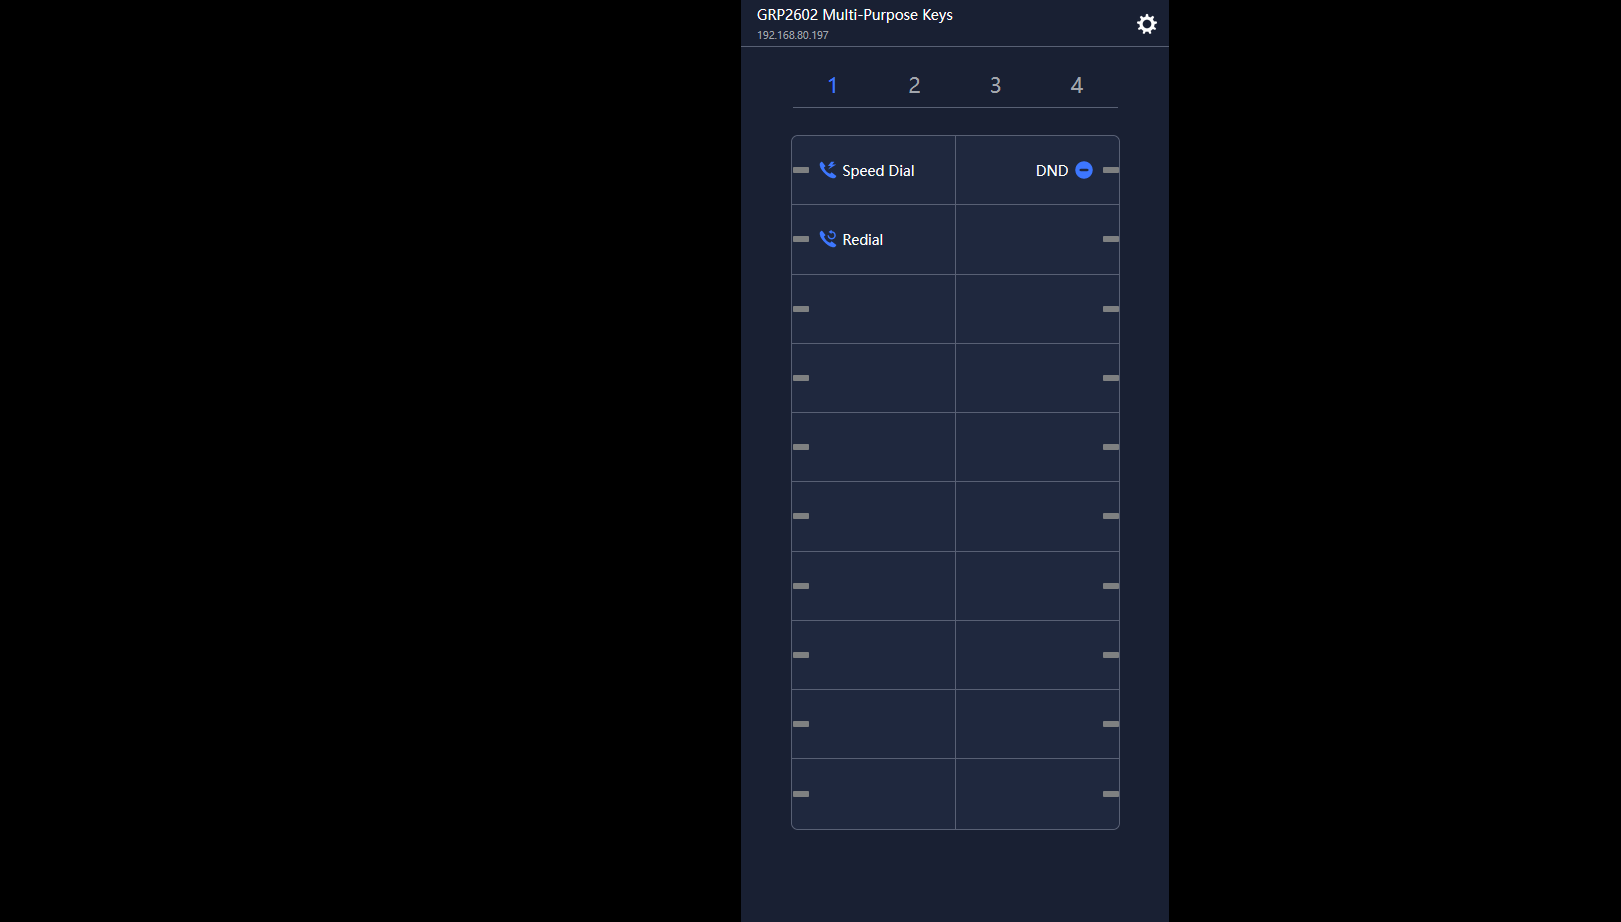
- This will redirect you to the following page:
Multicast DNS
In GRP260x web UI , and Under Access IP type:
- Click the link that appears on the screenshot below.
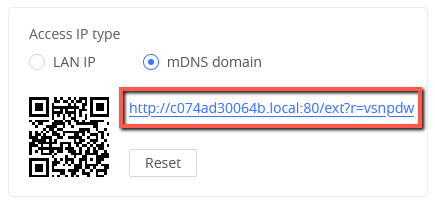
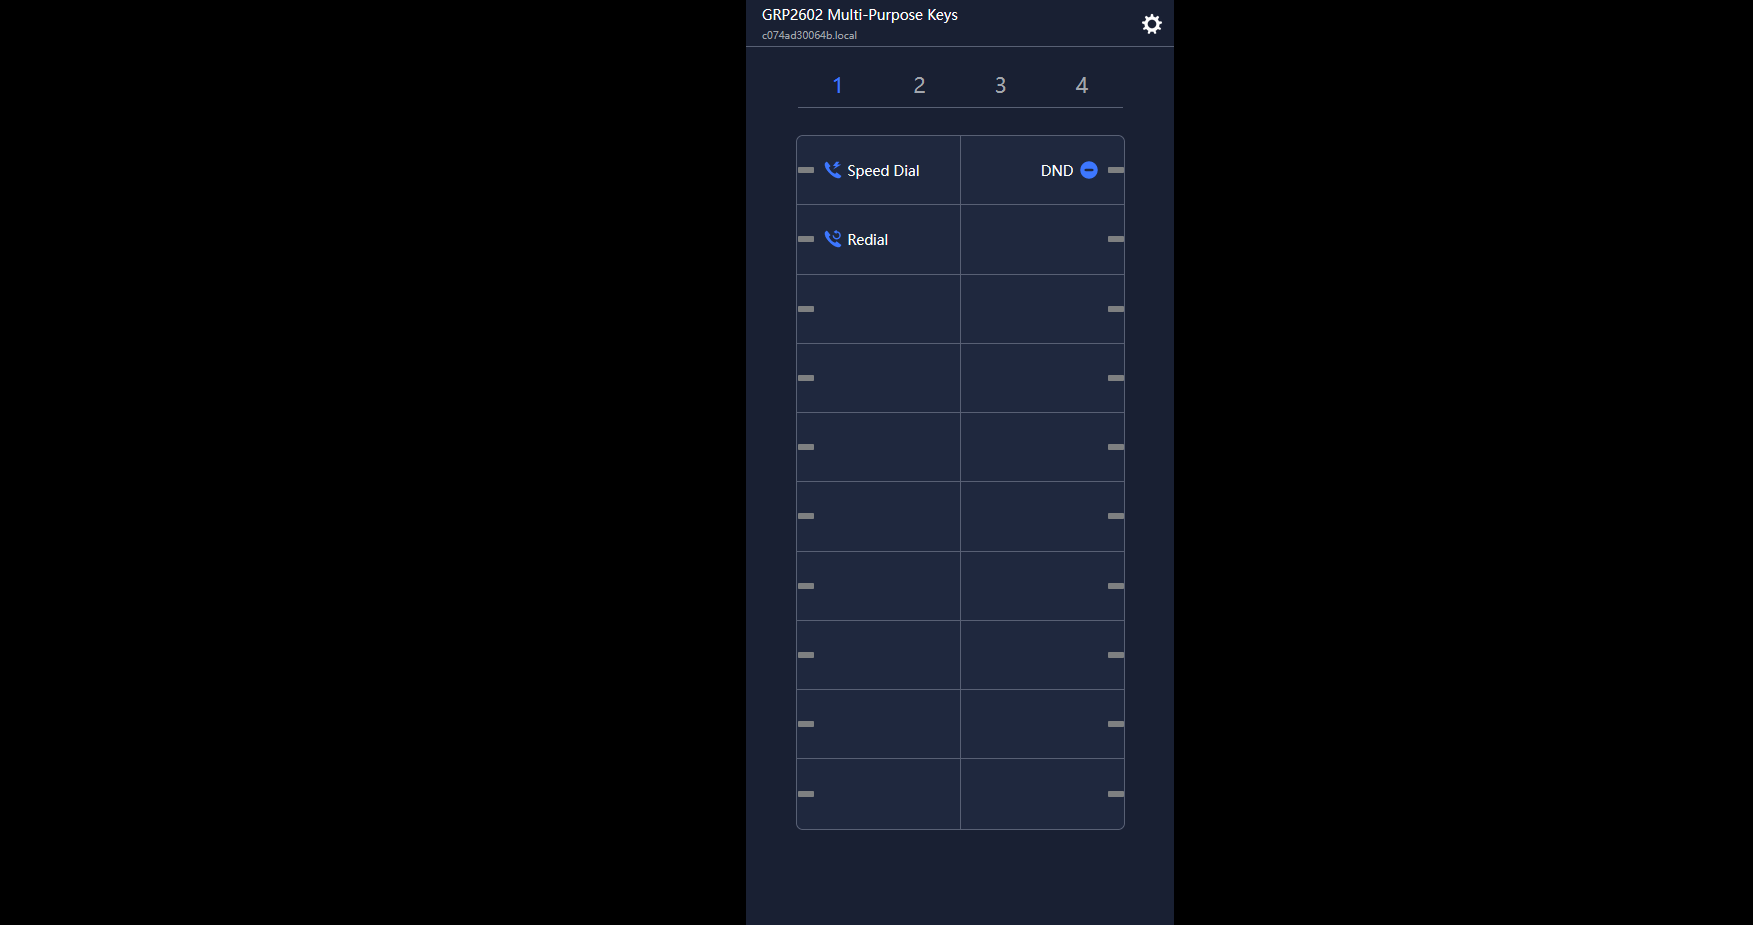
- This will redirect you to the following page:
Accessing Virtual Extension from GS EXT
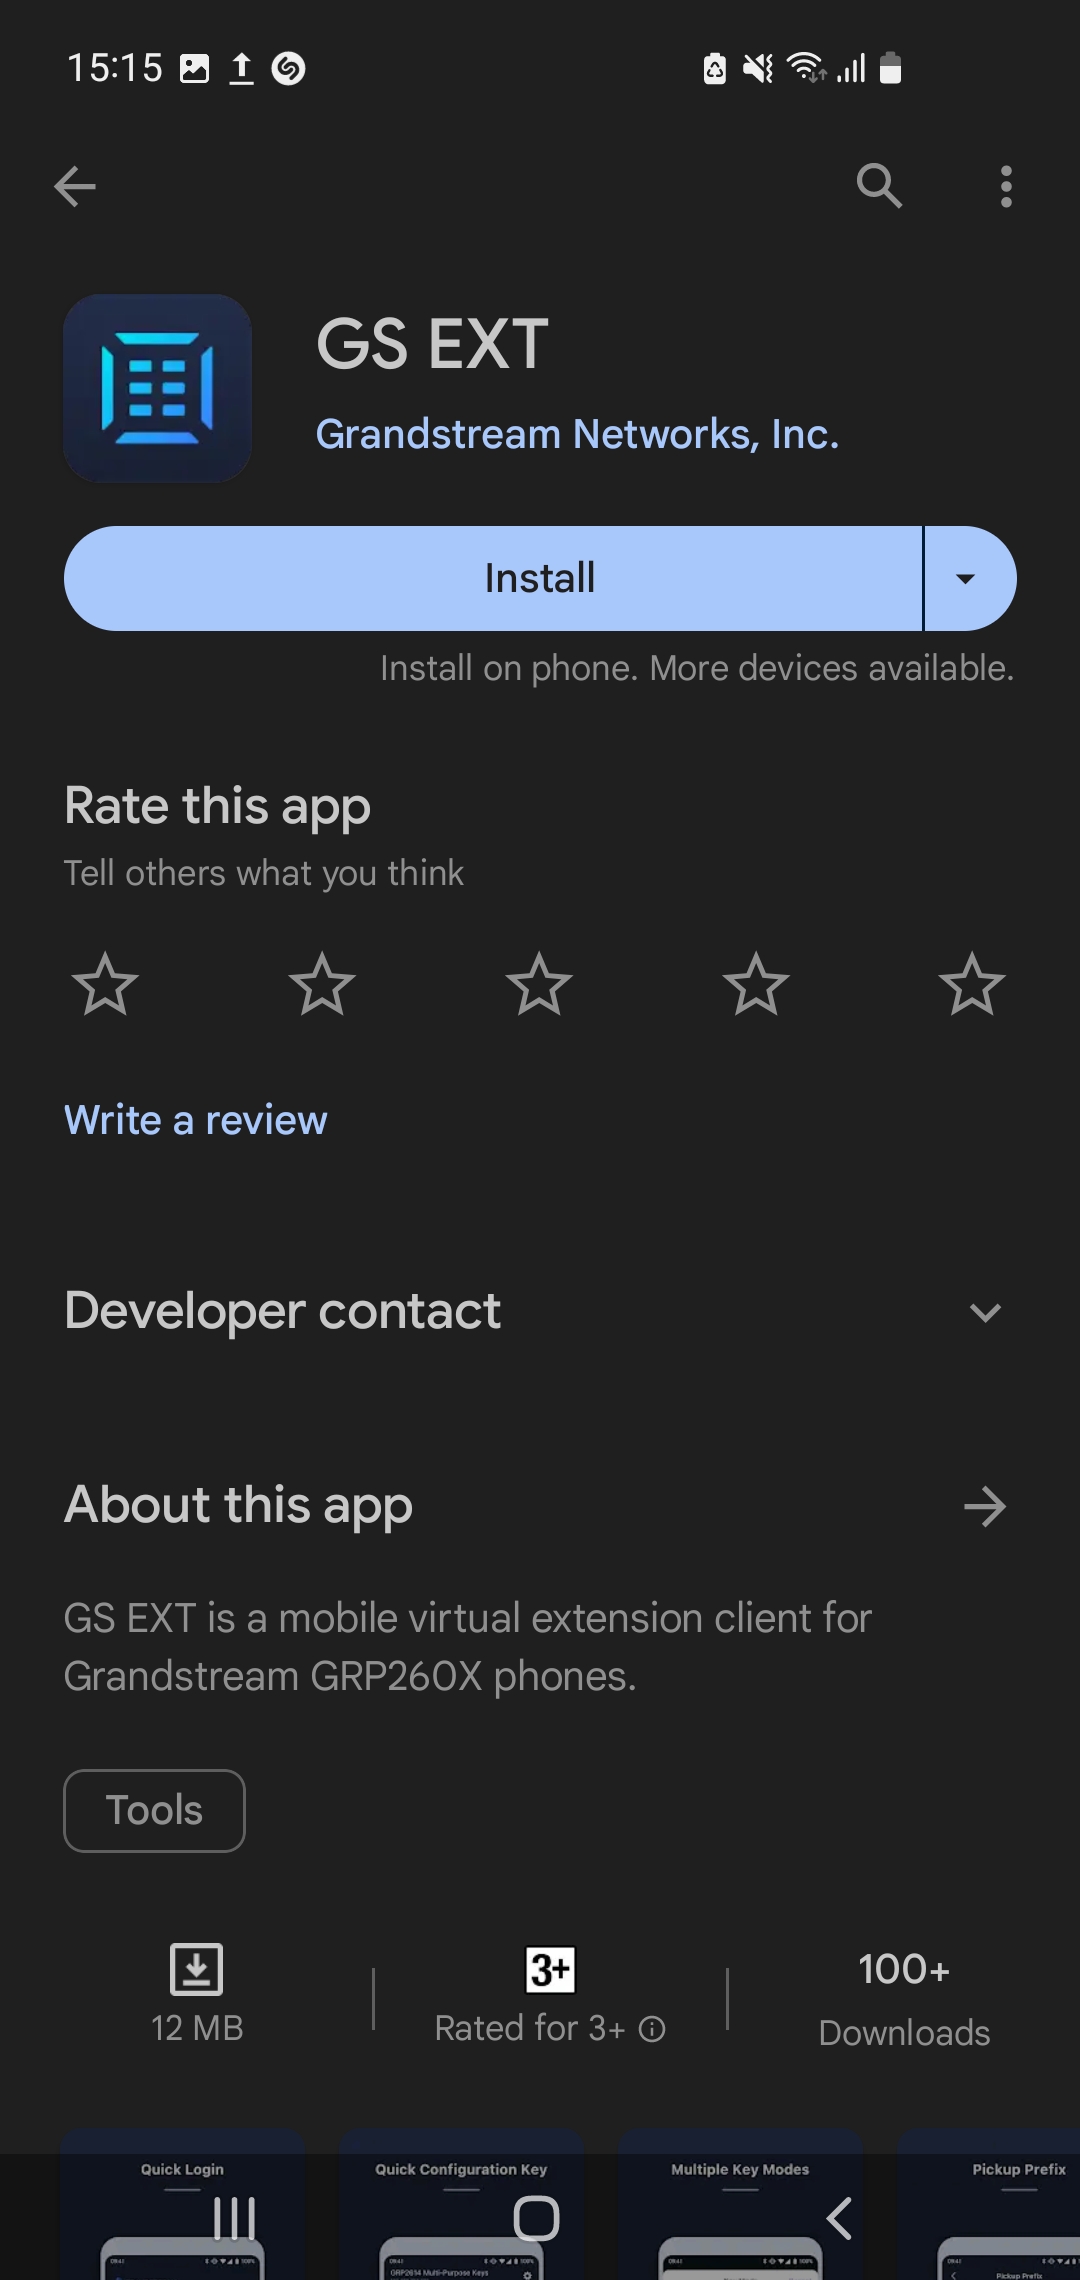
GS EXT is a mobile client used in conjunction with the Grandstream GRP260X series phones, providing simple and fast programmable buttons to record various communication needs in office scenarios, making it convenient for users to operate communication functions with one click.
Installing the Application
To install the application on your smartphone, you can:
- Search for the application name in App store or Google play store, then download it.
- Install the application by scanning the QR code from the GRP260x Web UI, For either IOS client or Android client.

Once installed, you can access it by entering the IP Address of the GRP260x, and its user level password:
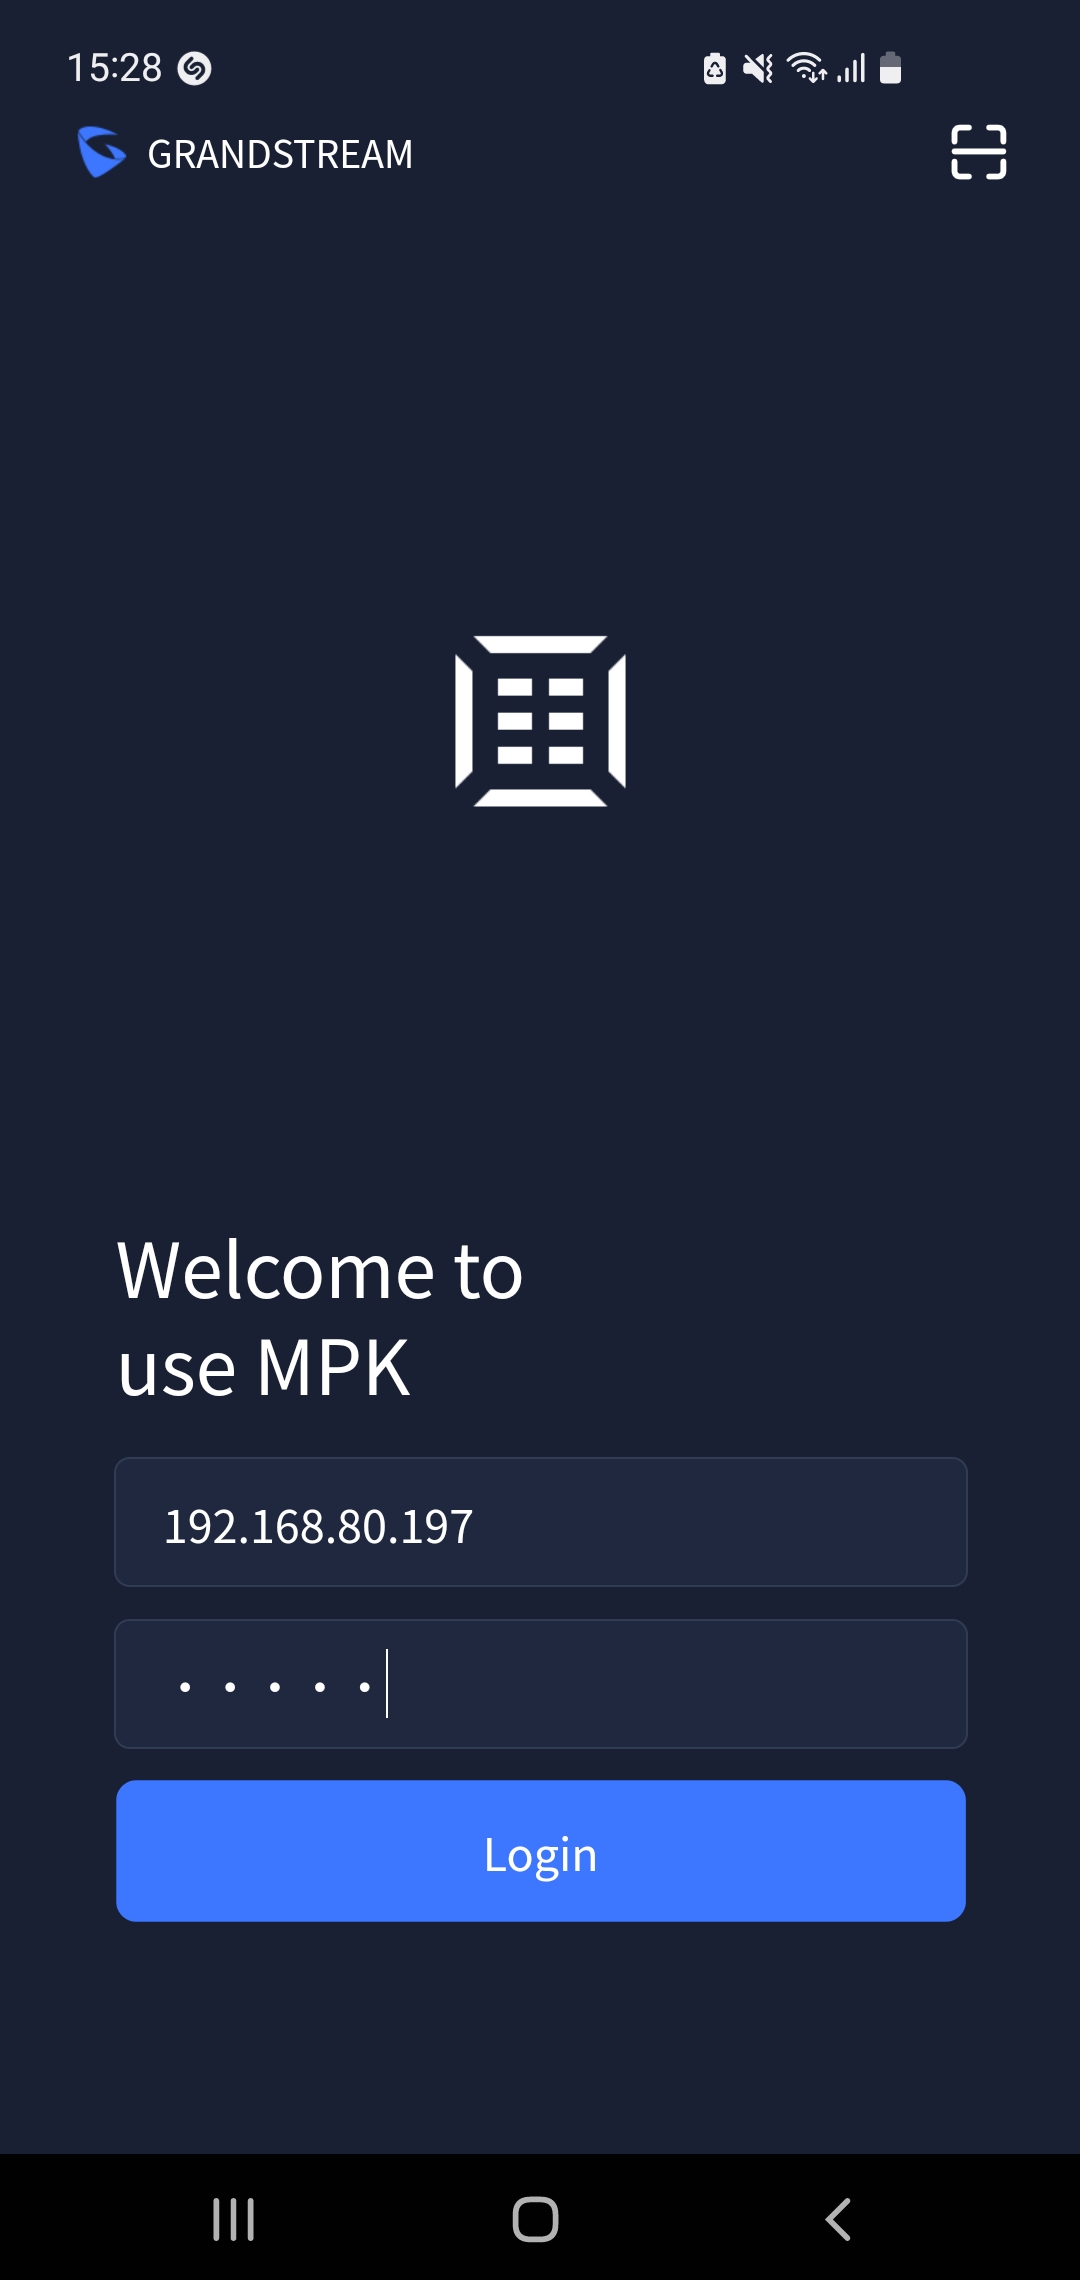
Configuring Virtual Extension
After installing the application on your smartphone or accessing it via the web, you can begin utilizing it by setting up virtual extension associated with the designated IP phone. It’s important to recognize that the configuration remains consistent across all platforms, whether accessed through the web, the application, or the GRP260x web UI – changes made on one platform will synchronize seamlessly across all others.
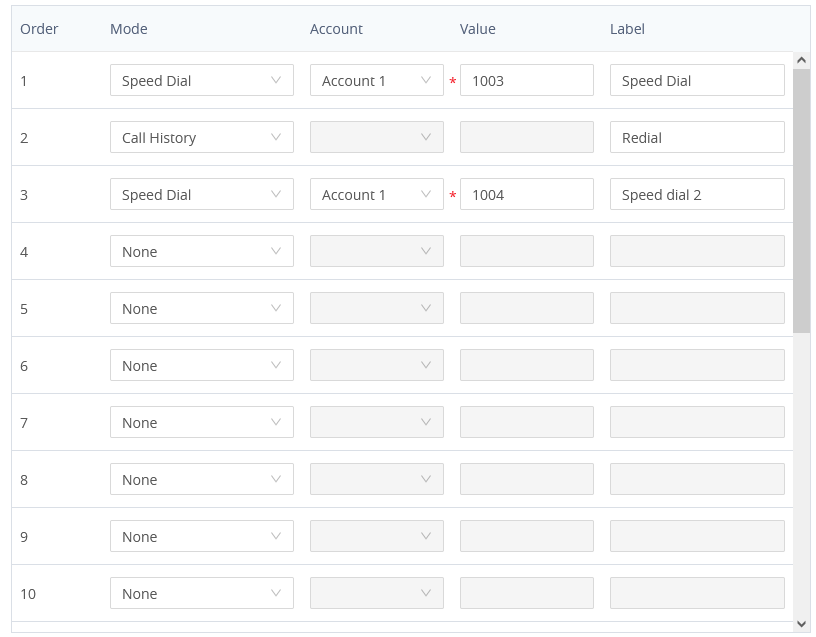
The configuration parameters are the following :
Order | Sets the order of the Virtual Extensions. |
Virtual Extension Mode | Speed Dial: Select Account and enter the number in the Value field to be transferred (blind transfer) during the call. This option is to narrow the LDAP search scope. Enter the LDAP search base in the Description field. It could be the same or different from the Base in LDAP configuration under Advanced Settings. The Base in LDAP configuration will be used if the Description field is left blank. Enter the LDAP Name/Number filter in the Value field. If users set MPK 1 as “LDAP Search” for “Account 1”, and set filters: Description -> ou=video,ou=SZ,dc=grandstream,dc=com Value -> sn=Li Conference: Allow user to set their Multi-Purpose Key to “Conference” mode to trigger a conference. By setting the extension number in the value box, the users will be able to activate a 3-way conference by simply pressing the assigned MPK button. Allows the user to configure the address to send a multicast page to. Select this feature in order to display the Menu from the MPK buttons, no field is required for configuration. Select this feature in order to display the Information popup to show the firmware version, MAC address, IP address, and IP Settings from the MPK buttons, no field is required for configuration. Select this feature in order to display the Message menu from the MPK buttons, no field is required for configuration. Set the MPK Button to perform call forwarding to the destination number configured on the “Value Field”. During ringing press the button to perform the call forward. Press the configured key to enable/Disable DND. In this mode, the configured key can be used to redial numbers. Call Flip: |
Account | Defines the account extension. |
Value | Enter the value to be associated with the configured MPK depending on the Virtual MPK mode. ( Extension, Multicast Address....) |
Label | Defines the name of the VPK. |
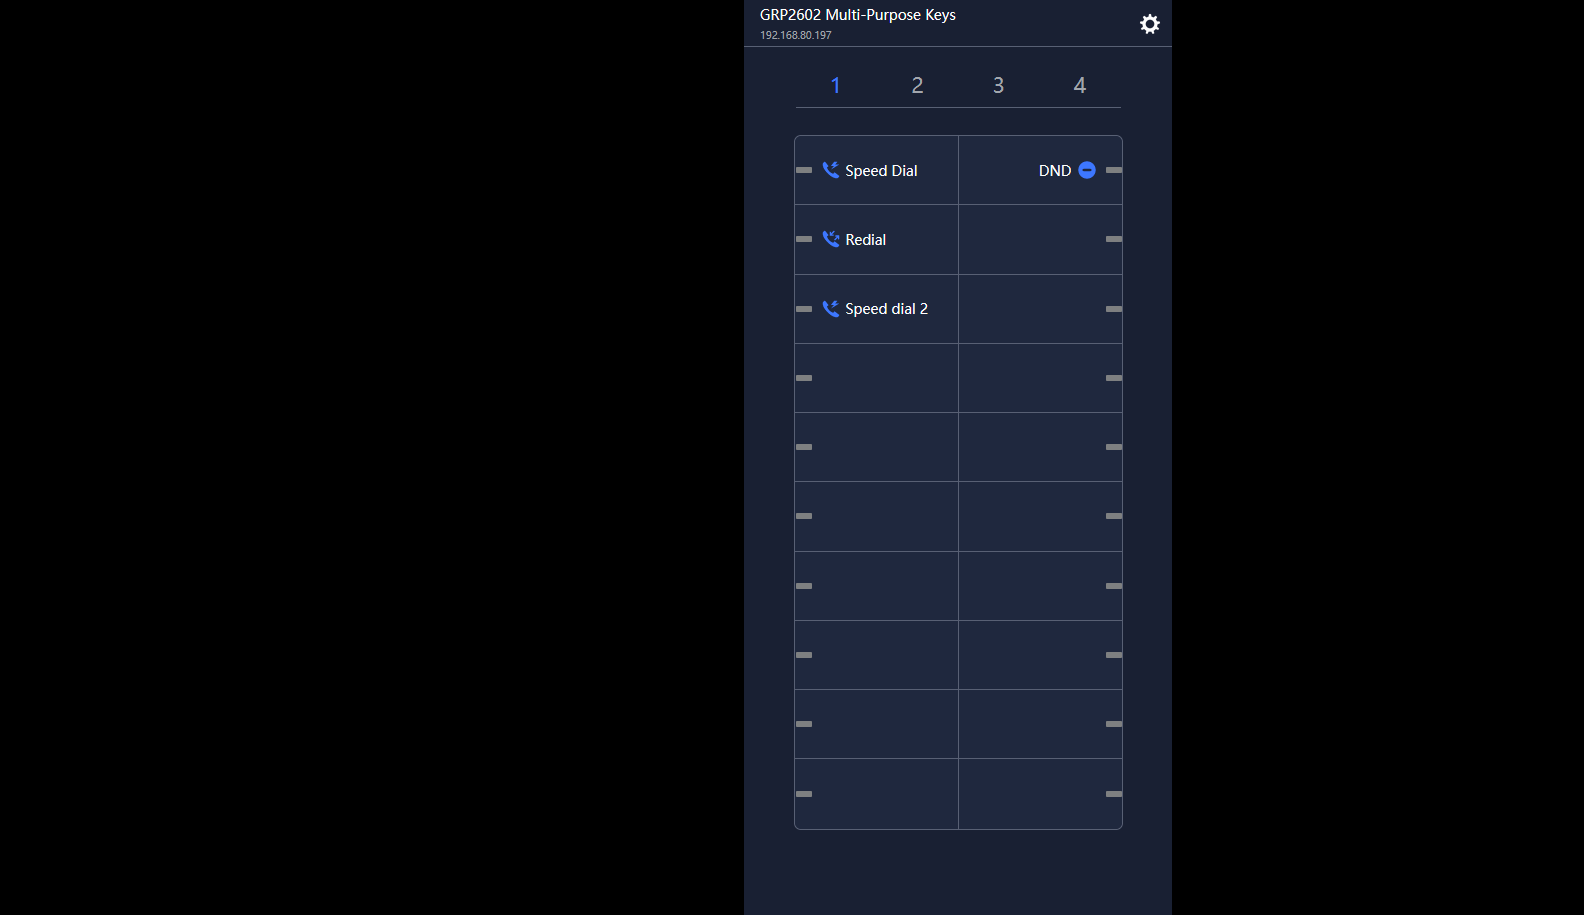
Virtual Extension Configuratin
From GRP260x Web UI
To configure Virtual MPK from the GRP260x Web UI:
- Access Programmable keys => Virtual Extension.
- Choose an available Virtual MPK, Select the mode of Virtual MPK you want to set : Speed dial , Redial , DND ….
- Select the account on which the Virtual MPK will be applied.
- Define the value to be associated with the MPK depending on the Virtual MOK mode.
- Set a label or a name for the Virtual MPK.
From Virtual Extension App
To configure Virtual MPK from the Local IP, Multicast DNS or GS EXT App, Follow the below steps:
- Access the corresponding link to land on the below page:
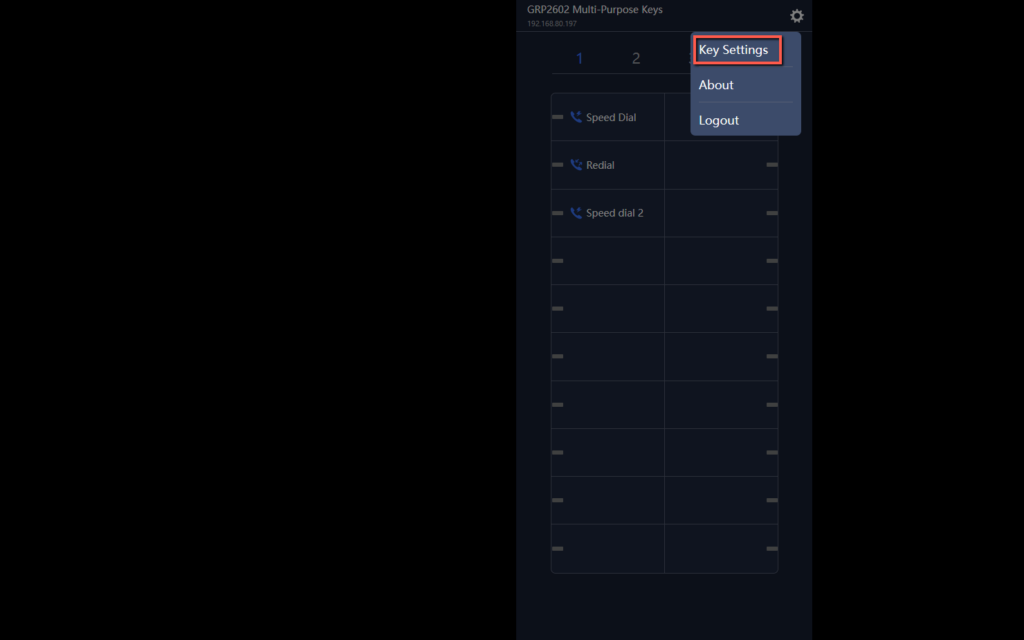
- Click the icon
 to access settings then click on Key settings.
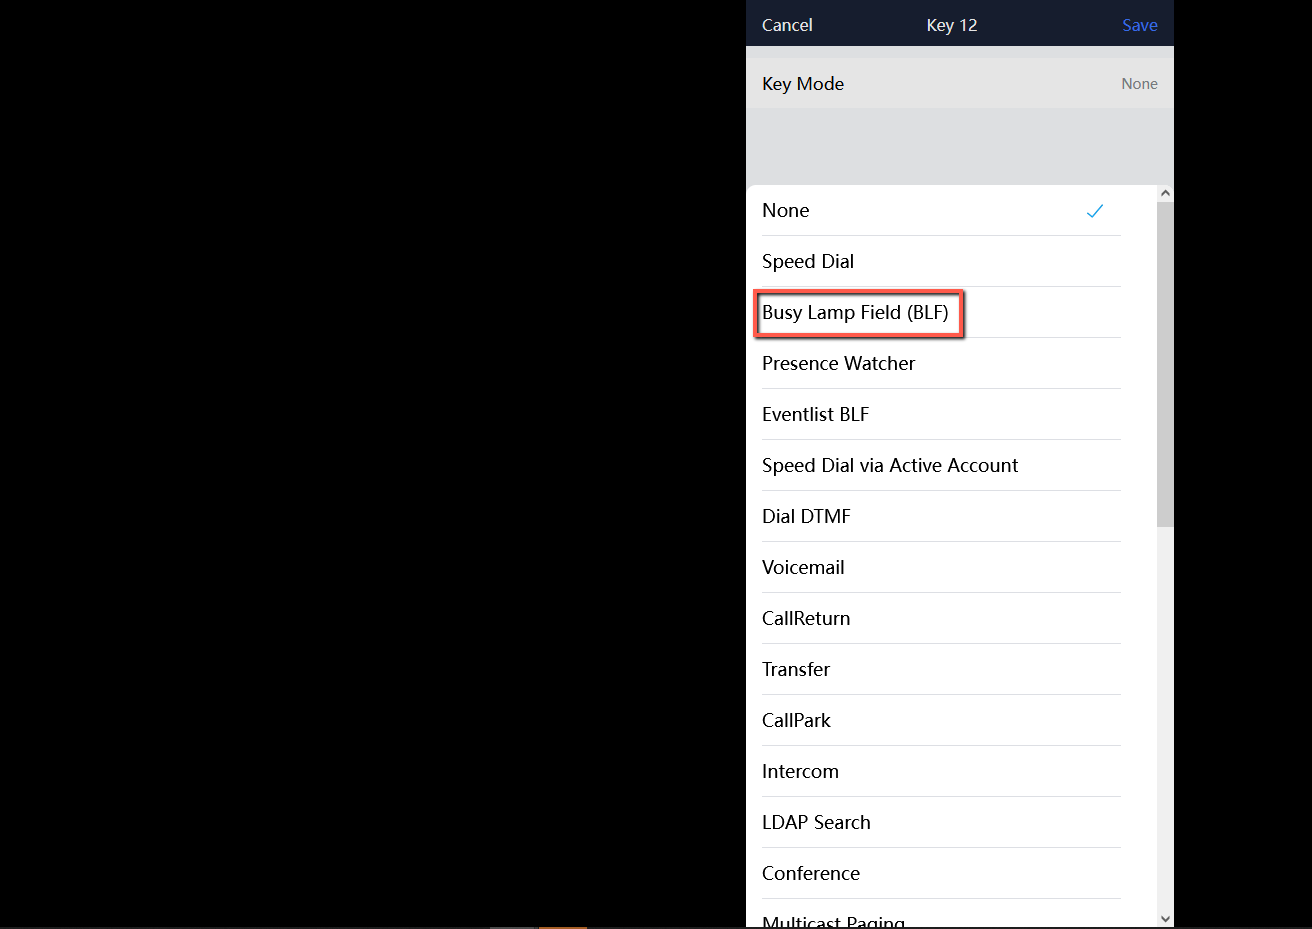
- Click on the virtual button you want to configure, then select the key mode.
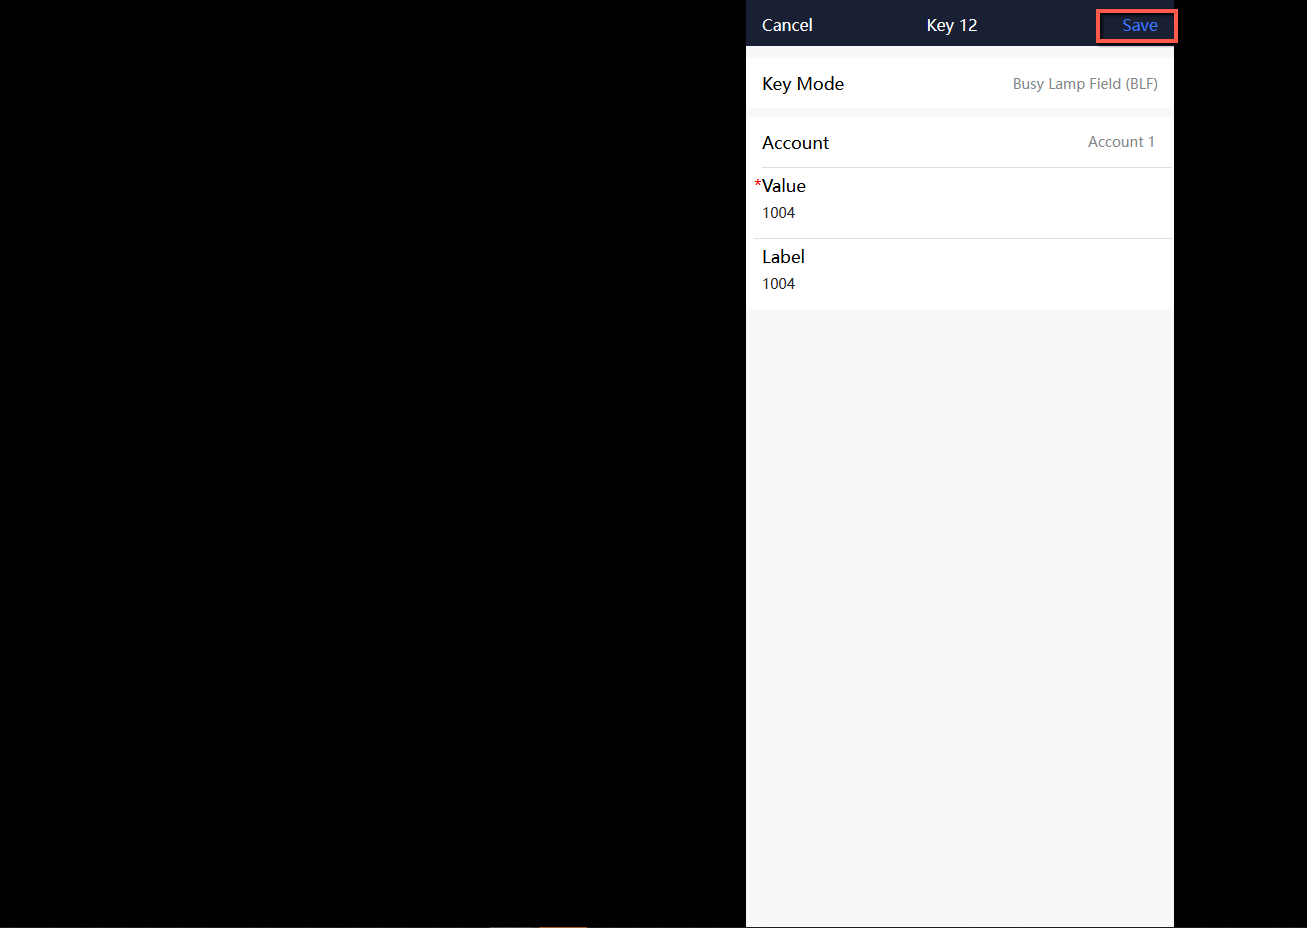
- Configure the Account,Value, and Label then Click “Save”
Supported devices
Supprted device | Firmware required |
GRP2601 | 1.0.5.19 or Higher |
GRP2601P | 1.0.5.19 or Higher |
GRP2601W | 1.0.5.19 or Higher |
GRP2602 | 1.0.5.19 or Higher |
GRP2601P | 1.0.5.19 or Higher |
GRP2601W | 1.0.5.19 or Higher |
GRP2603 | 1.0.5.19 or Higher |
GRP2603P | 1.0.5.19 or Higher |
GRP2604 | 1.0.5.19 or Higher |
GRP2604P | 1.0.5.19 or Higher |
List of supported devices