
Overview
GXP1628 is a Small Business Gigabit HD IP phone that features 2 lines with 2 SIP accounts, 132×48 backlit graphical LCD, 3 XML programmable context-sensitive soft keys, dual-switched gigabit network ports integrated PoE, 8 BLF keys and 3-way conference. The GXP1628 delivers HD wideband audio, superb full-duplex hands-free speakerphone with advanced acoustic echo cancellation, advanced security protection for privacy, and compatible with Grandstream
UCM Features.
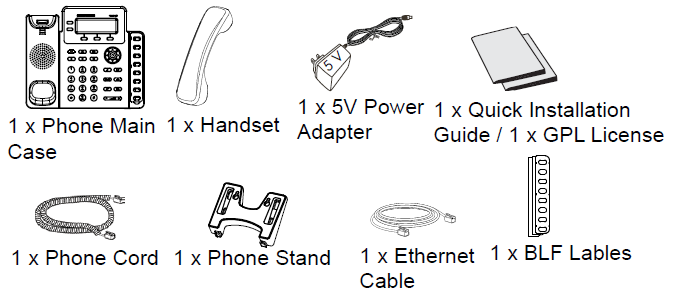
Package Contents
Phone Setup

Installing the Phone (Phone Stand)
- Insert the hooks on top of the stand into a slots, you have options to use either upper OR lower slots.
- Firmly slide the stand upward to lock it in place.
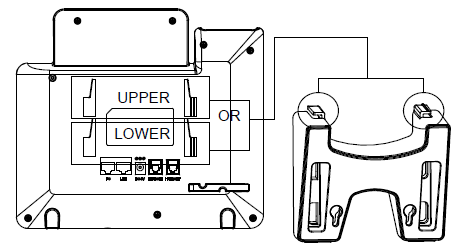
Installing the Phone (Wall Mount)
- Insert all 4 hooks located in the front of wall mount into the slots.
- Firmly slide the wall mount upward to lock it in place.
- Pull out and rotate the tab from handset rest to hold the handset while the phone is mounted on the wall.

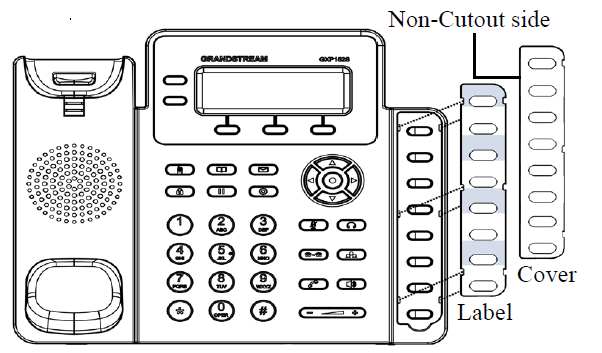
Installing BLF Paper Label
- Install the paper label by aligning the cutouts on paper label with the plastic notches on the phone and gently lay the paper down on the phone surface.
- Install the plastic cover over the paper label by inserting the non-cutout side of the plastic cover under the notches on the left side of the panel, adjust the plastic cover in up/down direction to make 3 cutouts on the right side align with the plastic notches.
- Slightly pull the plastic cover upward to complete the installation.
Connecting the Phone
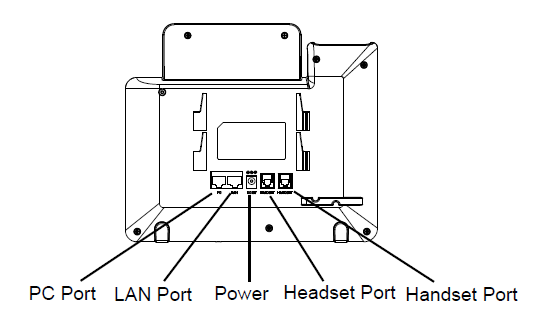
To setup the GXP1628, follow the steps below:
- Connect the handset and main phone case with the phone cord.
- Connect the LAN port of the phone to the RJ-45 socket of a hub/switch or a router (LAN side of the router) using the Ethernet cable.
- Connect the 5V DC output plug to the power jack on the phone; plug the power adapter into an electrical outlet.
- The LCD will display provisioning or firmware upgrade information. Before continuing, please wait for the date/time display to show up.
- Using the phone embedded web server or keypad configuration menu, you can further configure the phone using either a static IP or DHCP.
Tips for using the Keypad
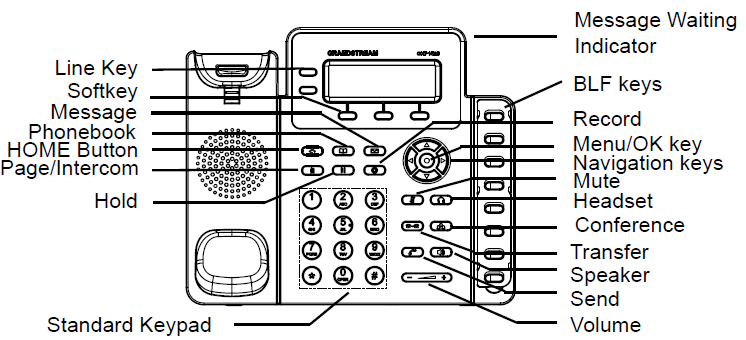
- To access the MENU, press the round MENU button.
- Navigate the menu by using the UP/DOWN and LEFT/RIGHT buttons.
- Press the round MENU button to confirm a menu selection.
- The phone automatically exits MENU mode when there is an incoming call, the phone goes off-hook, or when the MENU mode is left idle for 60 seconds.
Phone Configuration
Configure the GXP1628 using a Web Browser
- Ensure your phone is powered up and connected to the Internet.
- Press MENU button to go into menu of the phone.
- Select “Status,” then “Network Status,” to check the IP address(es).
- Type the phone’s IP address in your PC browser. (See figure below).
- The default administrator username and password are “admin”; the default end-user username is “user“ and the password is “123”.

Configure the GXP1628 using the Keypad
- Make sure the phone is idle.
- Press the MENU button to access the keypad MENU to configure the phone.
- Select MENU->Config, to configure settings for SIP Proxy, Outbound Proxy, SIP User ID, SIP Auth ID and SIP Password.
- Follow MENU options to configure the basic features of the phone. For example: the IP address if using a static IP. For details, please check GXP1628 User Manuals.
- Please contact your ITSP (Internet Telephony Service Provider) for additional settings that may be necessary to configure the phone.
For the detailed user manual, please download from: https://www.grandstream.com/support

For Certification, Warranty and RMA information, please visit www.grandstream.com