OVERVIEW
WebRTC (Web Real-Time Communications) is a technology that allows establishing calls from a web browser. It is supported by all the major web browsers like Mozilla Firefox, Chrome and other Chromium based web browsers. WebRTC supports peer-to-peer infrastructure which makes it a very flexible technology to deploy and expand.
The UCM6300 series offers creating a WebRTC trunk. After the creation, an html code of the call button is generated, and the user can embed the code into the website/web application from which calls will be initiated. Once the call reaches the UCM, it will be forwarded according to the destination set in the inbound route. E.g., the destination can be set to a call queue, if you wish to use this feature for pre-sale and after-sale customer service.
WEBRTC TRUNK CONFIGURATION
First, create a WebRTC trunk, and to do that please access the web GUI of the UCM and then navigate to Extension/Trunk → WebRTC Trunks then click on “Add”.
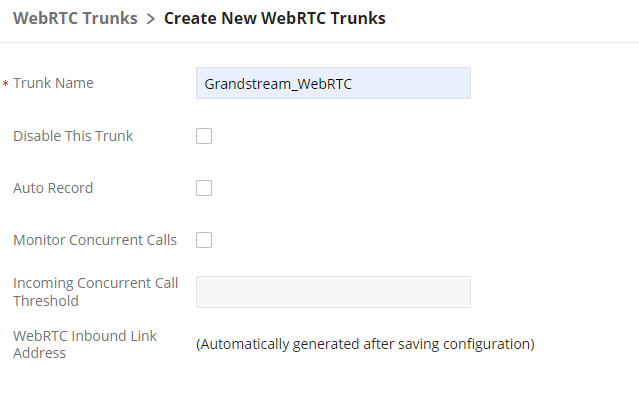
| Disable This Trunk | Enable this option to create the trunk but to keep it disabled. |
| Auto Record | When enabled, all the calls coming into the trunk will be recorded. |
| Monitor Concurrent Calls | If enabled, the number of concurrent calls on this trunk will be monitored. If the “Trunk Concurrent Calls” system alert is enabled, alert notifications will be generated if the number of concurrent calls exceeds this trunk’s configured concurrent call thresholds. |
| Incoming Concurrent Call Threshold | Threshold of all incoming concurrent calls passing through this trunk. |
| WebRTC Inbound Link Address | This link can be embedded onto a web page. Clicking the link will connect to a pre-configured WebRTC trunk destination. You can also enter this link in the browser address bar to directly access and test WebRTC calls. |
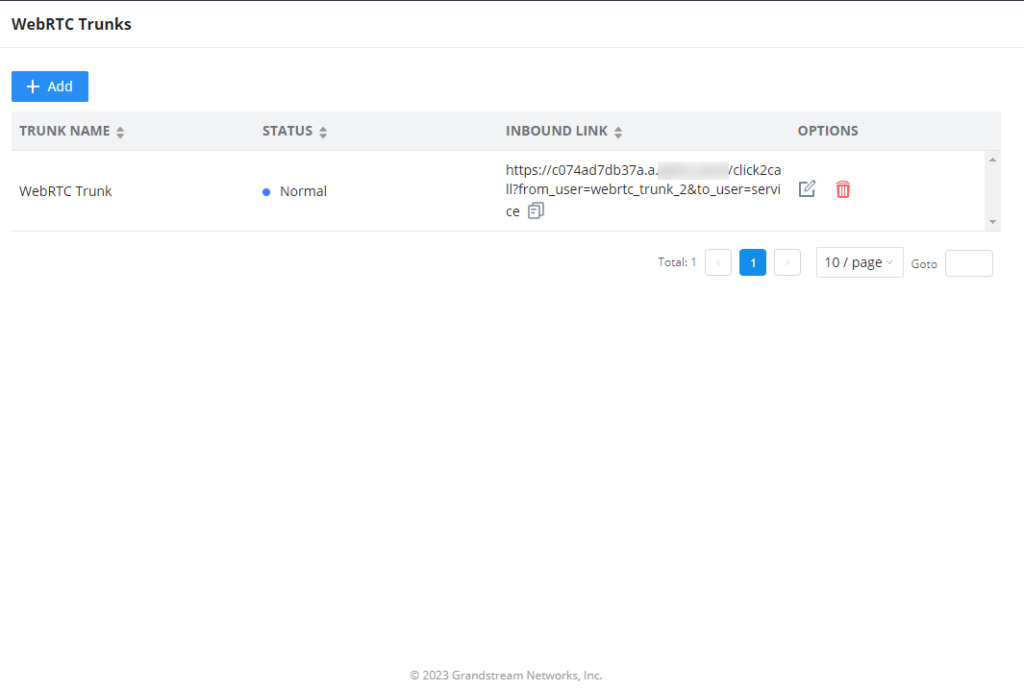
After the creation of the WebRTC trunk, it will be displayed as follows.
INBOUND ROUTE CONFIGURATION
Now that the WebRTC Trunk is created, let’s configure an inbound route for the trunk so we can route all our calls to a specific destination of our choice.
To create an inbound route, please access the web GUI of the UCM and navigate to Extension/Trunk → Inbound Routes then click on “Add”.
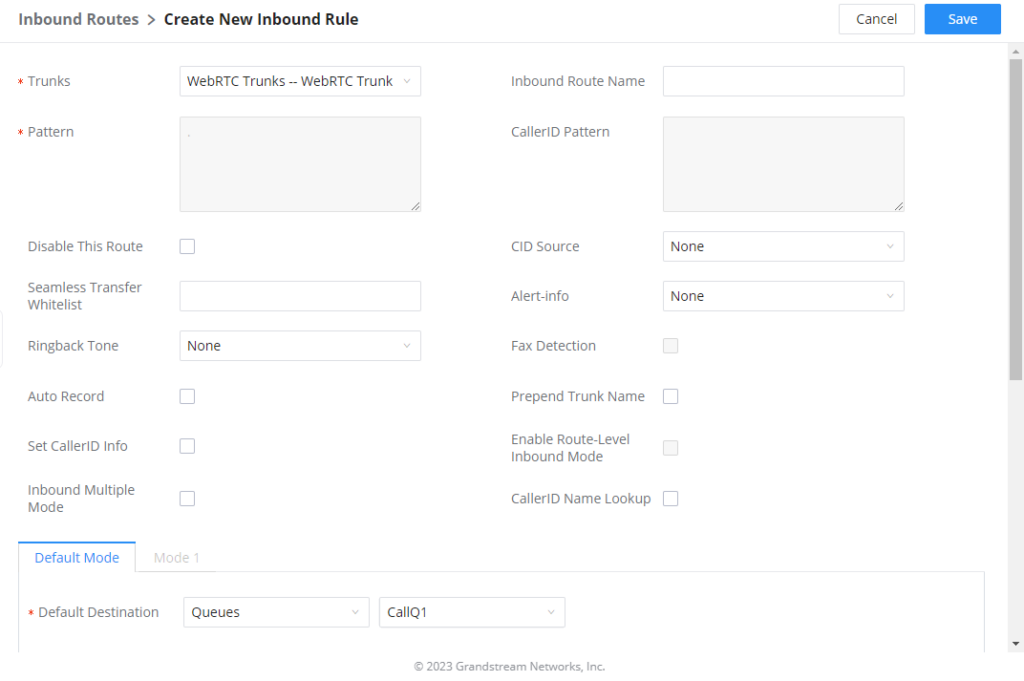
On “Trunks” select the WebRTC trunk that has been created, then specify a name for the Inbound Route.
Scroll down to “Default Destination” and select the default destination to which the inbound calls will be forwarded.
For more information about other option in “Inbound Route” please refer to the table below
Trunks | Select the trunk to configure the inbound rule. |
Inbound Route Name | Configure the name of the Inbound Route. For example, “Local”, “LongDistance” etc. |
Pattern | All patterns are prefixed with the “_”. Special characters: X: Any Digit from 0-9. Z: Any Digit from 1-9. N: Any Digit from 2-9. “.“: Wildcard. Match one or more characters. “!“: Wildcard. Match zero or more characters immediately. Example: [12345-9] – Any digit from 1 to 9. Notes: Example: |
Disable This Route | After creating the inbound route, users can choose to enable and disable it. If the route is disabled, it will not take effect anymore. However, the route settings will remain in UCM. Users can enable it again when it is needed. |
CID Source | Configures the source of the CID to match with the configured CallerID Pattern. |
Seamless Transfer Whitelist | Allows the selected extension to use this function. If an extension is busy, and a mobile phone is bound to that extension, the mobile phone can pick up calls to that extension. |
Ringback tone | Choose the custom ringback tone to play when the caller reaches the route. |
Auto Record | If enabled, calls using this route will automatically be recorded. |
Block Collect Call | If enabled, collect calls will be blocked. Note: Collect calls are indicated by the header “P-Asserted-Service-Info: service-code=Backward Collect Call, P-Asserted-Service-Info: service-code=Collect Call”. |
Alert-Info | Configure the Alert-Info, when UCM receives an INVITE request, the Alert-Info header field specifies an alternative ring tone to the UAS. |
Fax Detection | If enabled, fax signals from the trunk during a call will be detected. |
Fax Destination | Configures the destination of faxes.
Note: please make sure the sending email address is correctly configured in System Settings->Email Settings. |
Auto Answer | If enabled, the UCM will automatically answer calls and receive faxes through the inbound route. If disabled, the UCM will not receive a fax until after the call has been answered. Enabling this option will slow down the answering of non-fax calls on the inbound route. The alert tone heard during the detection period can be customized. |
Block Collect Calls | If enabled, collect calls will be blocked. |
Prepend Trunk Name | If enabled, the trunk name will be added to the caller id name as the displayed caller id name. |
Set Caller ID Info | Manipulates Caller ID (CID) name and/or number within the call flow to help identify who is calling. When enabled two fields will show allowing to manipulate the CalleID Number and the Caller ID Name. |
CallerID Number | Configure the pattern-matching format to manipulate the numbers of incoming callers or to set a fixed CallerID number for calls that go through this inbound route.
|
CallerID Name | The default string is ${CALLERID(name)},which means the name of an incoming caller, it is a pattern-matching syntax format. A${CALLERID(name)}B means Prepend a character ‘A’ and suffix a character ‘B’ to ${CALLERID(name)}. Not using pattern-matching syntax means setting a fixed name to the incoming caller. |
Enable Route-Level Inbound Mode | Gives uses the ability to configure inbound mode per individual route. When enabled two fields will show allowing to set the Inbound mode and the Inbound mode Suffix. Note: Global inbound mode must be enabled before users can configure route-level inbound mode. |
Inbound Mode | Choose the inbound mode for this route. Note: Toggling the global inbound mode will not affect routes that have Route-level Inbound Mode enabled. If all routes have the option enabled, toggling the global inbound mode via BLF will trigger a voice prompt indicating that none of the routes will be affected by the global inbound mode change. |
Inbound Mode Suffix | Dial “Global Inbound Mode feature code + Inbound Mode Suffix” or a route’s assigned suffix to toggle the route’s inbound mode. The BLF subscribed to the inbound mode suffix can monitor the current inbound mode. |
Inbound Multiple Mode | Multiple mode allows users to switch between destinations of the inbound rule by feature codes. Configure related feature codes as described in [Inbound Route: Multiple Mode]. If this option is enabled, the user can use feature code to switch between different modes/destinations. |
CallerID Name Lookup | If enabled, the callerID will be resolved to a name through local LDAP. Note, if a matched name is found, the original callerID name will be replaced. The name lookup is performed before other callerID or callerID name modifiers (e.g., Inbound Route's Set CallerID Info or Prepend Trunk Name). Note: Name lookup may impact system performance. |
Dial Trunk | This option shows up only when “By DID” is selected. If enabled, the external users dialing into the trunk via this inbound route can dial outbound calls using the UCM’s trunk. |
Privilege Level | This option shows up only when “By DID” is selected.
|
Allowed DID Destination | This option shows up only when “By DID” is selected. This controls the destination that can be reached by the external caller via the inbound route. The DID destination is:
|
Default Destination | Select the default destination for the inbound call.
When “By DID” is used, the UCM will look for the destination based on the number dialed, which could be local extensions, conference, call queue, ring group, paging/intercom group, IVR, and voicemail groups as configured in “DID destination”. If the dialed number matches the DID pattern, the call will be allowed to go through.
|
Strip | Specify the digits to be prepended before the call is placed via the trunk. Those digits will be prepended after the dialing number is stripped. |
Prepend | Specify the digits to be prepended before the call is placed via the trunk. Those digits will be prepended after the dialing number is stripped. |
Time Condition | |
Start Time | Select the start time “hour:minute” for the trunk to use the inbound rule. |
End Time | Select the end time “hour:minute” for the trunk to use the inbound rule. |
Date | Select “By Week” or “By Day” and specify the date for the trunk to use the inbound rule. |
Week | Select the day in the week to use the inbound rule. |
Destination | Select the destination for the inbound call under the defined time condition.
When “By DID” is used, the UCM will look for the destination based on the number dialed, which could be local extensions, conference, call queue, ring group, paging/intercom group, IVR, and voicemail groups as configured in “DID destination”. If the dialed number matches the DID pattern, the call will be allowed to go through. Configure the number of digits to be stripped in the “Strip” option.
|
Now that the WebRTC and the inbound route are configured, calls can be initiated using the embedded call button.
First, access the UCM6300 web UI and navigate to Extension/Trunk → WebRTC Trunks and copy the Inbound Link.

Paste the link in your web browser, then click the calling button.
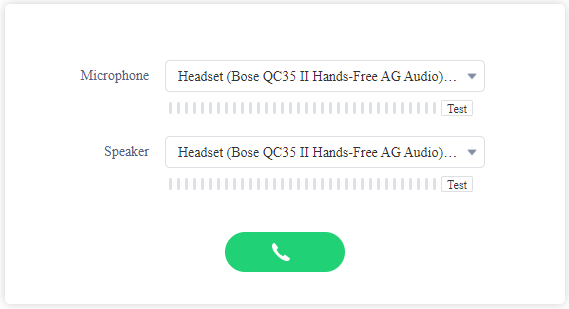
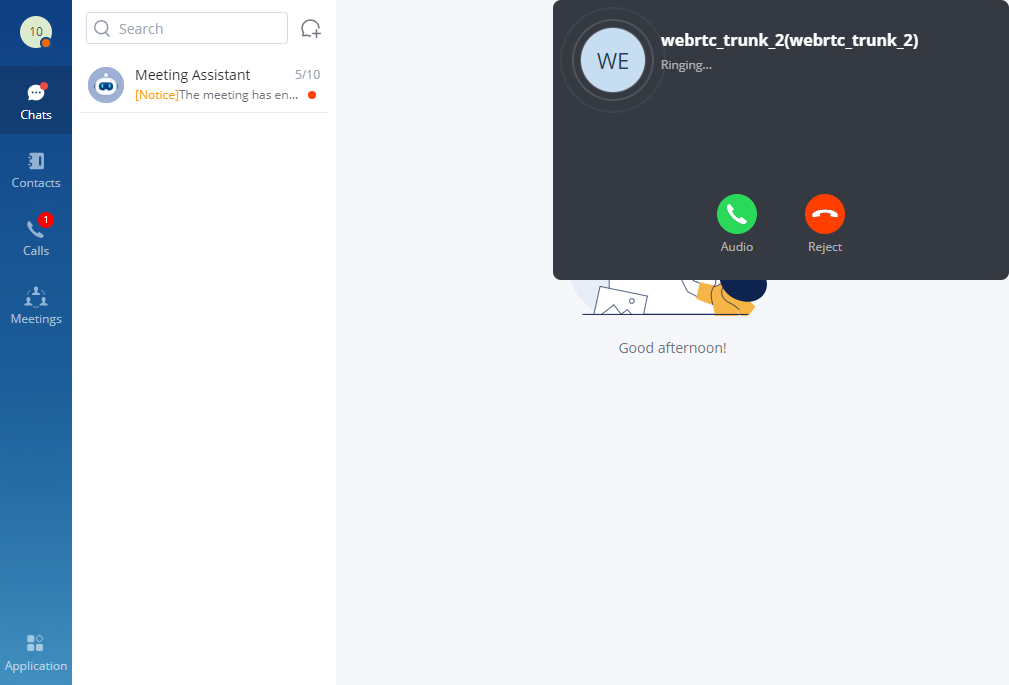
Since we set the default destination to “Call Queue” in the inbound route rule, the call will be router to one of the agents in the call queue, and the call will be displayed on Wave as follows.
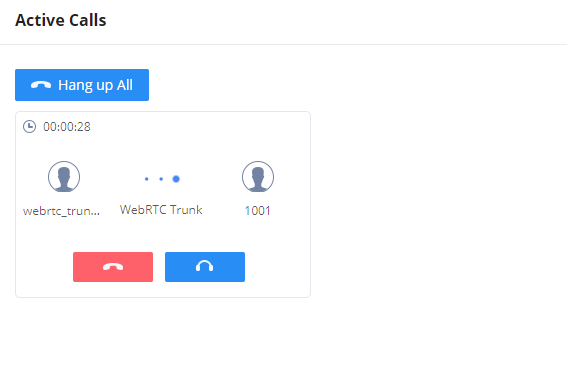
On the UCM6300 user interface, we can see the inbound calls which were received on the WebRTC trunk that we created.
For more information about WebRTC please refer to the following RFC reference. RFC8835